Ever tried a cute nail design at home… and ended up with polish everywhere except where it should be?
You’re not alone.
Most beginners don’t struggle with ideas. They struggle with control, tools, and the fear of messing up. The good news? The most popular nail designs right now are actually the easiest to do, especially on short nails, with minimal tools, and zero fancy brushes.
This guide will show you how to paint simple nail designs that look clean, chic, and trendy — even if you have shaky hands and no nail art kit.
Start With the Right Base (This Prevents 80% of Mess)
Before any design, this step matters most.
A messy nail design usually starts with:
- Thick, gloopy polish
- Uneven base coat
- Not letting layers dry properly
Do this instead:
- Apply thin layers of polish
- Wait 60–90 seconds between coats
- Clean edges with a small brush or cotton swab dipped in remover
- Use a light or neutral base color when learning
Light shades make mistakes less visible. Dark shades highlight every wobble.
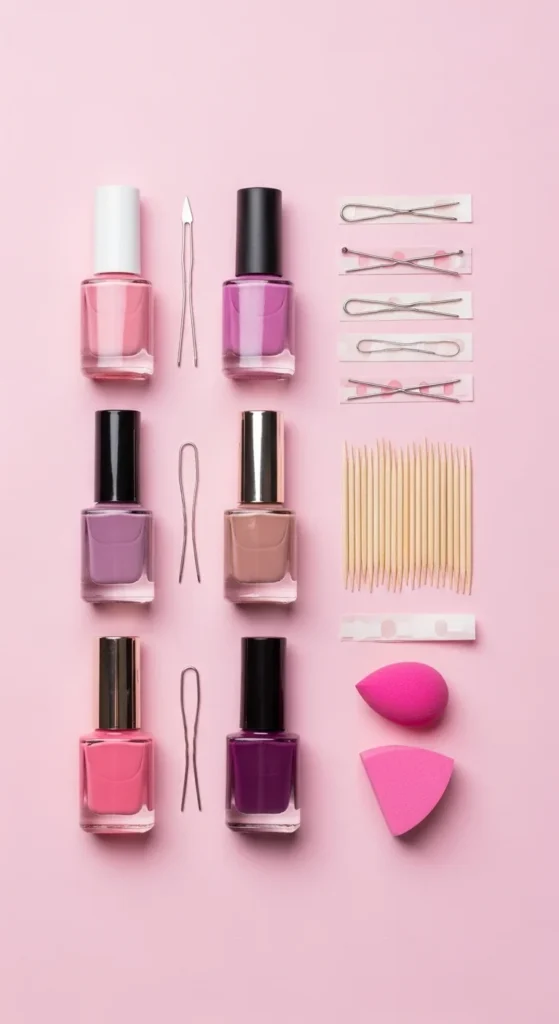
Use Household Items Instead of Brushes
You do not need a nail art kit.
The easiest tools are already in your house:
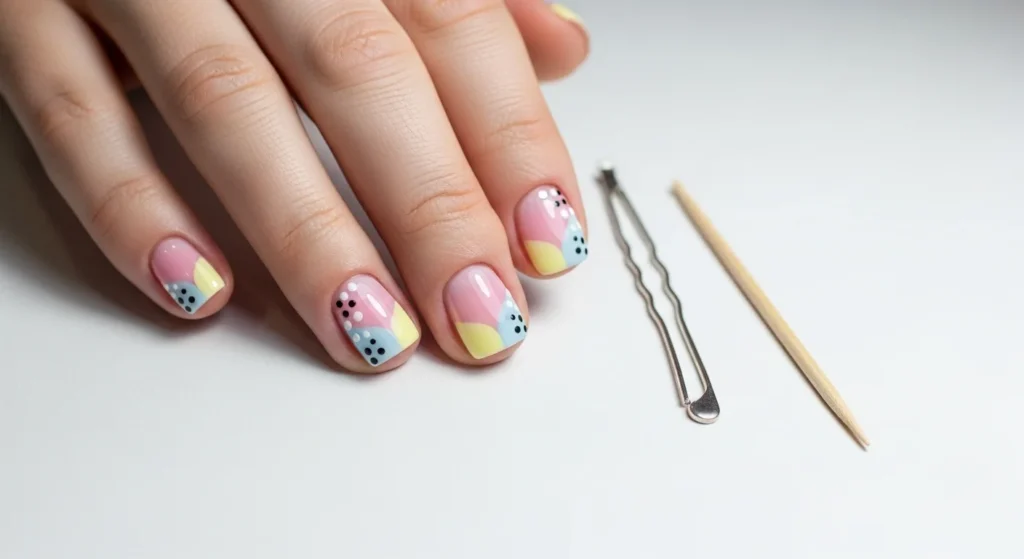
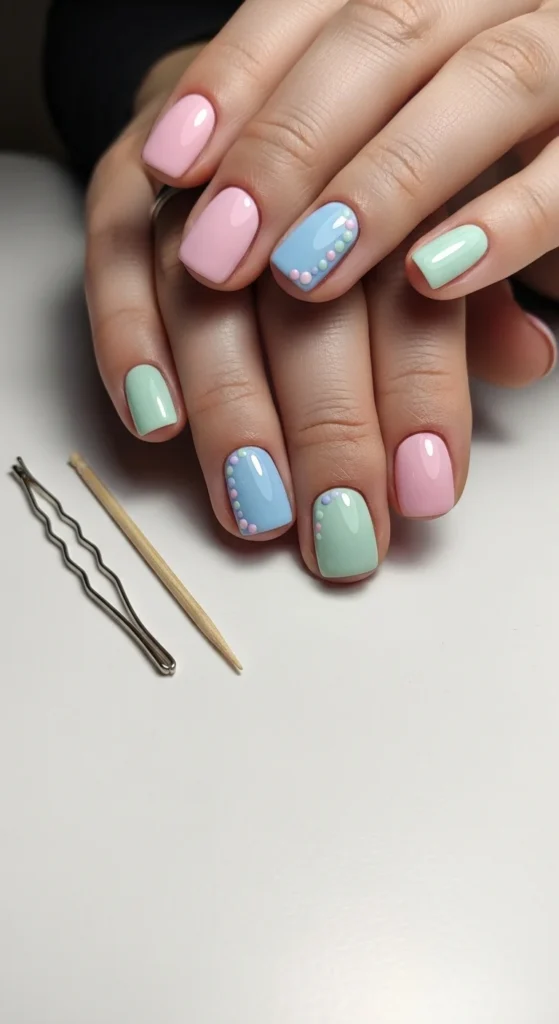
- Bobby pin → perfect dotting tool
- Toothpick → tiny hearts, swirls, lines
- Makeup sponge → gradients and aura effects
- Tape → clean French tips and color blocks
These tools give you more control than thin brushes.
The 5 Most Forgiving Nail Designs for Beginners
These designs are popular because they hide mistakes rather than show them.
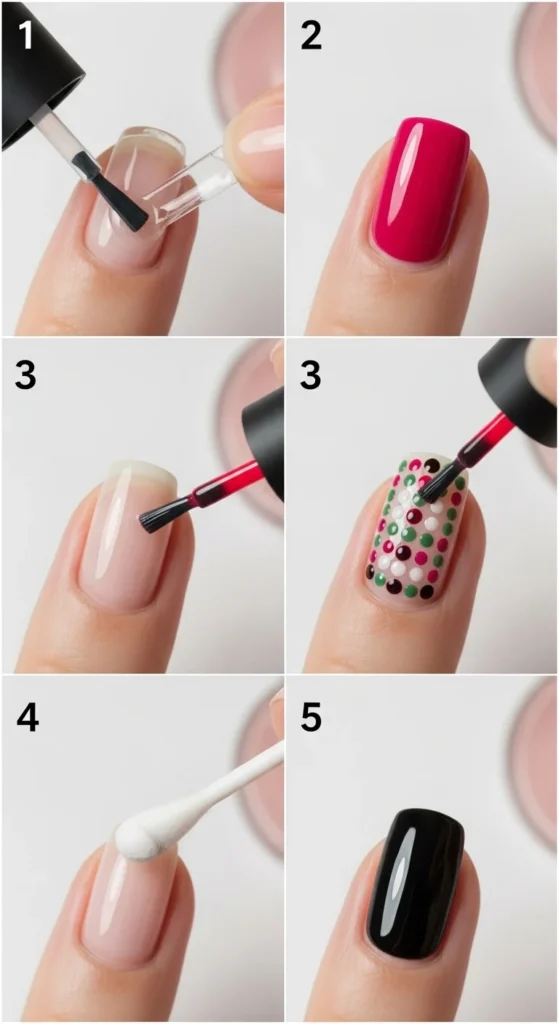
1. Micro Dots (The easiest design ever)
How to do it:
- Dip the Bobby Pin tip into polish
- Gently tap 3–5 tiny dots near the cuticle
- Leave the rest of the nail plain
That’s it. This takes about 1–2 minutes per hand and looks intentional and minimalist.
Best for: short nails, accent nails, shaky hands.
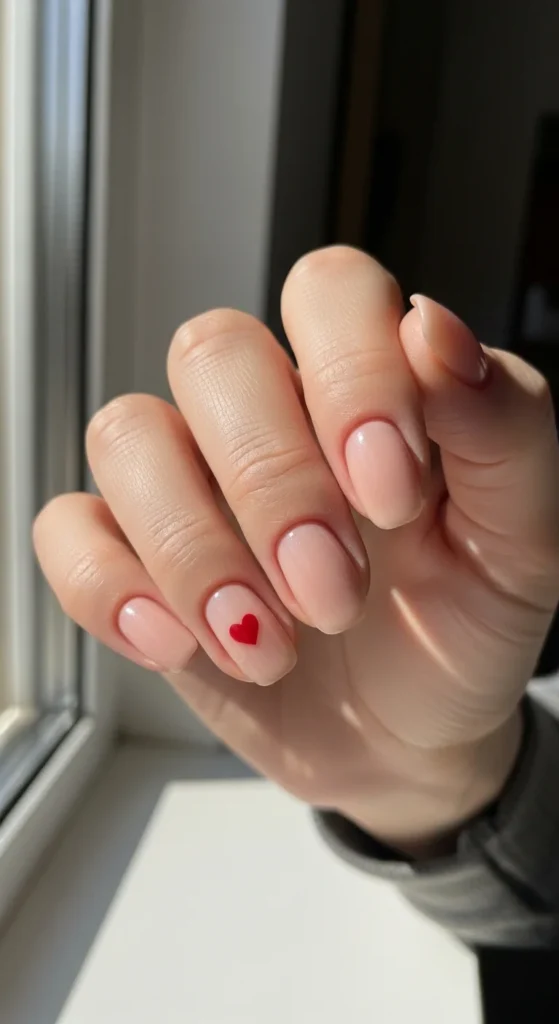
2. Accent Nail Only (Zero-pressure trend)
Paint all nails one color. Choose one nail (usually ring finger) for the design.
Try:
- Dots
- Tiny heart
- Single swirl
- Glitter dab
Because you’re decorating only one nail, there’s no stress.
Accent Nail Only (Zero pressure trend)
3. Abstract Swirls (Imperfect is perfect)
Swirls look advanced but are actually beginner-friendly because they don’t require straight lines.
Steps:
- Add a small drop of polish on nail
- Use toothpick to gently drag it into a swirl
- Don’t overthink it
The more organic it looks, the better.
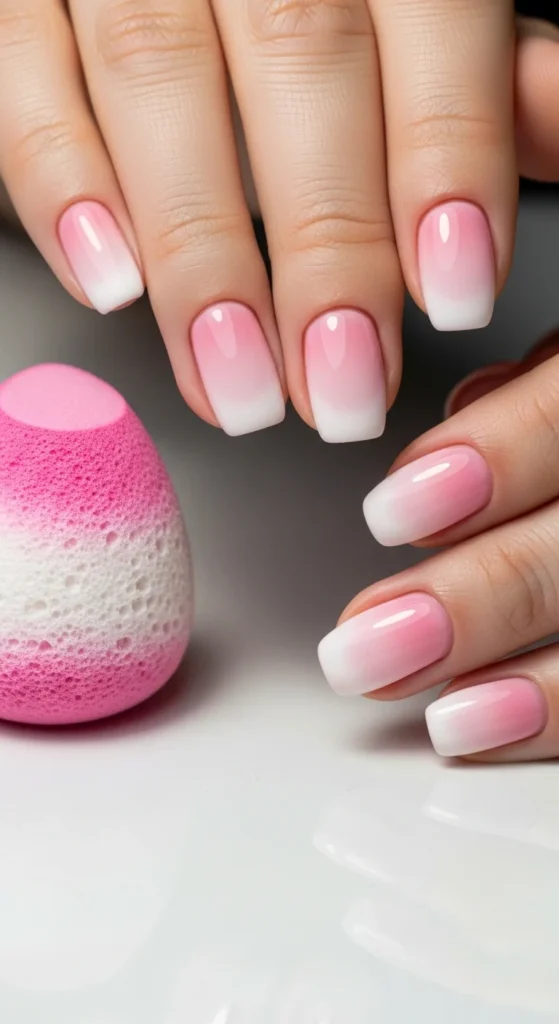
4. Glitter Gradient (Hides every mistake)
This design is famous because it covers uneven polish.
Steps:
- Apply a clear or nude base
- Dab glitter polish onto the sponge
- Tap the sponge on the nail tip
- Repeat for a stronger effect at the tip
No precision needed. It always looks good.
5. Beginner Aura Nails (Sponge trick)
Aura nails look trendy but are shockingly easy.
Steps:
- Paint base color and let dry
- Put a small dot of second color on sponge
- Dab lightly in the center of nail
It creates a soft blended glow without any lines.
Simple Designs That Look Great on Short Nails
Short nails are actually easier for nail art.
Try these:
- Micro French tips (very thin line at edge using tape)
- Side dots along one edge of the nail
- Color-blocked tip using tape
- Tiny hearts near the cuticle
- Confetti dots in random places
Short space = less room for mistakes.
How to Keep Your Lines Clean
This is where most designs get messy.
Pro beginner tips:
- Rest your painting hand on a table
- Paint in good lighting
- Turn your finger instead of twisting your brush/tool
- Wipe your tool after every dot or swirl
- Seal everything with a glossy top coat
Top coat hides small bumps and makes everything look polished.
Practice Without Ruining Your Nails
A trick many beginners don’t know:
Practice on:
- A plastic surface
- Old press-on nails
- A piece of tape stuck to the table
You can test dots, swirls, and gradients before touching your nails.
This builds confidence fast.
The “No Mess” Order to Follow Every Time
Follow this order and your designs will instantly look neater:
- Base coat
- Two thin polish layers
- Let dry fully
- Do design
- Clean edges
- Top coat
Most people rush step 3 — that’s where the mess begins.
Trendy Looks You Can Simplify at Home
You don’t need salon skills to try trendy styles. Simplify them:
- Color-blocked French → use tape
- Glazed look → apply shimmery top coat
- Confetti nails → random dots with bobby pin
- Minimalist chic → accent nail with micro dots
These look modern, clean, and beginner-friendly.
Final Takeaway
Simple nail designs don’t look messy because they’re basic.
They look clean because:
- You use fewer tools
- You choose forgiving patterns
- You work in thin layers
- You let the polish dry properly
Start with dots. Then swirls. Then gradients.
You’ll be surprised how quickly your at-home nails start looking chic and trendy.
Save this guide for your next manicure night and try one design at a time!