
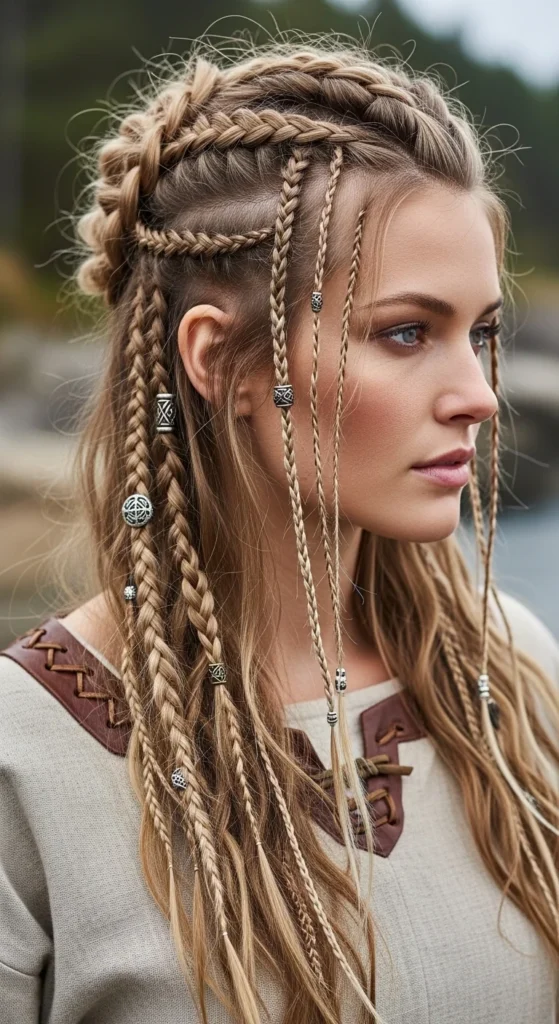
There’s something powerful about a clean, rugged Viking braid with beads. It’s not just a hairstyle—it’s a whole warrior vibe. But here’s the problem most beginners face: beads sliding right off and ruining the look.
The truth? Viking hair isn’t messy chaos—it’s controlled texture with smart technique. Once you learn how to secure beads properly, your braids will look intentional, strong, and long-lasting.
Let me walk you through a simple, beginner-friendly method that actually works.
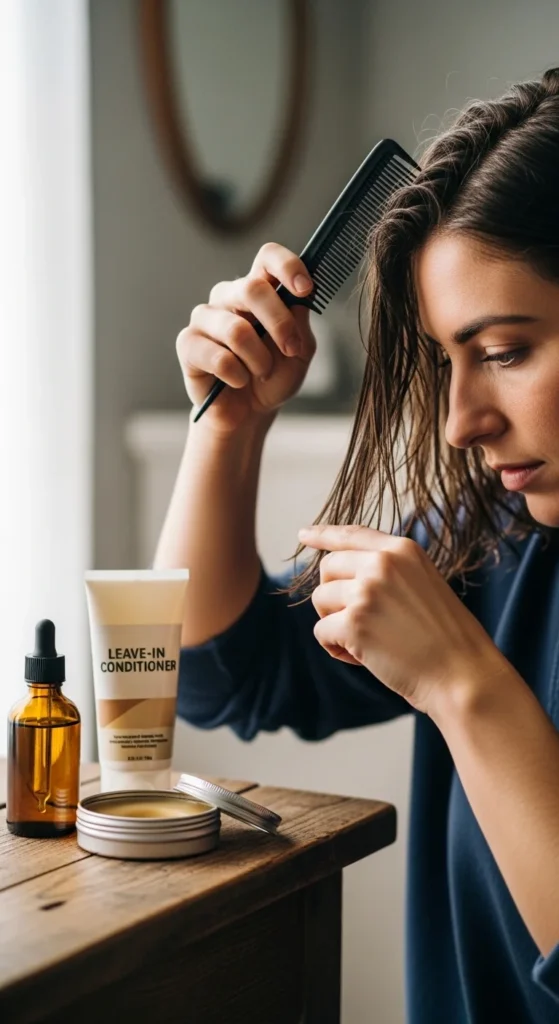
Step 1: Start with Clean, Prepped Hair
Before anything else, your base matters.
Viking styles may look rough, but they’re built on well-prepped hair. Clean hair gives better grip and structure.
What to do:
- Wash and condition your hair
- Towel dry or air dry completely
- Detangle using a comb
- Apply a small amount of:
- Hair wax
- Pomade
- Or light oil
This helps control flyaways and gives your braid that gritty, warrior texture, not frizz.
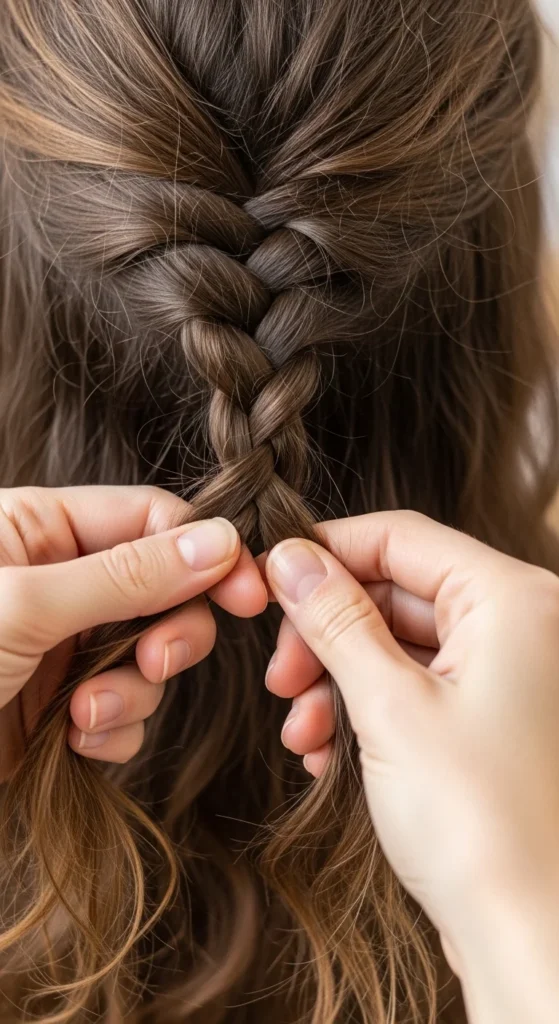
Step 2: Section and Create Your Braids
Now comes the foundation of your Viking look.
You don’t need anything fancy to start. A simple three-strand braid works perfectly.
Beginner braid styles:
- Single braid (classic Viking look)
- Double side braids
- Small multiple braids for a warrior layout
How to braid:
- Take a small section of hair
- Divide it into 3 equal parts
- Cross left over middle, then right over middle
- Repeat until you reach the end
Keep it slightly loose, then gently pull the braid outward (called pancaking) to add volume.
Step 3: Secure with Small Elastics (This Is KEY)
This is where most people go wrong.
If you try to slide beads directly onto loose hair, they will slip. The secret is using small rubber bands (elastics).
Do this:
- Tie a small elastic at the end of each braid
- Make sure it’s tight but not painful
- Keep it close to the braid’s end
This creates a stopper that holds your bead in place.
Pro tip: Use clear or hair-colored elastics so they stay hidden.
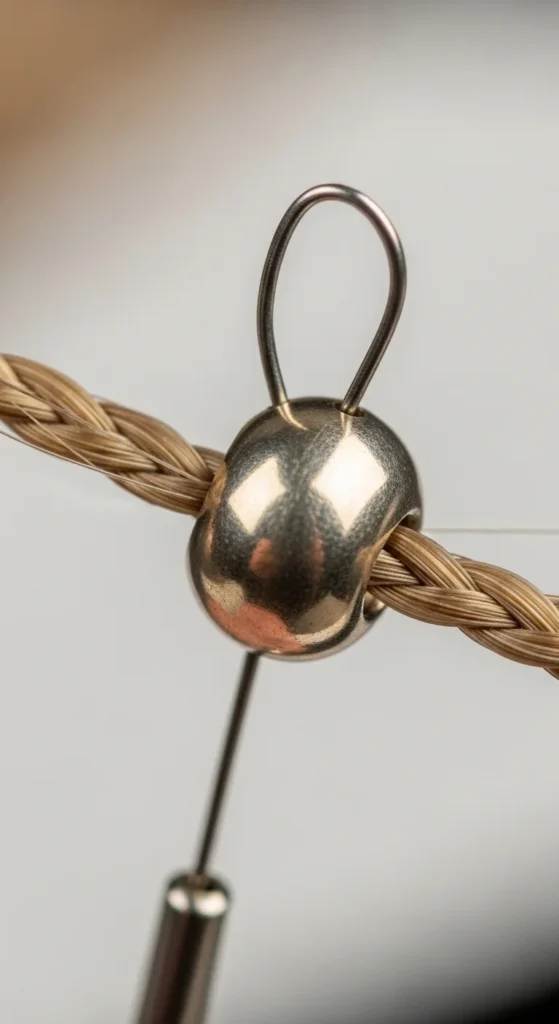
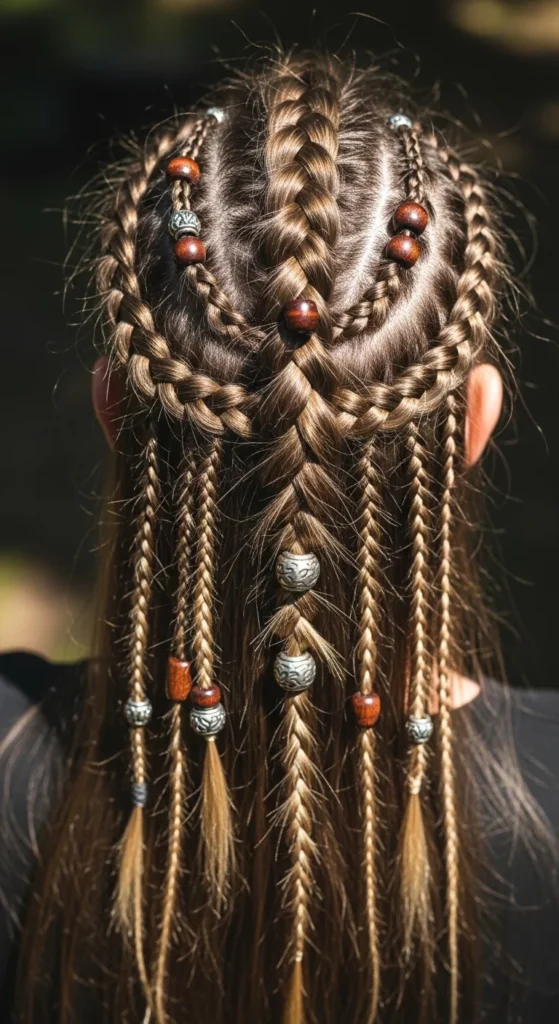
Step 4: Add Beads the Right Way (No Slipping)
Now for the fun part, adding beads.
Option 1: Slide Beads Over the Elastic
- Choose beads slightly wider than your braid
- Push the bead up from the end
- Let it sit directly over the elastic
Option 2: Use a Bead Threader (Best for Tight Beads)
- Insert your braid into a loop threader
- Pull it through the bead
- Slide bead down to the elastic
Important tips:
- Match bead size to braid thickness
- Thin braid plus big bead causes slipping
- Thick braid plus tiny bead will not fit
Step 5: Lock the Bead in Place
Want your beads to stay secure all day? Use this trick.
Try these fixes:
- Add a second elastic under the bead
- Slightly push the bead into the braid for friction
- Use a bobby pin hidden inside thicker braids
- Double-braid thin sections for extra grip
This creates tension and keeps everything secure, even during long wear.
Step 6: Style for That True Viking Finish
This is where your look transforms from basic to a cinematic Viking style.
Viking hair is not flat. It has volume, movement, and intention.
Finishing moves:
- Gently pull sections of the braid for thickness
- Leave some loose strands for a rugged feel
- Add multiple beads across different braids
- Mix bead placement:
- At the ends
- Stacked on one braid
- Staggered across multiple braids
Common Problems (And Quick Fixes)
Let’s solve the most common issues quickly:
Beads keep slipping
- Use smaller beads
- Add tighter elastics
- Double the braid
Hair too short
- Go for mini braids with small beads
- Focus on side sections
Feels uncomfortable
- Switch to lighter beads such as wood instead of heavy metal
- Avoid pulling too tight
Hair gets tangled
- Do not keep braids in too long
- Re-braid every 1–2 days
Bonus: Beard + Hair Combo (Optional)
If you have a beard, you can match it with your hair for a full Viking style.
The method is exactly the same:
- Small braid
- Elastic at the end
- Slide bead over
Just make sure your beard is at least a few inches long for proper braiding.
Final Thoughts
Viking hair with beads is not about being messy. It is about controlled texture with purpose. Once you master elastics and bead placement, slipping beads will no longer be a problem.
Start simple. Practice one braid. Then build your own warrior look step by step.
Save this guide for later and try it the next time you style your hair.

Leave a Reply