
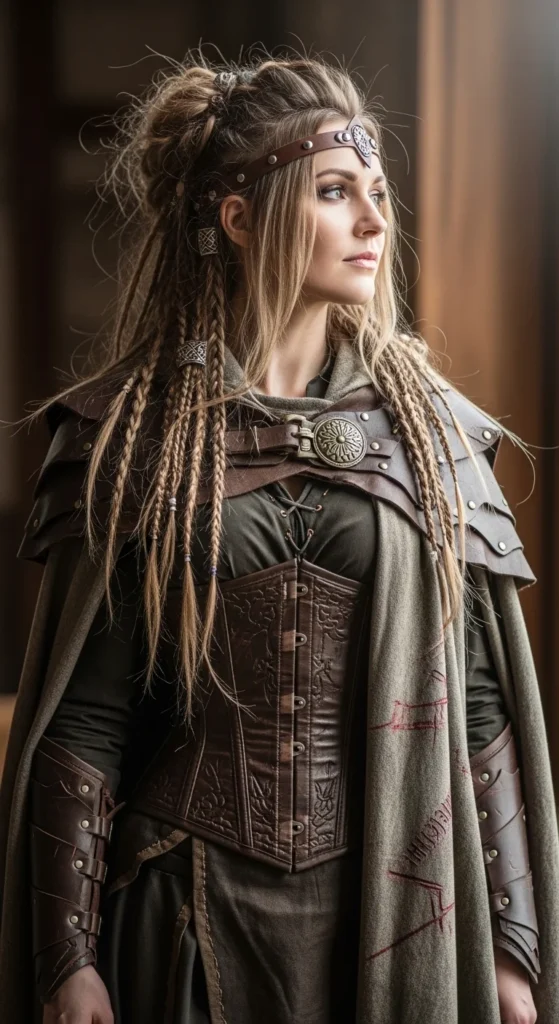
If you’ve ever admired Lagertha’s epic braids on Vikings or scrolled through Pinterest marveling at warrior-inspired hairstyles, you’re in the right place. Viking braids aren’t just a hairstyle—they’re a statement. Thick, dramatic, and ruggedly beautiful, they give long hair that “battle-ready” vibe without looking stiff or forced. Best of all, with a few tricks and the right prep, you can recreate them at home—even by yourself.
In this guide, we’ll break down the step-by-step process for achieving the ultimate Viking braid, cover the best products for grip and volume, and share pro tips for different hair types and braid variations.
Step 1: Prep Your Hair for Viking Braids
The secret to a full, dramatic braid starts before you even pick up a comb. Viking braids rely on texture and grip, especially for long hair.
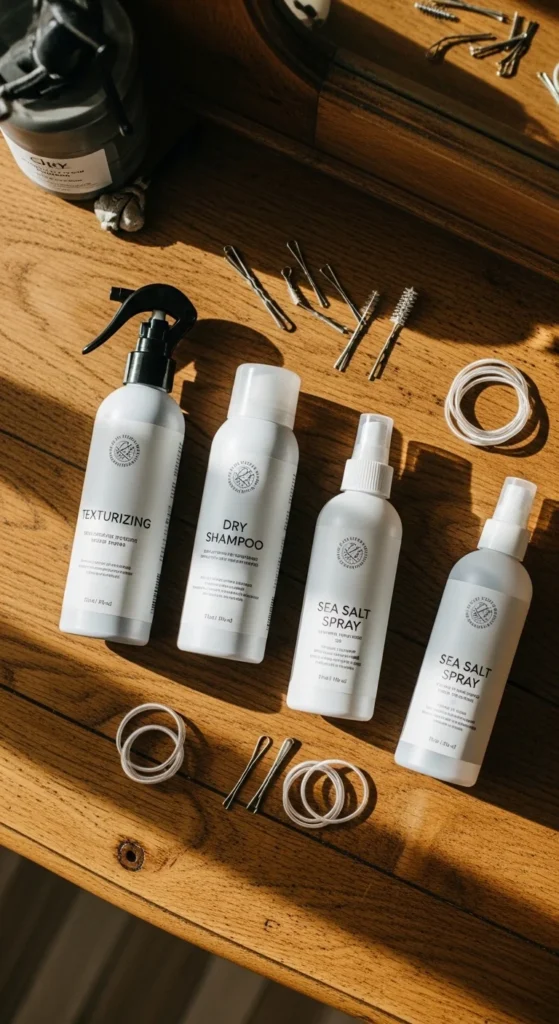
Best products for prepping long hair:
- Texturizing spray: Adds grit to slippery strands and boosts volume. Spray lightly before starting.
- Dry shampoo: Perfect for second-day hair or silky fine hair; it absorbs oil and helps braids hold.
- Sea salt spray: Optional, for extra rugged texture.
Best hair state:
Second-day or lightly dirty hair works wonders. Freshly washed hair tends to slip, making your braid loose and flat. If your hair is clean, add extra texturizing product and tease lightly at the roots.
Pro tip: Comb lightly to detangle but keep some natural volume; over-brushing reduces grip.
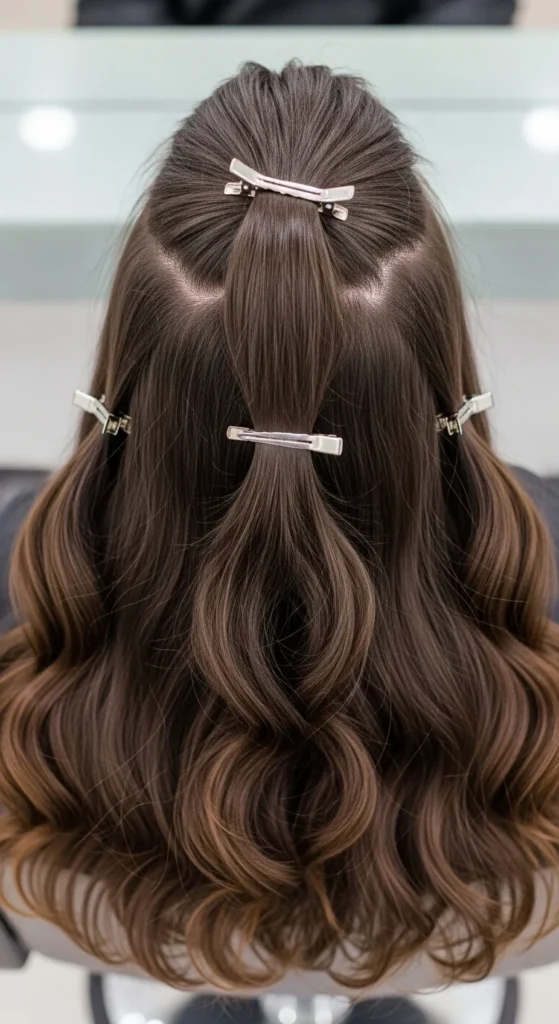
Step 2: Section Your Hair Like a Pro
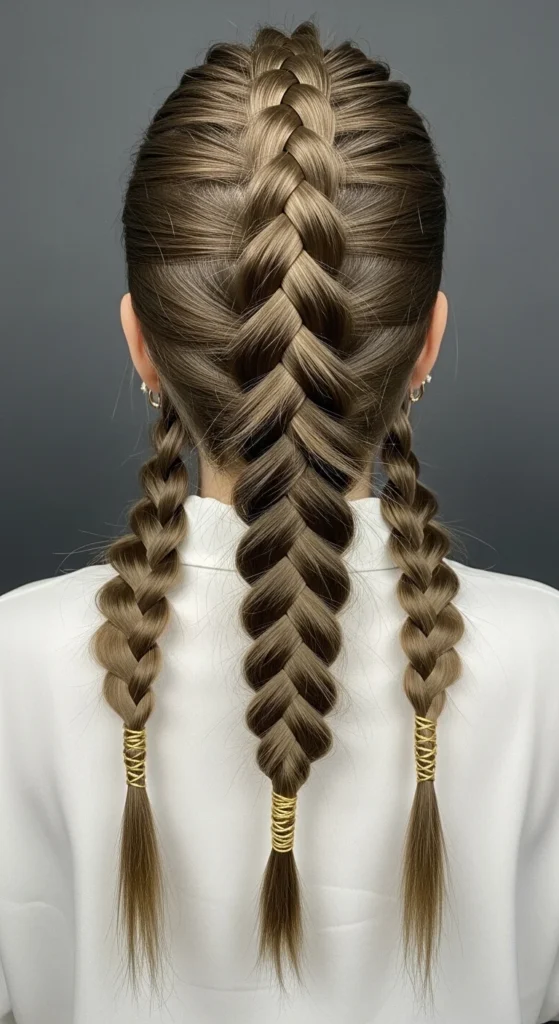
Sectioning is the backbone of a Viking braid. The classic “3-part Viking braid” includes two side braids and one top braid running down the center.
Step-by-step sectioning guide:
- Part your hair in the middle or slightly off-center.
- Clip the top section away for later Dutch braiding.
- Split the sides into 1-inch-wide strands for side braids.
Creating a visual “section map” helps keep strands organized. Label sections if needed; messy Viking braids are the goal, but the base still needs structure.
Tip: Use clips or bobby pins to secure sections while working on another temporarily.
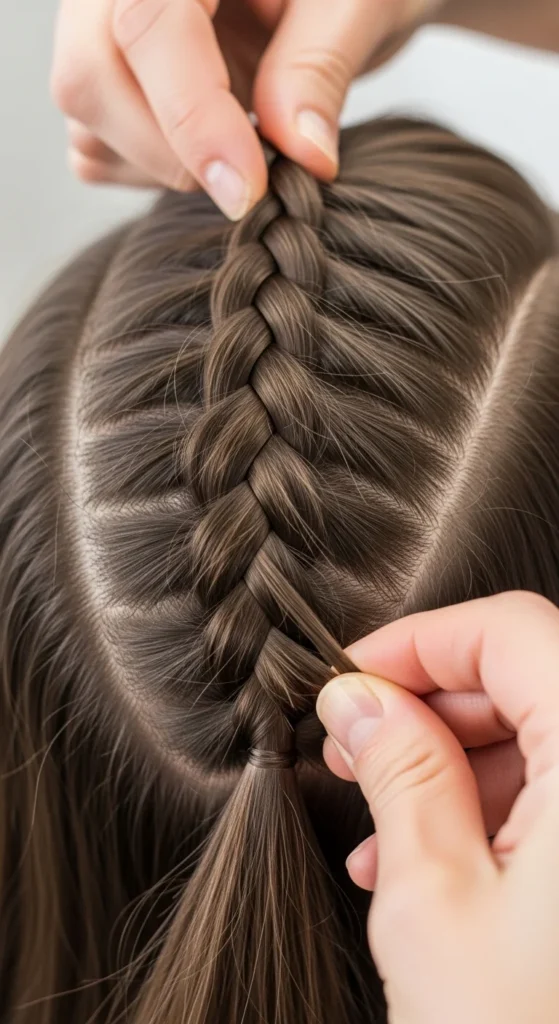
Step 3: Dutch Braid Basics for Side and Top Braids
Dutch braids are the signature technique for Viking braids. Unlike a French braid, where strands cross over, Dutch braids cross under, creating a raised, dramatic effect perfect for a battle-ready style.
How to Dutch braid:
- Grab three small strands at the start of your braid.
- Cross the side strands under the middle strand instead of over it.
- Add small sections gradually as you move down, keeping tension consistent.
For side braids, start near the temples and work back toward the ears. For the top braid, begin at the crown and braid down the back center.
Pro tip: Don’t over-tighten. Viking braids should feel secure but still have volume and rugged texture.
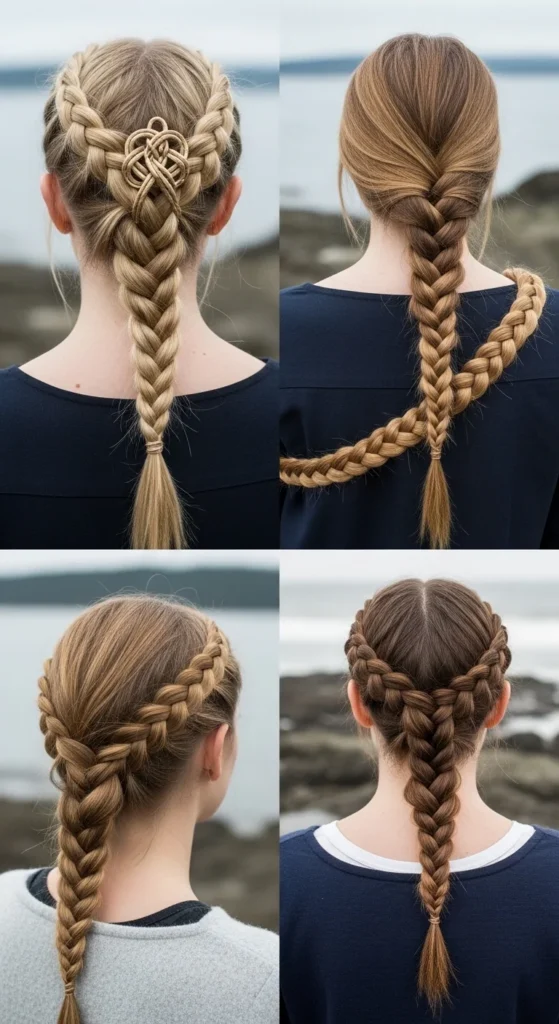
Step 4: Choose Your Viking Braid Variation
Once you’ve mastered the basics, you can upgrade your look with braid variations:
| Braid Type | Best For | How to Integrate |
|---|---|---|
| Rope braid | Side sections | Split into two, cross small outer strands to the opposite side |
| Fishtail | Top braid | Split into two, cross small outer strands to opposite side |
| Lace braid | Crown area | Adds intricate detail for a festival or cosplay look |
| Snake braid | Entire length | Perfect for dramatic, twisting textures |
Mixing techniques creates a layered, voluminous effect that looks effortless and complex.
Step 5: Pancake, Tease, and Finish
A Viking braid isn’t just about technique—it’s about volume. Pancaking (pulling braid edges gently outward) and teasing the ends adds thickness, creating that rugged, battle-ready aesthetic.
Finishing touches:
- Light hairspray for hold without stiffness
- Clear elastics at braid ends
- Bobby pins to secure loose pieces or flyaways
- Optional metallic cuffs, rings, or headbands for a cosplay-inspired look
Pro tip: Don’t aim for perfection. Messy, imperfect details make the style feel authentic.
Step 6: Self-Braiding Tips for Long Hair
Braiding your own hair can be tricky around the crown. Try these tricks:
- Use two mirrors: front and back view.
- Start with side braids first; secure with elastics.
- Bring the top braid over or under side braids for a layered, polished battle braid look.
Even shoulder-length or armpit-length hair can work. Shorter layers may need extra teasing or accessory support to maintain volume.
Step 7: 5 Viking Braid Styles for Long Hair
- Classic Battle Braid: Two side Dutch braids plus a top crown braid.
- Half-Up Warrior Braid: Top braided crown with loose waves below.
- Rope Side Braids: Twisted side braids with soft pancaked top.
- Fishtail Mohawk Braid: Center top braid in fishtail, sides loose or rope braided.
- Festival Viking Braid: Mix lace braids with small accessories for cosplay-ready flair.
Step 8: Troubleshooting Common Issues
- Braids slipping: Use dry shampoo or texturizing spray.
- Flat braids: Pancake edges and tease lightly at the roots.
- Flyaways everywhere: Lightly mist with hairspray, tuck with bobby pins, or leave loose for rugged look.
Remember: messy, voluminous braids are the goal. Over-perfecting removes the Viking edge.
Conclusion
Viking braids give long hair a dramatic, textured, and warrior-ready vibe that’s perfect for cosplay, festivals, or just showing off your inner Lagertha. With the right prep, sectioning, and finishing touches, you can achieve thick, gorgeous braids—even by yourself.
Save this guide, grab your texturizing spray and elastics, and start your own Viking braid journey today!

Leave a Reply