
Braiding a little kid’s hair can feel intimidating at first. Wiggly heads, tender scalps, and limited time before school can turn a simple style into a stressful moment. But once you learn a few beginner steps, braiding becomes calm, quick, and even fun.
The secret is not fancy techniques. It is preparation, gentle hands, and starting with the right braid for your child’s age and hair type.
This guide walks you through the exact steps that actually work for beginners, even if you have never braided before.
The Braid Blueprint (Use This Every Time)
Almost every easy braid for kids follows the same order. Once you memorize this, you can create many styles.
Part → Detangle → Section → Braid → Secure → Accessorize
Keep this sequence in your mind. It prevents pain, tangles, and messy results.
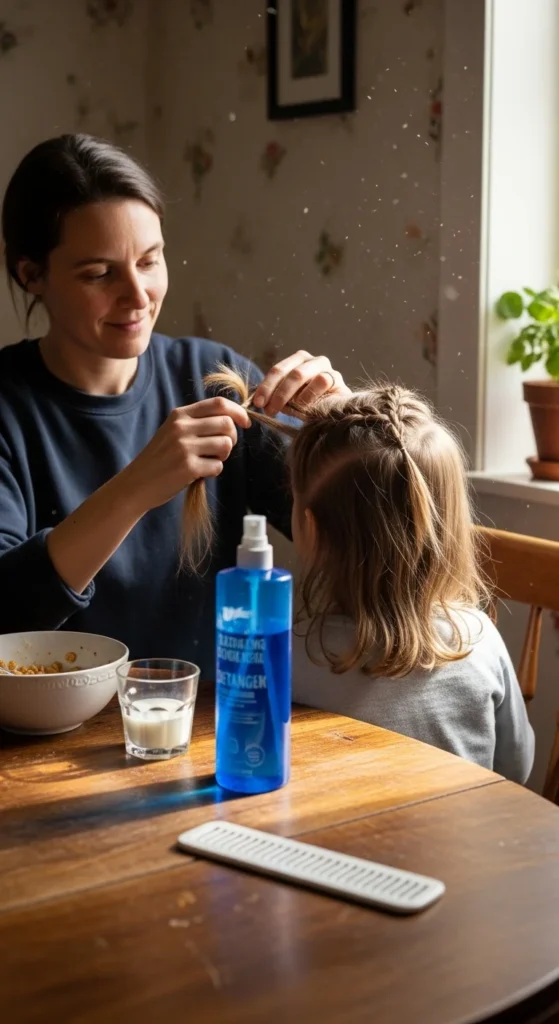
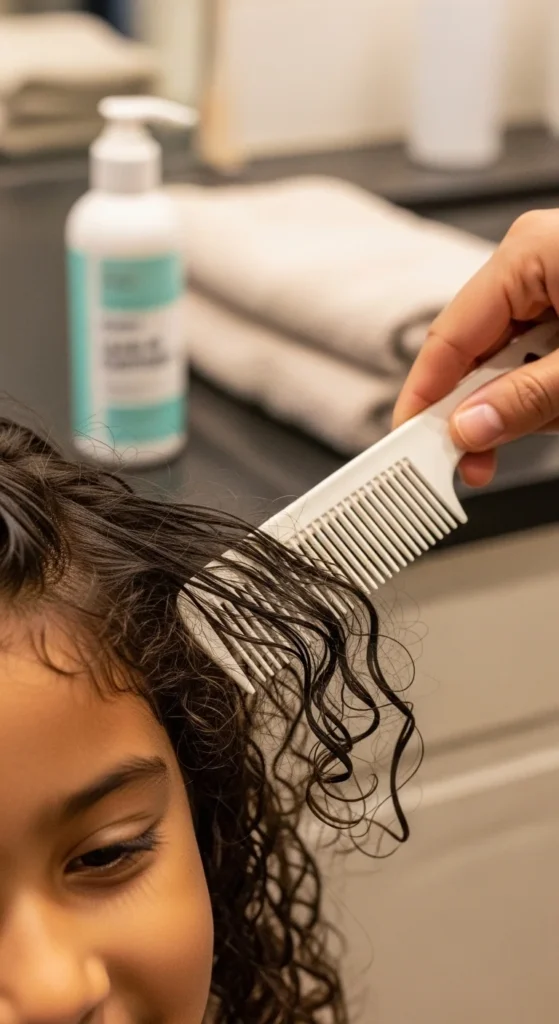
Step 1: Start with Clean, Moisturized Hair
Braiding dry, tangled hair is where most problems begin.
Before braiding day:
- Wash and condition the hair
- Apply a leave-in conditioner
- Detangle gently with a wide-tooth comb
- Let the hair dry, stretched or loosely tied overnight
This makes the hair soft, manageable, and much easier to braid without pulling.
Step 2: Create an Ouch-Free Setup for Tender Heads
Many kids are tender-headed. Comfort should always come first.
Pain-free hacks:
- Use a detangling spray before touching the hair
- Work in small sections
- Never pull tight near the edges or hairline
- Ask the child if it feels too tight
If they say “ouch,” loosen it. A loose braid still looks neat and protects the scalp.
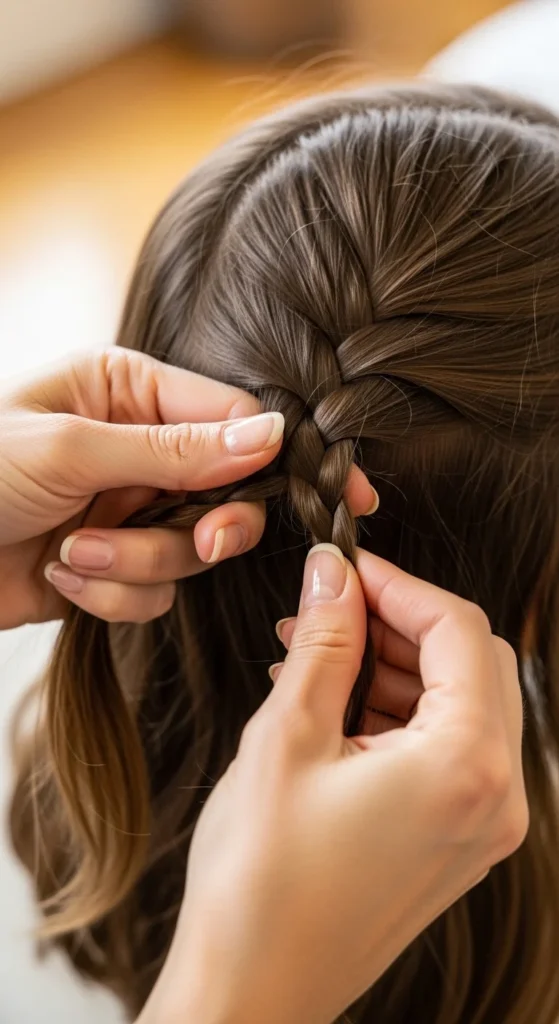
Step 3: Master the Basic Three-Strand Braid First
This is the foundation braid. Once you learn this, everything else becomes easier.
How to do it:
- Take a small section of hair
- Divide into three equal parts
- Cross left over middle
- Cross right over middle
- Repeat to the end
- Secure with a small elastic
This simple braid works for pigtails, side braids, and quick morning styles.
Step 4: Try Easy Styles by Age
Different ages sit for different amounts of time. Choose styles that match their patience level.
Ages 3–5 (1–2 weeks max)
- Pigtail braids
- Single back braid
- Bubble braids (no braiding needed, only elastics)
Ages 6–8 (2–3 weeks max)
- Double French braids
- Boxer (Dutch) braids
- Simple cornrows
Ages 9–12 (3–4 weeks max)
- Knotless box braids
- Feed-in braids
- Creative parting patterns
Younger kids need quicker, simpler styles. Older kids can handle longer sessions.
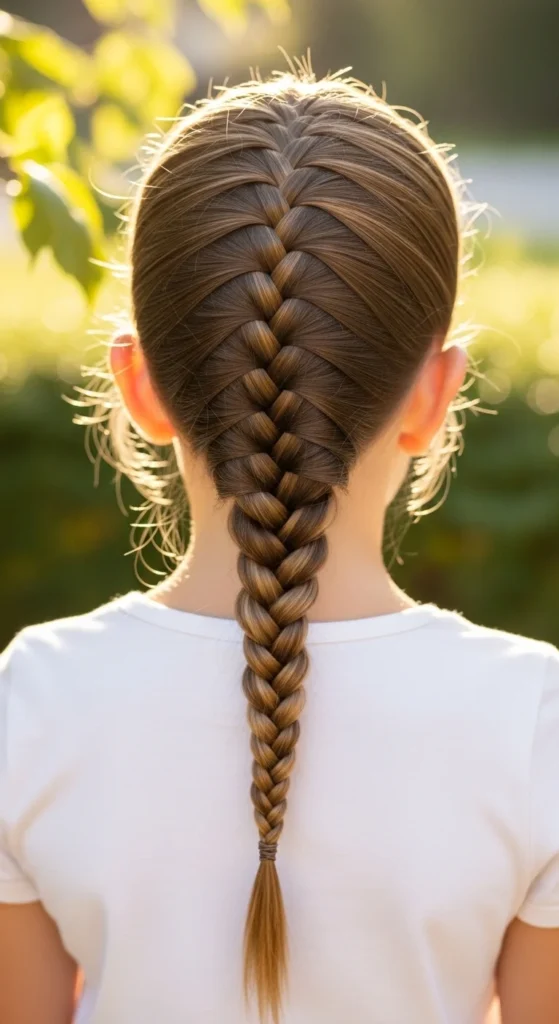
Step 5: Learn One Upgrade Braid — The French Braid
Once you know the three-strand braid, the French braid is the next step.
How it’s different:
You add small pieces of hair as you braid downward.
- Start with three sections at the top
- After each cross, add a little hair to that section
- Continue until you reach the end
- Secure with an elastic
French braids are perfect for school because they stay neat all day.
Step 6: Use Bubble Braids When You’re Tired
No braiding skills? No problem.
Bubble braids look impressive but only need elastics.
How to do it:
- Make a ponytail
- Add elastics every 2 inches
- Gently pull each section to create a bubble shape
This is perfect for beginners, dads, or rushed mornings.
Step 7: Add Accessories for Fun
Kids love choosing their own look.
You can upgrade any basic braid with:
- Colorful elastics
- Bows
- Beads
- Ribbons
Let your child pick the accessories. It makes them excited to sit still for braiding.
Step 8: Braids That Survive School, Sports, and Play
Some braids hold better during active days.
Best long-lasting options:
- Double Dutch braids
- Cornrows
- Knotless braids for older kids
These styles keep hair contained during recess, sports, and busy school days.
They also help reduce exposure to head lice by keeping hair secure and close to the scalp.
Step 9: Protect the Edges and Hairline
Tight braids around the edges can cause damage over time.
Edge-safe rules:
- Braid loosely near the front
- Avoid heavy extensions for kids
- Change parts regularly
- Do not keep braids in longer than recommended
Healthy hair always looks better than tight braids.
Step 10: How to Safely Remove Braids (No Breakage)
Taking braids out the wrong way can cause tangles and tears.
Removal steps:
- Spray hair with moisturizing spritz or conditioner
- Undo the braid from the middle or ends
- Detangle gently section by section
- Re-moisturize after removal
Never rush this step.

Final Thoughts
Braiding little kids’ hair does not require salon skills. It requires patience, gentle hands, and starting with simple styles that match your child’s age and comfort.
Begin with the three-strand braid. Add French braids next. Use bubble braids when you need a break. Keep styles loose, neat, and fun.
Save this guide for your next braid day and turn hair time into a calm, happy routine your child actually enjoys.

Leave a Reply