Every year, the hunt begins: how to add a touch of witchy charm to your hair without looking like you raided a Halloween store. Whether you’re aiming for a subtle gothic twist, a cosplay-ready look, or a full-on Halloween vibe, miniature witch-hat clips and accessories are the easiest way to make your hair magical. The secret? Placement, materials, and finishing touches that make even DIY creations look polished.
This guide will take you through beginner-friendly, step-by-step ideas for adding clips and accessories to your hair, with options ranging from no-sew mini hats to crochet designs. You’ll also discover tips for keeping everything secure, stylish, and wearable beyond just Halloween.
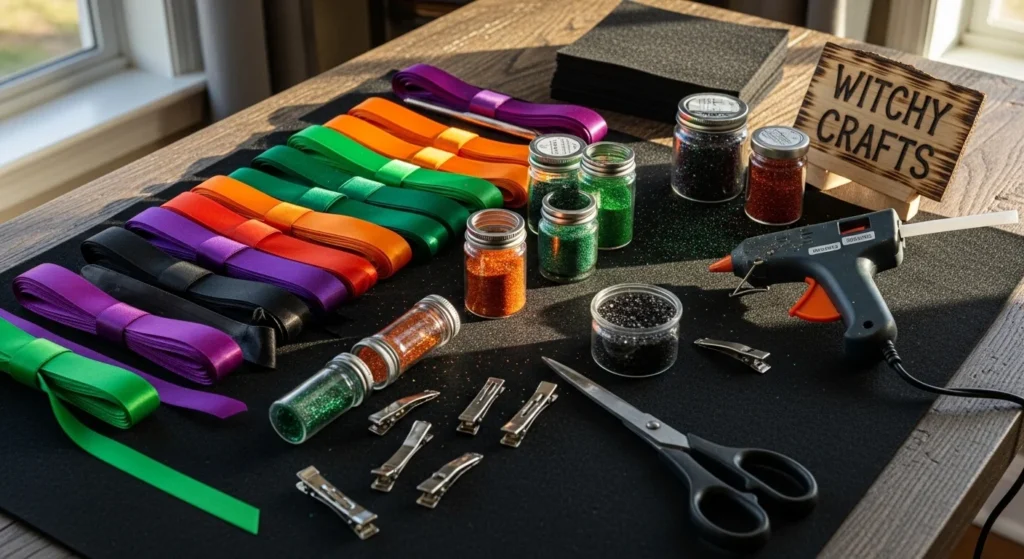
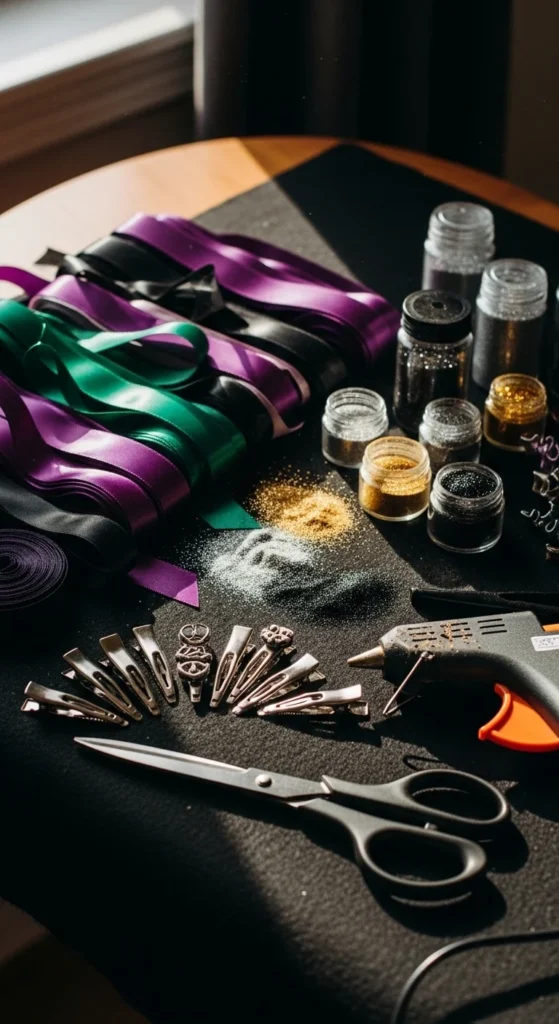
Materials Checklist: What You’ll Need
Before diving in, gather these basics. Most tutorials depend on readily available supplies, and having everything within reach accelerates your crafting process.
- Felt (black, dark purple, or glittery variations)
- Ribbon (satin, velvet, or patterned for accents)
- Hot glue gun and sticks
- Scissors
- Thread (optional, for sew-friendly versions)
- Decorative gems, stars, or mini charms
- Alligator clips or small hair claws
- Crochet yarn and hook (for crochet hat versions)
Pro tip: If you’re going for a 3D effect, layering felt or adding ribbon loops instantly adds dimension.
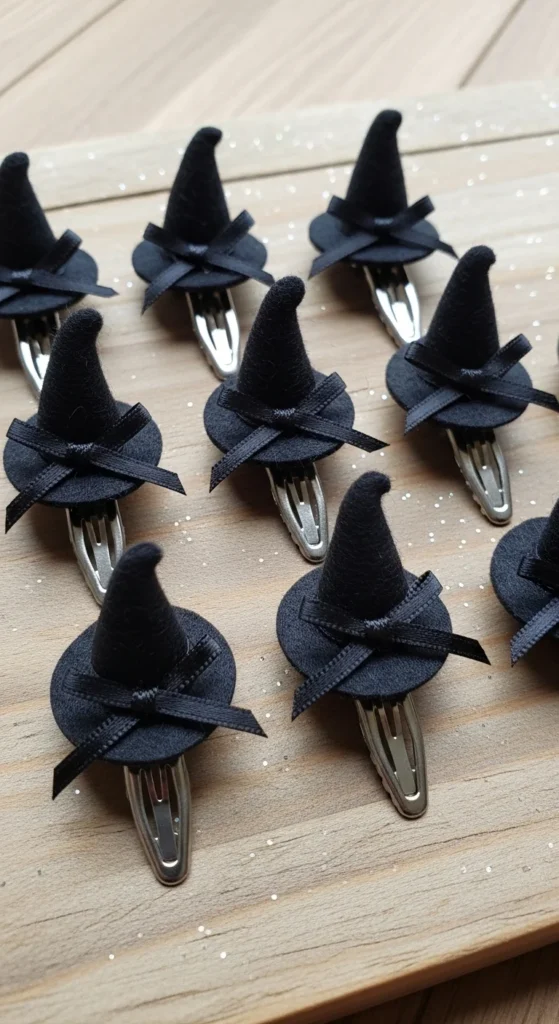
Step 1: Create Your Mini Witch Hats
There are three main approaches, each offering a different finish and effort level:
No-Sew Felt Hats (Fastest Version)
- Cut a small cone from felt (tip: use a template for uniformity).
- Roll and glue edges to form the cone shape.
- Cut a small circle for the brim, attach with glue.
- Decorate with ribbon, small stars, or tiny charms.
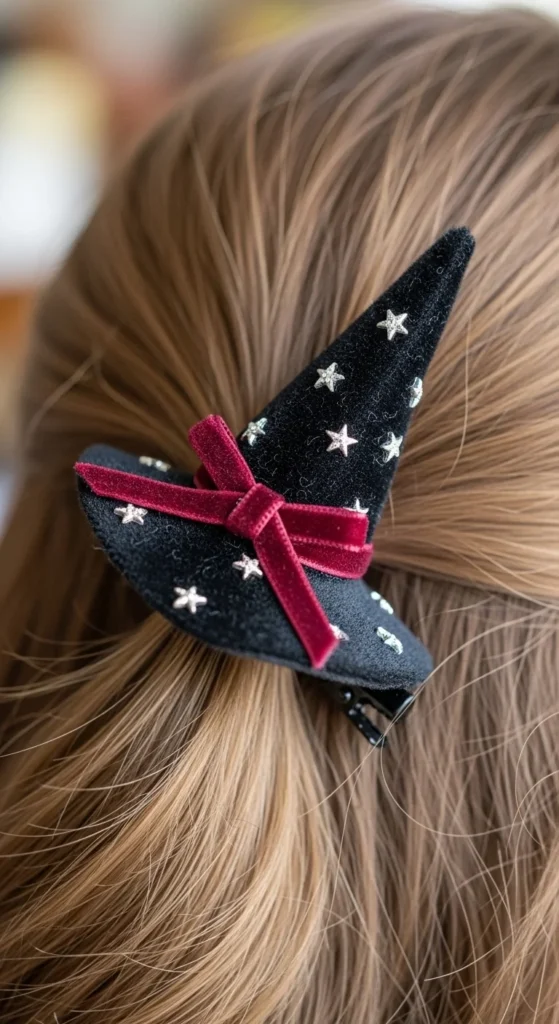
Sew/Glue Hats (Polished Look)
- Use thread to secure cone edges for durability.
- Attach a slightly stiffer brim with glue or hand-stitch.
- Add layered ribbons, glitter, or sewn-on gems for detail.
Crochet Hats (Creative Variation)
- Follow a simple beginner-friendly crochet pattern.
- Add embroidered stars or mini felt accents.
- Perfect for a whimsical, 3D effect that stands out.

Step 2: Attach Clips Securely
Even the cutest witch hat is useless if it slides out mid-party. Clip type and placement are key.
- Alligator Clips: Ideal for regular hair and small wigs; slide under hair to hide the base.
- Pressure Clips: Great for thicker hair or wig toppers; offer firm hold without pulling.
- Wig Clips: Essential if adding to a hairpiece; sew or glue for a secure attachment.
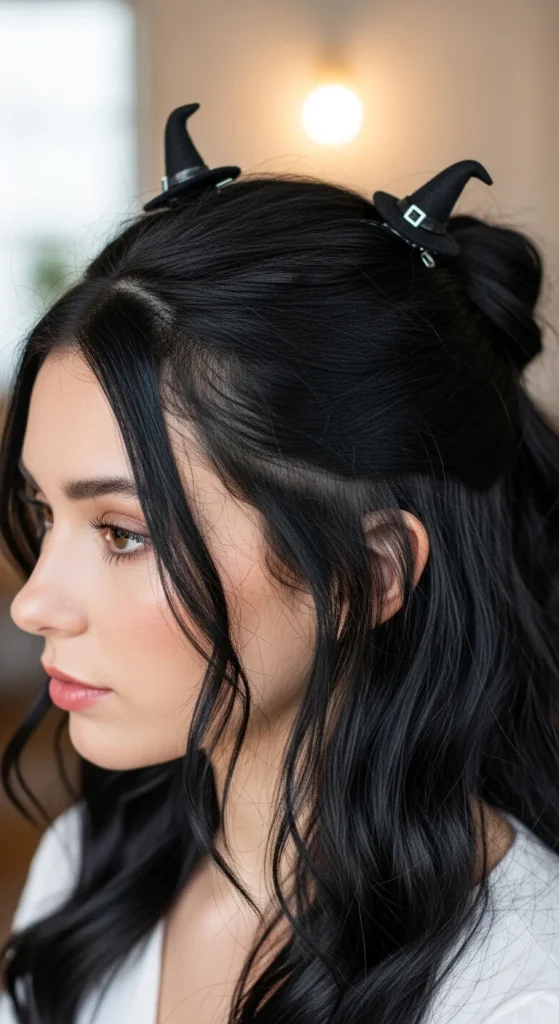
Placement Tips:
- Top-of-head accents work best for visibility without looking costume-y.
- Side parts, ponytails, or half-up styles allow layering with bows or moon pins.
- Avoid placing directly on bangs or thin hair edges—clips need volume to grip.
Step 3: Finishing Touches
The difference between “homemade” and “polished” comes down to small details:
- Trim ribbon ends neatly and seal with a dab of glue.
- Add tiny gems, stars, or beads for sparkle.
- Consider layering hats with smaller bows or hair charms for dimension.
- Check the cone seams—hot glue should be smooth, not lumpy.
Pro tip: If making for children or sensitive scalps, test for comfort. Cover glue ends and avoid heavy embellishments.
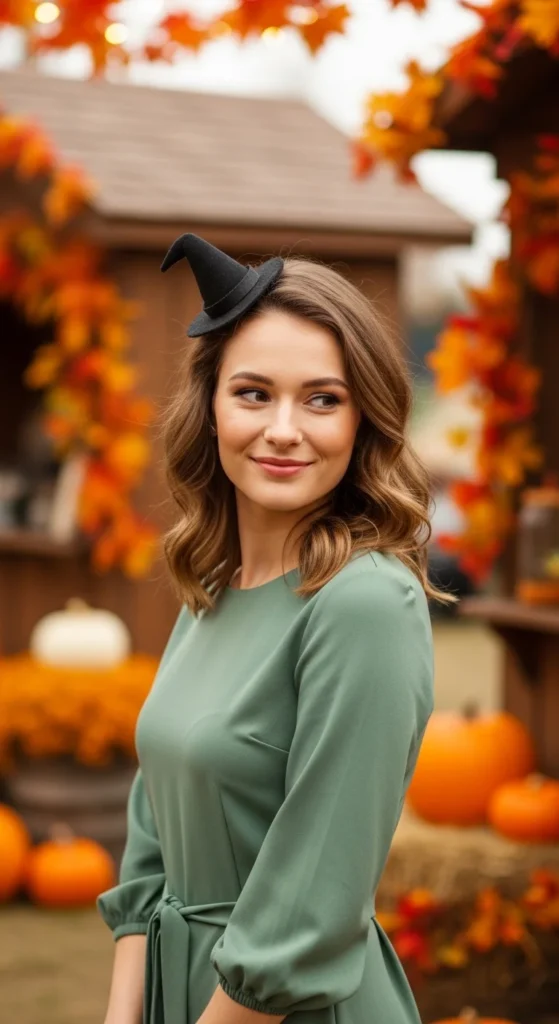
Step 4: Styling Beyond Halloween
While Halloween is the obvious occasion, witchy hair accessories can be worn year-round. Here’s how:
- Pair black or dark jewel-toned hats with gothic or celestial outfits.
- Layer with moon or star pins for a mystical everyday look.
- Cosplay or Renaissance fairs are perfect opportunities for a more dramatic 3D hat design.
- Even subtle felt hats on a half-up hairstyle give an adult witch vibe without looking “costume-y.”
Step 5: Buy vs DIY
Not everyone wants to craft. Online marketplaces offer ready-made options:
- Etsy: Unique, customizable witch-hat hair clips in felt, crochet, and 3D designs.
- Walmart/Party Perfectly: Budget-friendly, seasonal options suitable for quick Halloween prep.
DIY gives you personalization—ribbons, gems, and colors that match your outfit—while buying is fast and convenient. Why not mix both? Clip a store-bought hat on one side, DIY on the other, for a playful layered effect.
Final Thoughts
Adding witchy hair accessories is all about balance: keep them secure, decorative, and stylish. Whether you go no-sew, crochet, or fully decorated, your clips can be both playful and polished. Start small, experiment with placement, and layer for depth. Before you know it, your hair will be a magical statement that works for Halloween, cosplay, or your everyday witchy aesthetic.
Save this guide for later and get ready to craft your own adorable witch-hat clips—you’ll be turning heads all season long!