
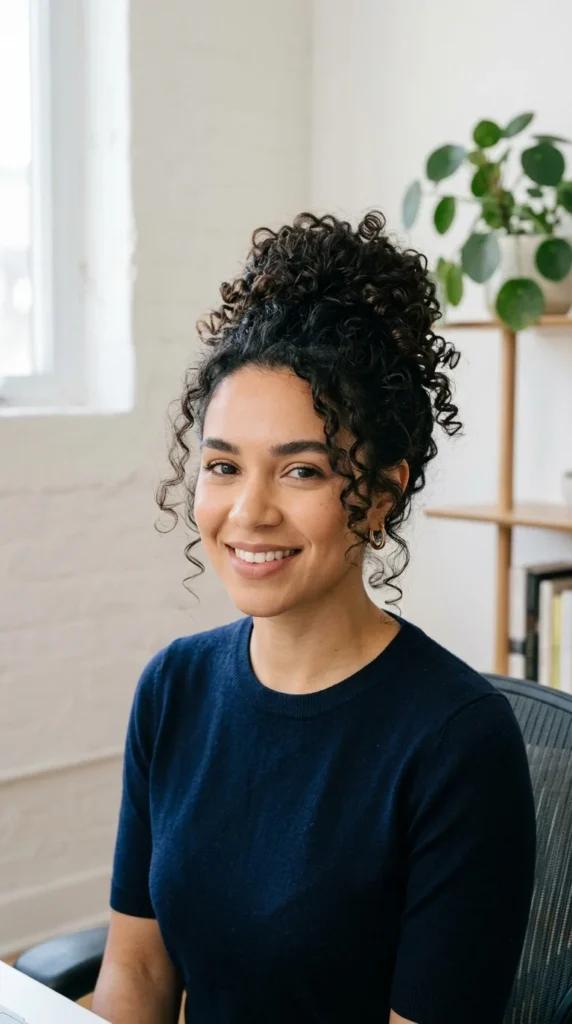
Messy curly buns sit at the sweet spot between effortless and put-together. They celebrate natural texture, work best on second- or third-day hair, and solve real issues like frizz, flyaways, and sagging hold. This listicle gives you step-by-step ideas, simple product stacks, and budget tricks that help your bun look undone but not frizzy. Expect quick how-tos, humidity tips, and accessory ideas you can try today.
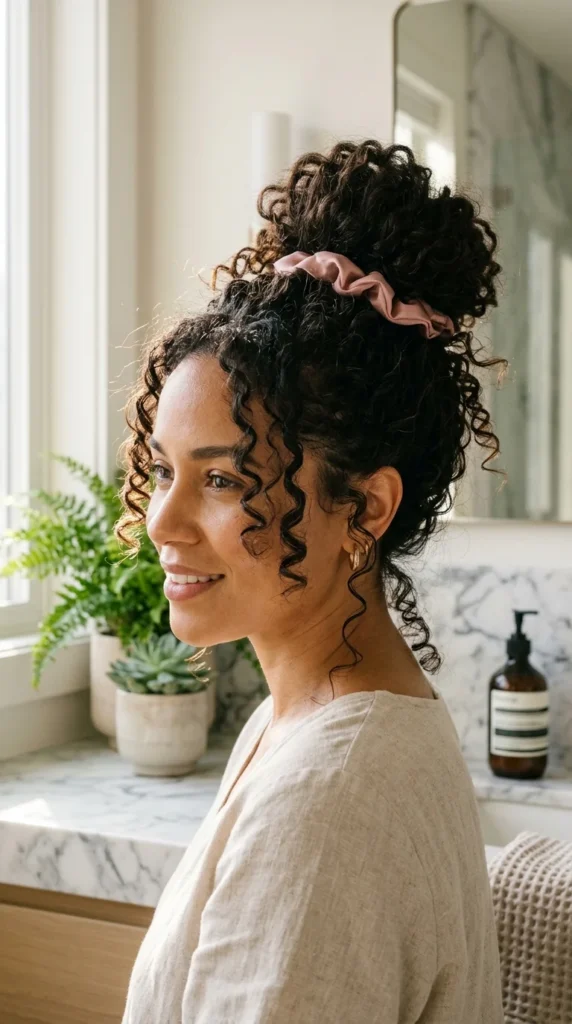
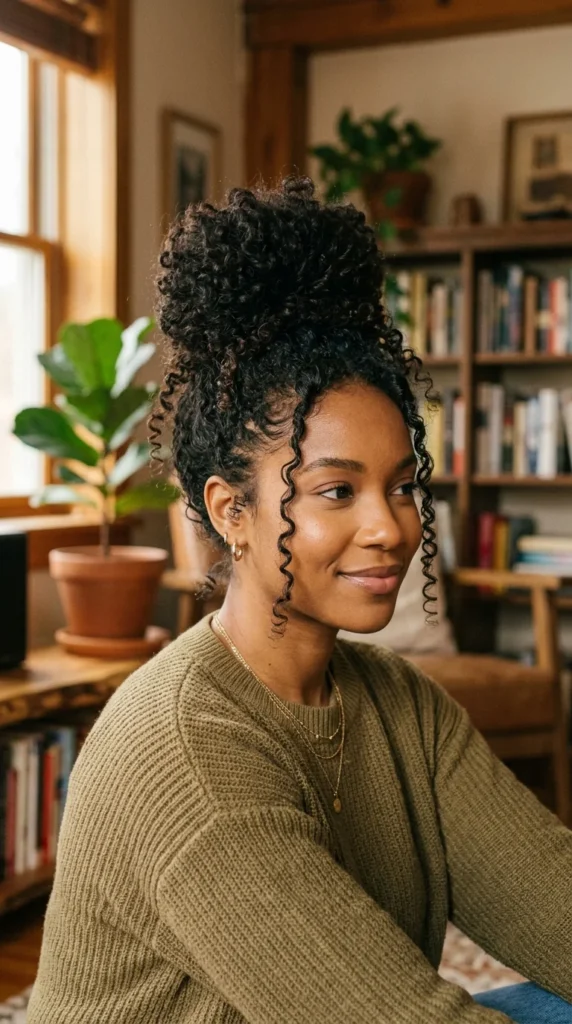
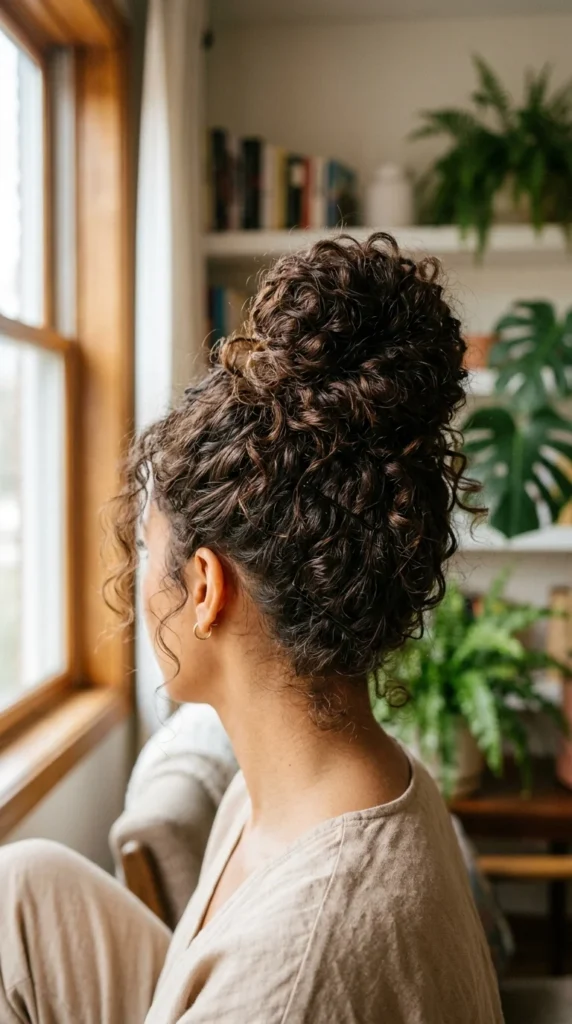
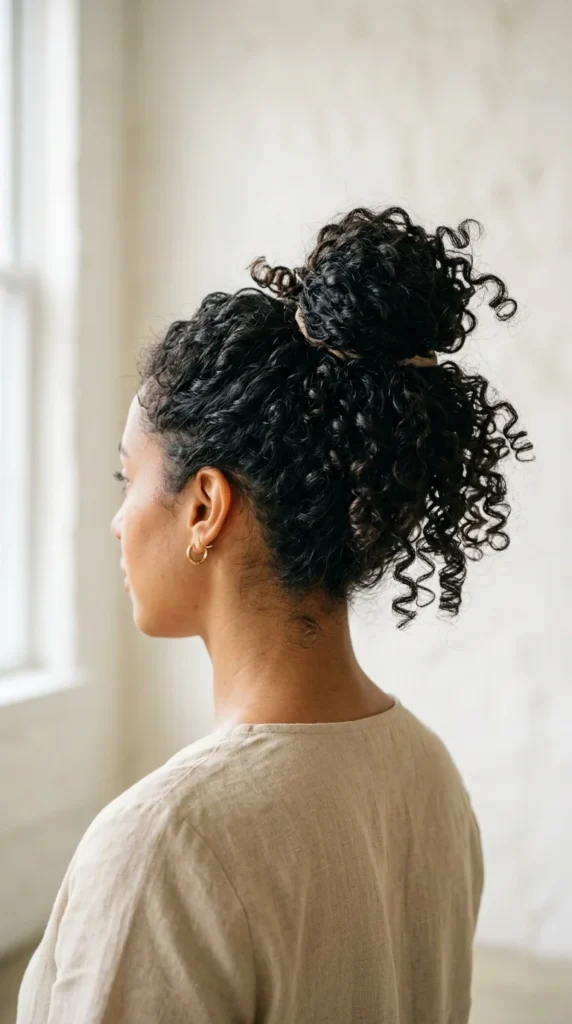
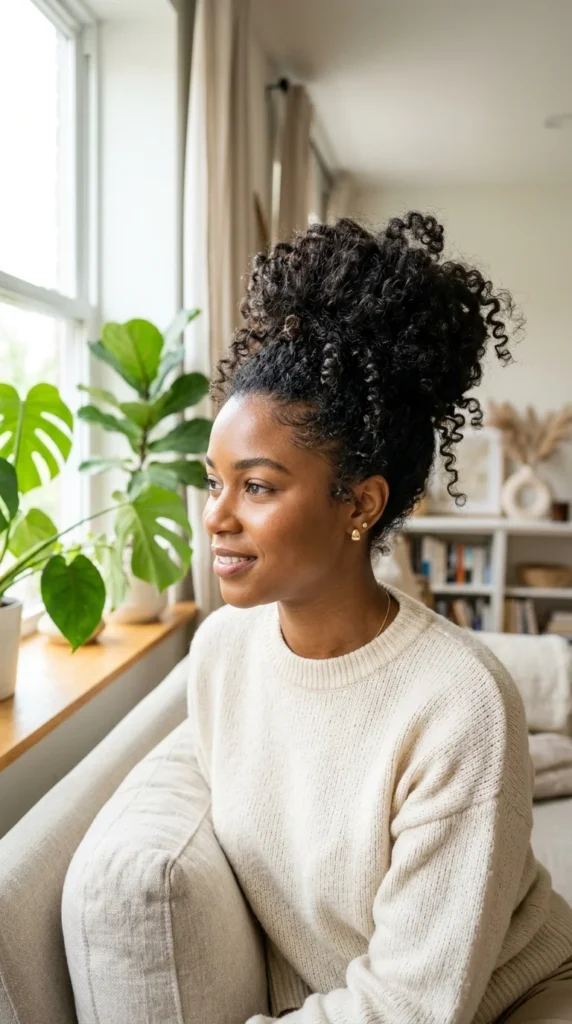
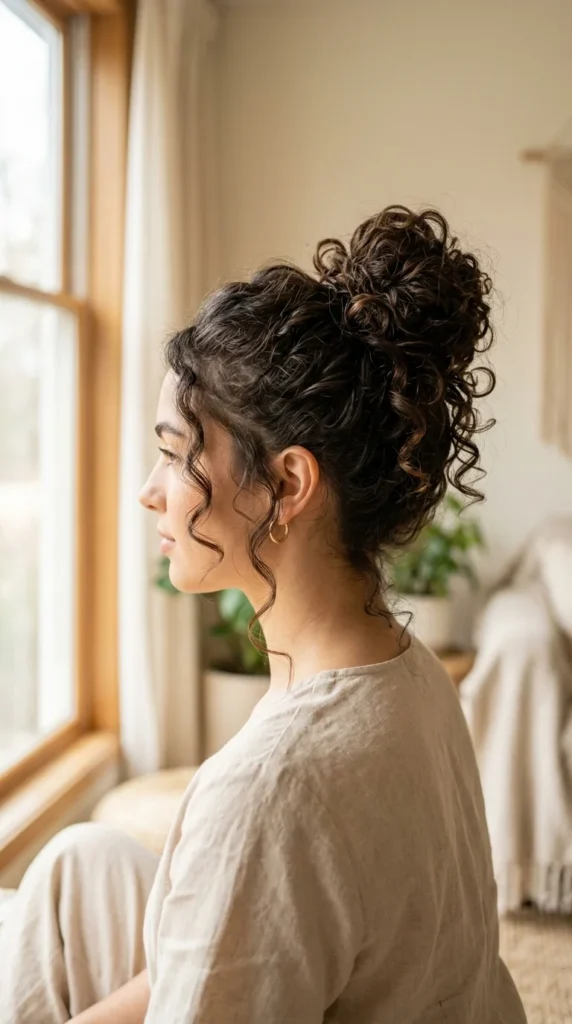
1. The Classic High Messy Curly Bun
Flip your head forward and gather curls into a high ponytail using a satin scrunchie. Do not brush. Let the texture stay visible and slightly tousled. Twist the ponytail loosely and wrap it around the base. Secure only the spots that droop with bobby pins. Gently pull a few curls near the temples to soften the hairline and create that artfully messy shape.
Spray dry shampoo at the roots before tying for extra grip and volume. Tap flyaways with a tiny bit of gel on an edge brush without slicking everything down. Finish with a light cloud of hairspray around the bun, not directly on it. This keeps the bun airy while still giving it the hold required to last through the day.
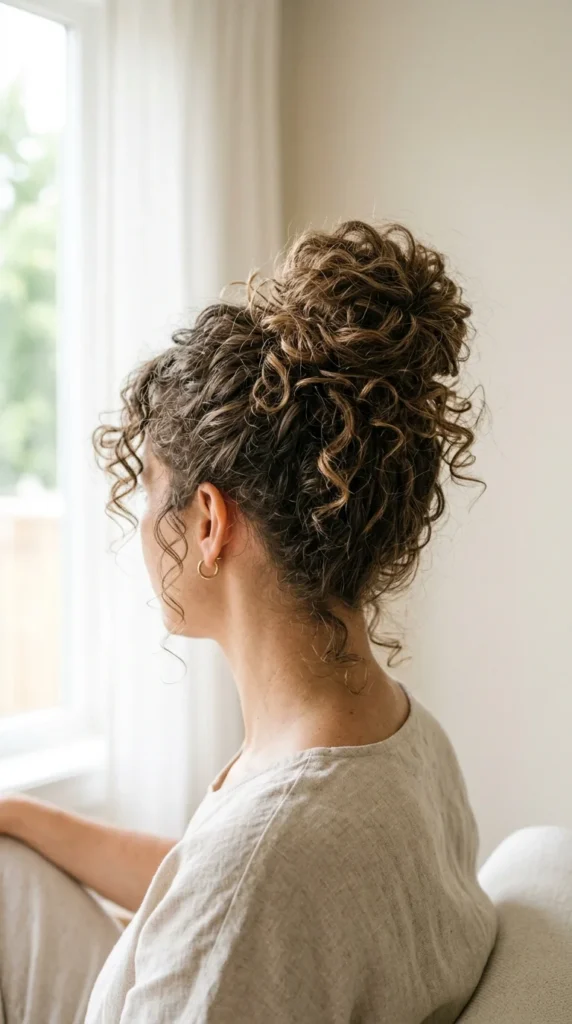
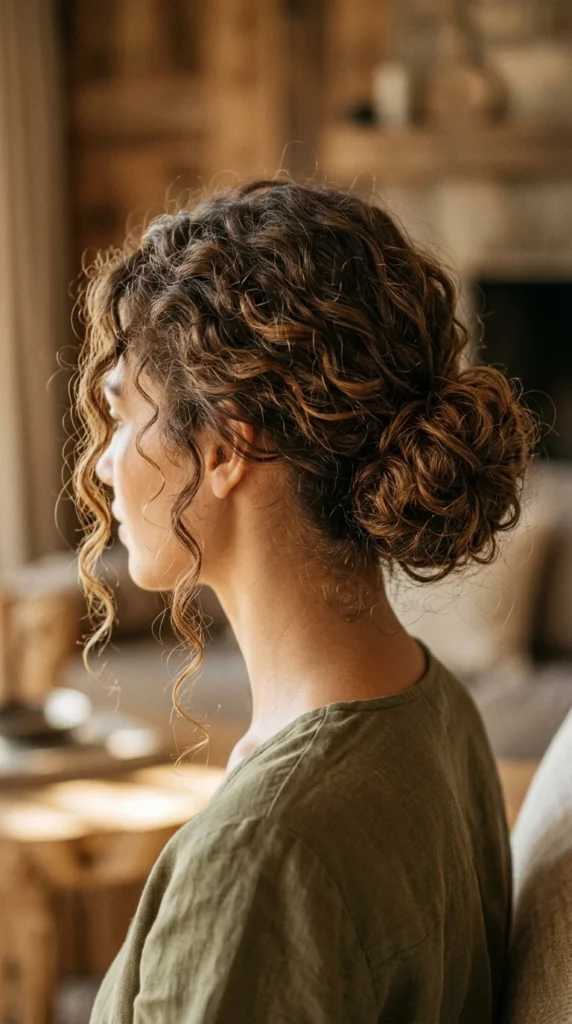
2. The Low Lived-In Curly Bun
Start by refreshing curls with a small amount of leave-in conditioner to bring back definition. Part your hair loosely and gather everything at the nape of your neck. Secure with a soft tie and wrap the ponytail into a loose bun. Pin only where the bun feels heavy or starts slipping downward.
Pull out two thin strands near the ears and allow natural flyaways to remain. Mist hairspray into the air and step into it for even coverage without stiffness. This style looks relaxed, reads neat on camera, and works well when you want something quick that still feels put-together.
3. The Half-Up Messy Curly Bun for Short Hair
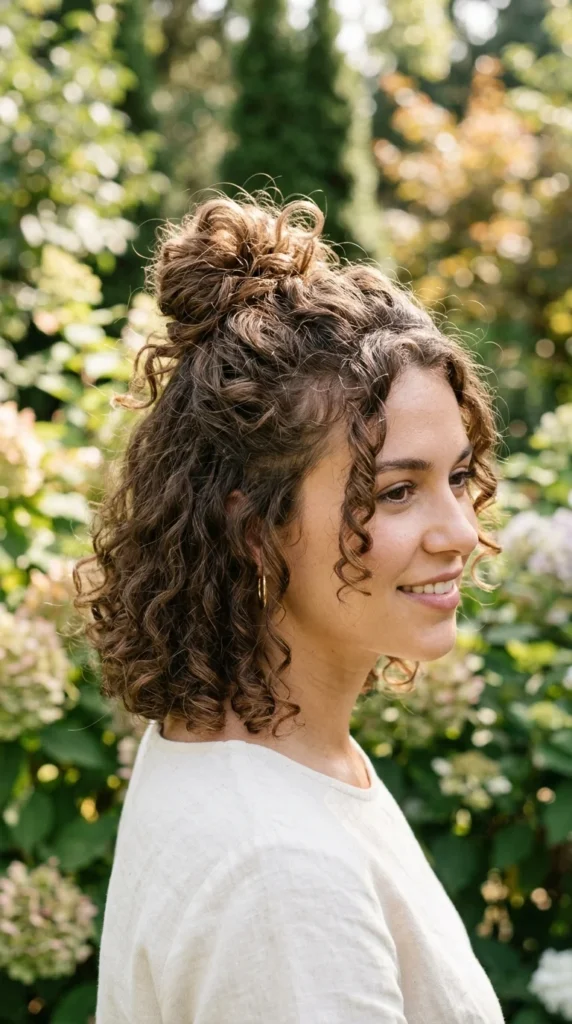
Section the top half of your curls and leave the bottom untouched. Spray a little texture spray at the roots of the top section for grip. Tie this section into a mini ponytail and wrap it into a small bun. Use slim bobby pins to hold the shape without adding bulk.
Let the lower curls fall freely to frame your face and neck. If pieces slide out, rub a tiny amount of mousse between your fingers and twist them back into place. This approach gives height and shape to short hair without forcing it into a full bun.
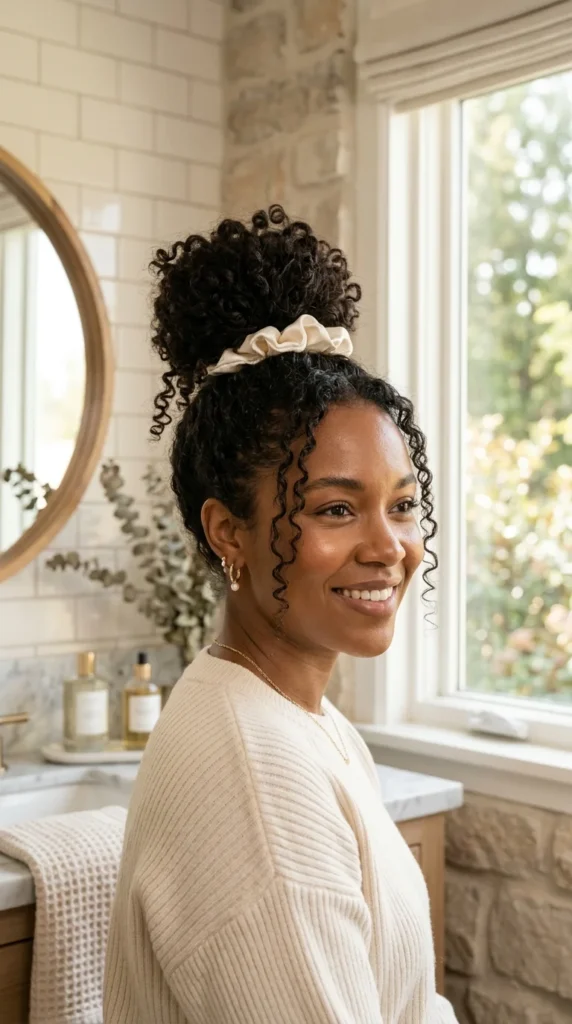
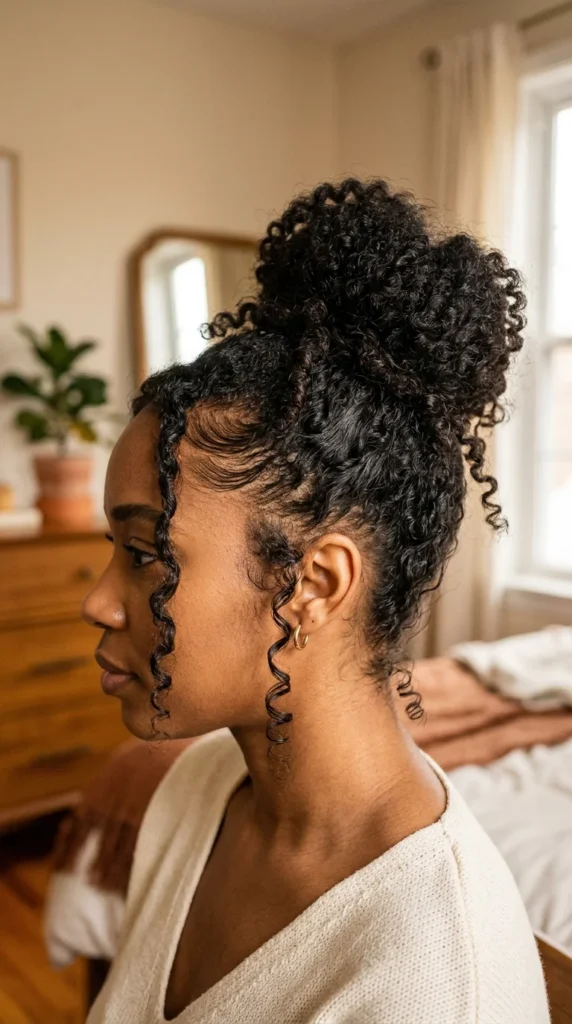
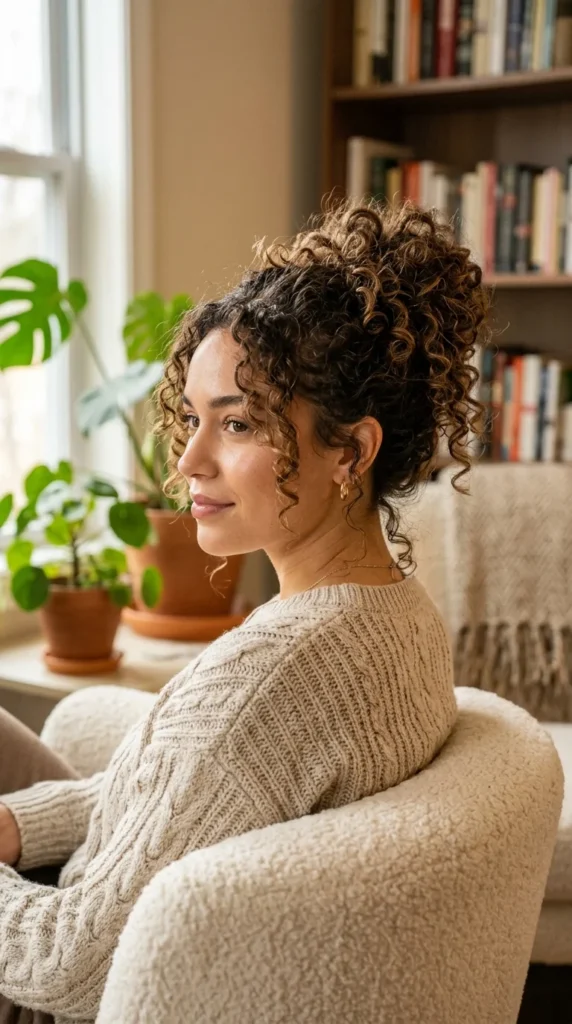
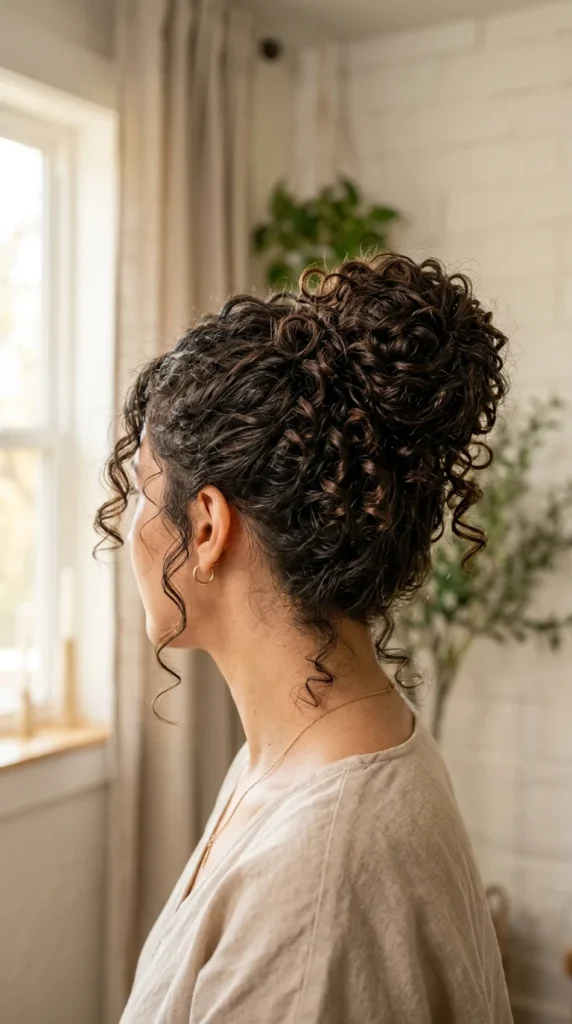
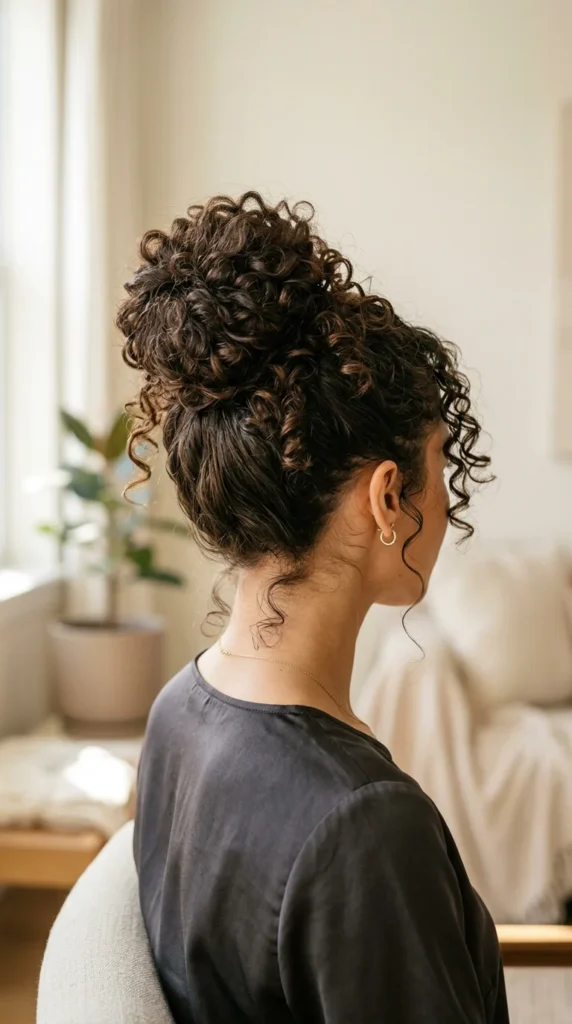
4. The Artfully Messy Curly Topknot
Flip your hair forward and gather it at the crown into a high ponytail. Secure gently and twist the length loosely before wrapping it into a topknot. Pin lightly around the base, leaving the bun slightly wide instead of tight and compact.
Pull at the crown with your fingertips to create height and fullness. Allow a few curls to fall toward the forehead for softness. Add a light layer of gel before tying if the air feels humid to help the bun keep its shape longer.
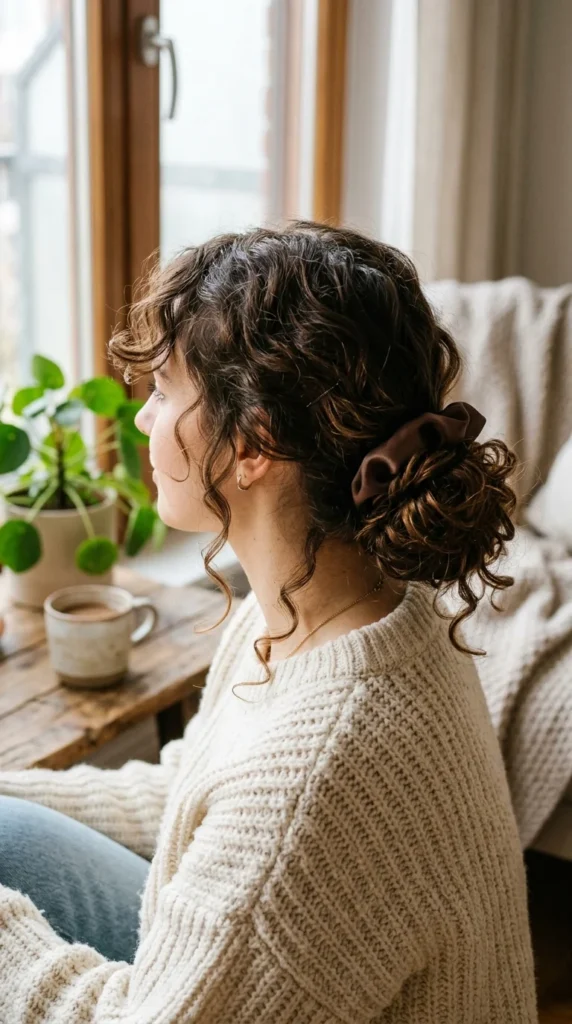
5. The Scrunchie-Wrapped Curly Bun
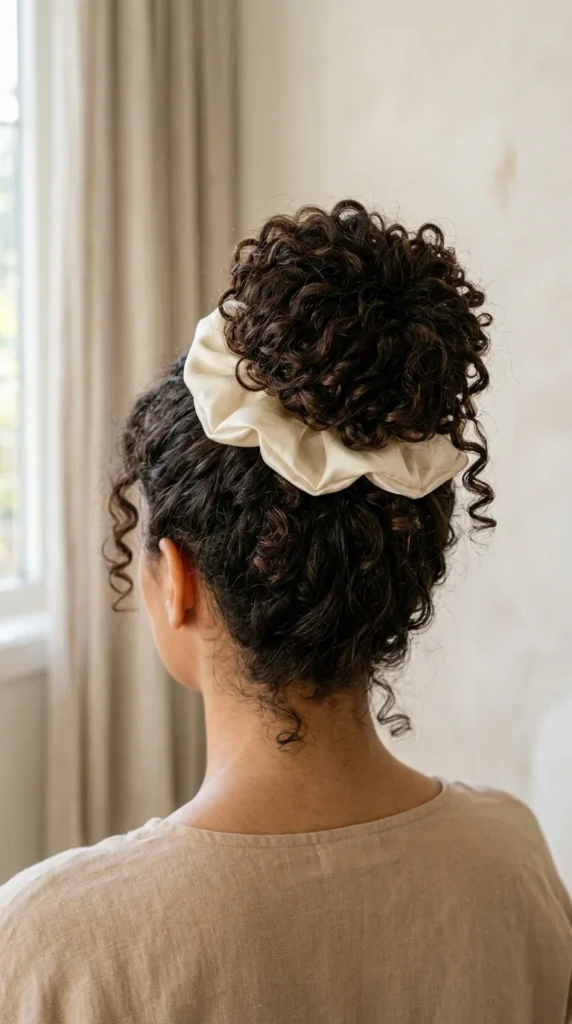
Create a mid or high ponytail and wrap it into a loose bun. Instead of hiding the tie, slide a satin scrunchie over the bun itself. This covers pins, adds style, and reduces tension on the curls while keeping the structure stable.
Gently tug at the edges of the bun to widen its shape and pull out a couple of curls in the front. The scrunchie holds everything in place without requiring many pins, which makes this option ideal for thick or heavy curly hair.
6. The Coily Protective Messy Bun
Start with damp or lightly refreshed coils and apply a leave-in conditioner for moisture and slip. Gather hair into a mid-height ponytail using a soft tie without pulling too tight. Wrap the coils loosely into a bun and pin only where the shape feels heavy or uneven.
Use a small edge brush with a touch of gel to shape baby hairs without slicking the full hairline. This keeps the bun relaxed while the edges look neat. Sleep with a silk scarf at night to keep the bun stretched and ready for the next day.
7. The Fine-Hair Volume Curly Bun
Spray dry shampoo generously at the roots and massage it in for instant grip. Add a light texture spray through the mid-lengths before gathering a ponytail. Wrap the ponytail loosely into a bun and secure with a few small pins.
Gently pull the bun outward with your fingers to create width and fullness. Avoid heavy creams that can flatten fine curls. This method creates volume and body without weighing the hair down or making the bun look compact.
8. The Thick-Hair Long-Hold Curly Bun
Use a coiled hair tie for extra grip when creating your ponytail. Twist the length into a bun and place bobby pins at four points around the base to distribute weight evenly. Keep the bun slightly loose instead of tight to maintain the messy shape.
Mist hairspray in light layers, allowing each layer to set for a few seconds. If the crown feels pulled, loosen it gently with your fingertips. This helps the bun last for hours without feeling heavy or strained.
9. The Face-Framing Tendril Curly Bun
Create any messy bun base you like, either high or low. Once secured, pull out two thicker strands near the temples. Apply a small amount of curl cream to these strands to define their shape and reduce frizz.
These tendrils soften the overall style and bring attention to your face. They also distract from any puffiness around the hairline. This tiny detail makes the bun look styled while still appearing undone.
10. The Edge-Styled Messy Curly Bun
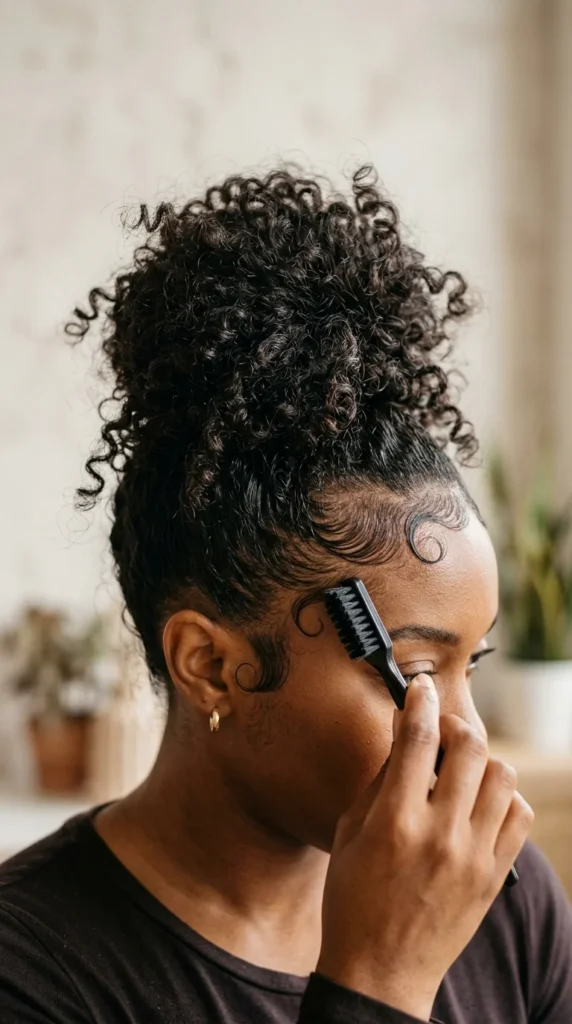
After tying your bun, focus only on the edges instead of the whole head. Use a small edge brush and a tiny amount of gel to shape baby hairs into soft curves along the hairline. Avoid pulling the rest of the hair back too tightly.
This technique keeps the bun messy and textured while the front looks neat and intentional. It works especially well for curly and coily textures where baby hairs add character to the overall style.
11. The Humidity-Ready Curly Bun

Start with a light layer of leave-in conditioner to keep curls hydrated and less reactive to moisture in the air. Apply a thin coat of gel over the surface of your curls before gathering them into a ponytail. Wrap the ponytail loosely into a bun and secure with a few pins.
Mist hairspray in a wide circle around your head instead of spraying directly onto the bun. This sets the style without making it stiff. Avoid touching your hair once finished because hands quickly invite frizz in humid weather.
12. The Second-Day Texture Curly Bun
Second-day curls have more grip and texture, which makes them ideal for messy buns. Spray dry shampoo at the roots and massage it in to lift the hair. Gather your curls into a ponytail using only your fingers, keeping the natural pattern intact.
Wrap the ponytail loosely and pin where needed. Do not brush or smooth too much. Allow the uneven texture to show because that is what gives the bun its lived-in appearance and effortless feel.
13. The Looped Pony Curly Bun
Tie your curls into a ponytail as usual. On the last loop of the hair tie, stop halfway so the ponytail forms a loop instead of pulling all the way through. This creates an instant bun shape with curls spilling out naturally.
Pin the sides of the loop to hold it in place and gently pull a few strands loose around the face. This is one of the quickest ways to create a messy curly bun when you are short on time but still want a styled look.
14. The Accessory-Pinned Curly Bun
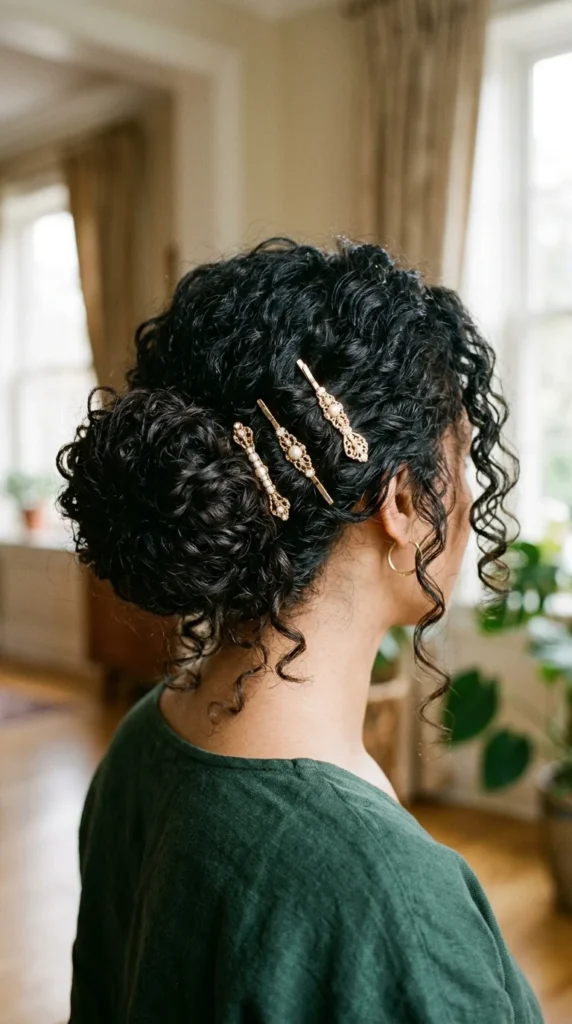
Create a loose curly bun at any height you prefer. Instead of hiding your pins, use decorative or metallic bobby pins and place them diagonally along the side of the bun. They hold the structure while also acting as a subtle style detail.
This method requires fewer pins because each one serves both function and design. It works well when you want the bun to look styled without spending extra time shaping it perfectly.
15. The Work-Friendly Messy Curly Bun
Choose a low or mid-height bun for a cleaner silhouette on camera. Smooth only the front hairline lightly with your fingers while keeping the bun airy and textured. Pull out two thin tendrils near the temples for softness.
Finish with a light mist of hairspray to keep everything in place without stiffness. This bun reads neat in meetings while still keeping the relaxed, undone texture that makes messy curly buns so appealing.
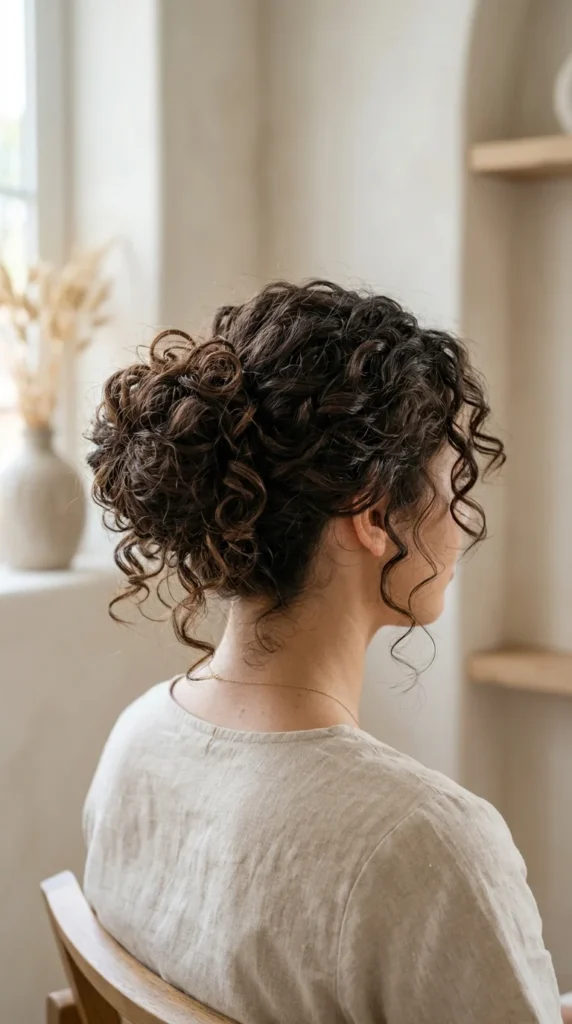
16. The Curl-Cream Defined Messy Bun
Work a small amount of curl cream through damp curls and let them air dry fully before styling. This step helps ringlets hold their shape even after being gathered. Once dry, pull hair into a loose ponytail and wrap it into a soft bun without over-twisting.
Gently pull a few defined curls out near the front so the ringlet pattern stays visible. Skip extra gel here because the goal is definition, not stiffness. The bun looks textured, touchable, and naturally undone.
17. The Mousse-Lift Messy Curly Bun
Scrunch a golf-ball amount of mousse into your roots and mid-lengths while hair is slightly damp. Let it dry or diffuse lightly to build lift before styling. Gather your curls into a high ponytail and wrap them into a loose bun.
Use your fingertips to gently tug at the crown and widen the bun shape. Mousse adds body without weight, making this style great when your roots feel flat but your curls still have shape.
18. The Gel-Set Long Wear Curly Bun
Apply a thin layer of gel only along the hairline and top surface of your curls. Gather hair into a ponytail and wrap it loosely into a bun. This keeps the base neat while the body of the bun stays messy and full.
Mist hairspray after shaping the bun and allow it to set for a few seconds before moving. This method helps the bun hold its shape for long days without looking overly styled or tight.
19. The Textured Twist Messy Curly Bun
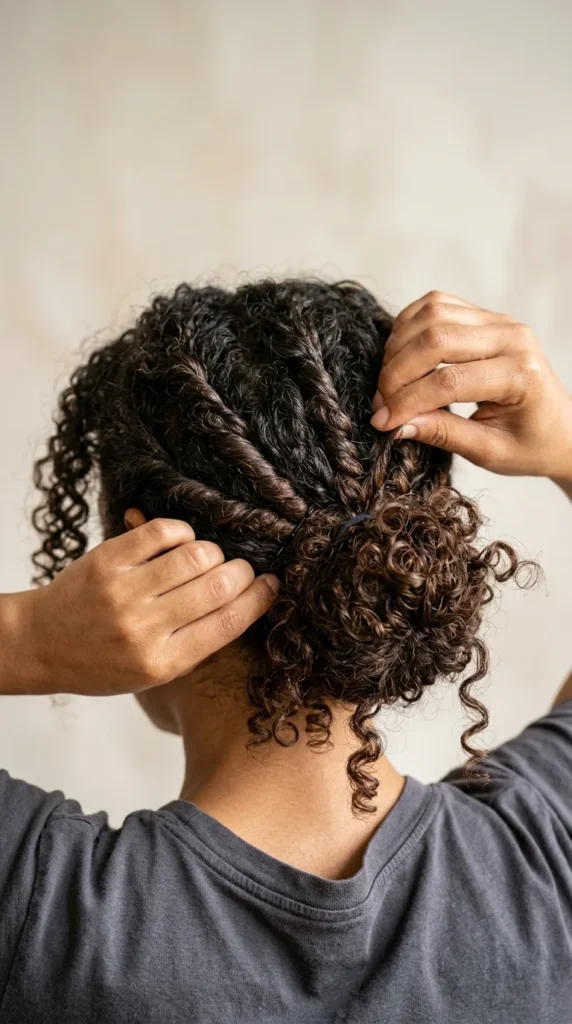
Before gathering your ponytail, twist two small sections from each side of your head toward the back. Combine these twists with the rest of your curls into a ponytail and wrap into a bun. The twists add detail and help the bun stay secure.
Pull gently at the twists to keep them soft and relaxed. This small step makes the bun look more styled without adding extra effort or tools.
20. The Pin-Only Messy Curly Bun

Gather your curls with your hands and twist them lightly into a bun shape without using a hair tie. Hold the shape in place and insert bobby pins around the base until the bun feels balanced and secure.
This method reduces tension on the hair and helps prevent breakage from tight ties. Adjust the pins until the bun feels stable while still looking airy and undone.
21. The Texturizing Spray Grip Messy Bun
Mist texturizing spray through dry curls, focusing on the roots and mid-lengths for grip. Flip your head forward and gather a high ponytail using your fingers only. Wrap the ponytail loosely into a bun and secure with a few pins where the shape feels heavy.
Gently pull the bun outward to widen it and create fullness. Texturizing spray helps slippery curls hold their position without teasing. This method works well when hair feels too soft or freshly washed to stay in place.
22. The Satin Scarf Wrapped Messy Bun
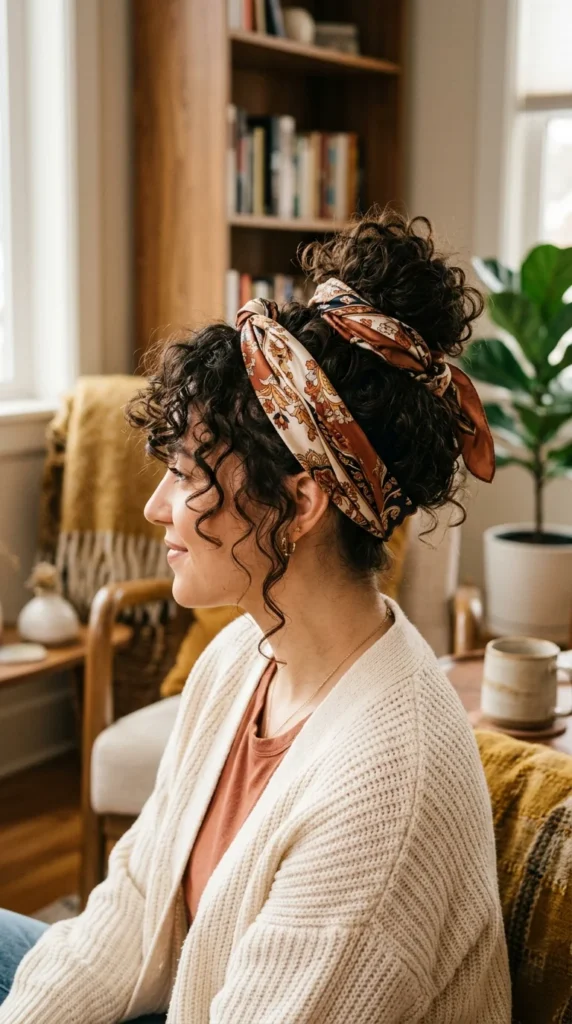
Create a low or mid messy bun and secure it lightly with pins. Fold a satin scarf into a thin strip and wrap it around the base of the bun, tying it gently underneath. Allow a few curls to fall out around the face for softness.
The scarf reduces friction, protects curls, and adds a stylish detail without extra effort. This option is great for casual days or when you want your bun to last longer without constant touch-ups.
23. The Loose Crown Pull Messy Curly Bun
After creating any messy bun base, slide your fingers under the hair at the crown and lift gently. This loosens the top and creates height without pulling the bun apart. Pull out two soft strands near the temples to balance the shape.
Finish with a light mist of hairspray around the head to set the lifted crown. This final adjustment gives the bun that lived-in, artfully messy look that feels relaxed but still styled.
Conclusion
Messy curly buns work best when you let texture lead and keep your steps simple. Try one idea on second-day curls today, use light products for grip, and play with accessories for variety. Your curls do most of the work.

Leave a Reply