
Festival season calls for hair that stays put, looks bold in photos, and feels comfortable for long hours outdoors. Viking-inspired braids check every box. These styles mix tight scalp braids, woven sections, ponytails, crowns, and accessories that hold through wind, heat, and dancing. You can do most of them at home with a mirror, clips, and a little patience. No salon visit required.
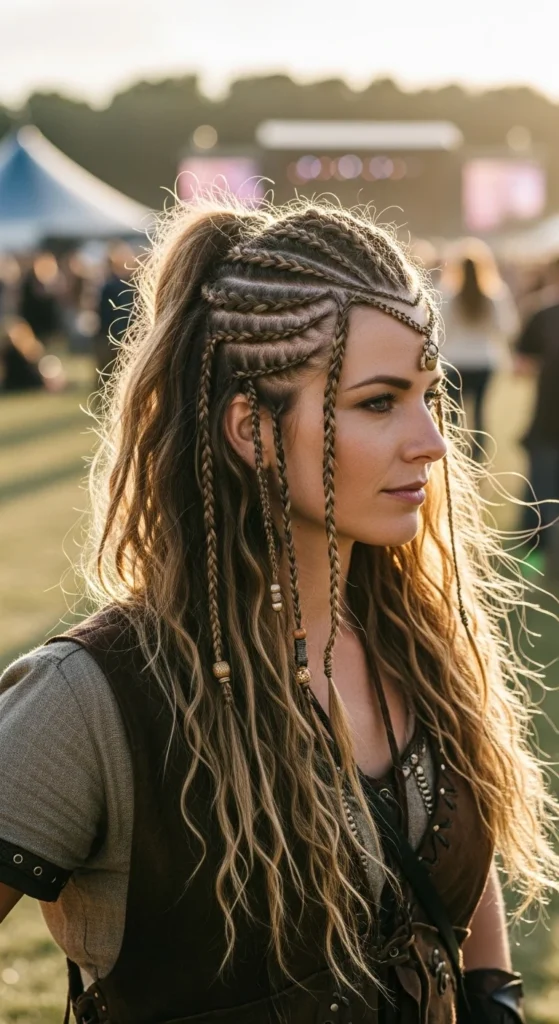
1. Lagertha-Style Shield-Maiden Braid

Start with a clean middle section from hairline to crown. Clip the sides away. Create a tight inverted Dutch braid running straight back. Keep tension firm so the braid sits raised and bold. After reaching the crown, secure it and gently pull the loops wider for volume. This creates the strong shield-maiden shape seen in festival looks.
Now braid two thin sections near the temples. Add small rings or beads for detail. Leave the rest of the hair wavy and textured. Use texture spray before braiding and hairspray along the scalp after finishing. This style holds for hours, looks striking in photos, and works best on medium to long hair.
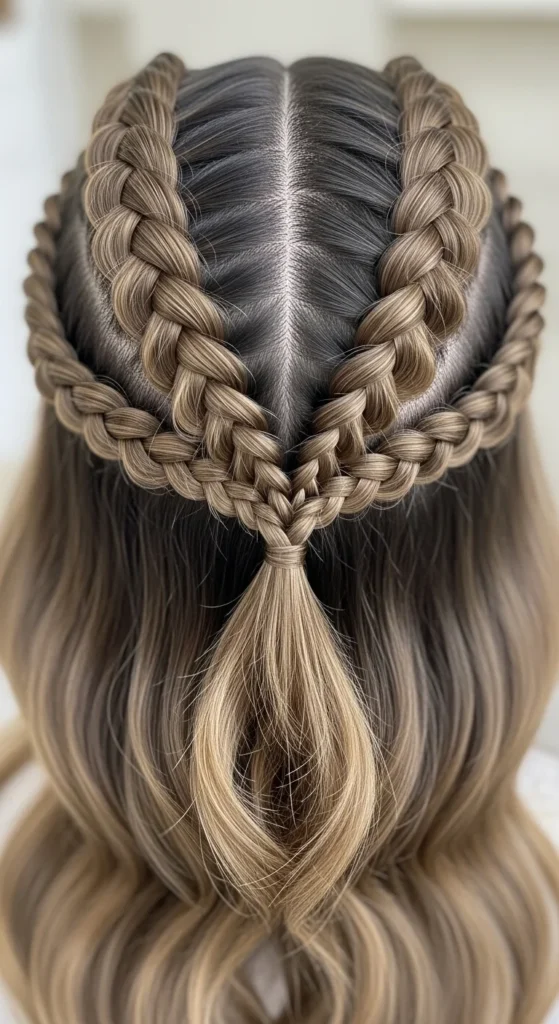
2. Viking Crown Festival Braids
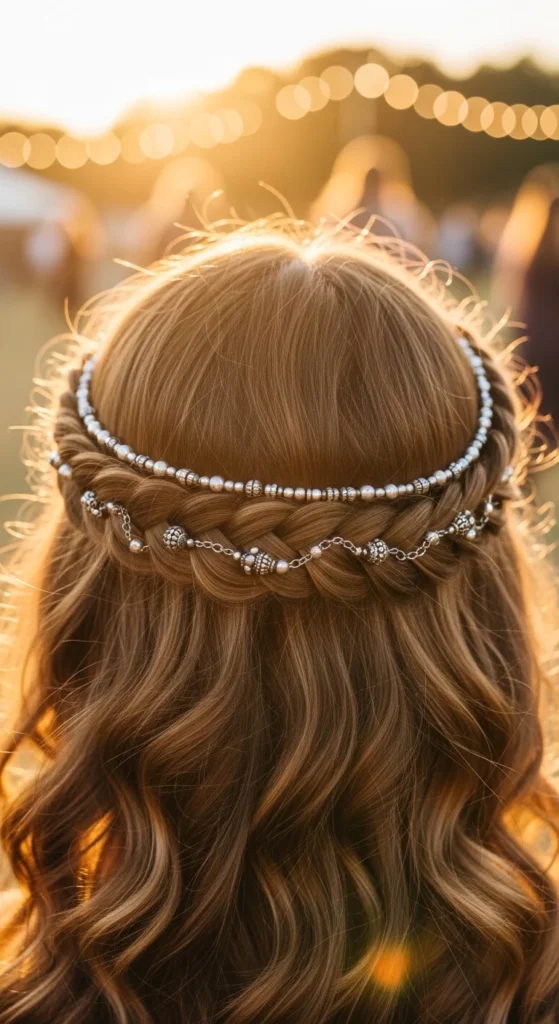
Part the hair down the middle and create two Dutch braids starting behind each ear. Braid upward toward the top of the head instead of downward. Keep the braids thick and close to the scalp. Once both braids reach the top, cross them over and pin into a crown shape.
Gently pull the braid edges to make them wider and softer. Leave the remaining hair curly or wavy underneath. Slide beads or a thin leather cord into the braid for added festival character. This style keeps hair away from the face and feels comfortable in heat and wind.
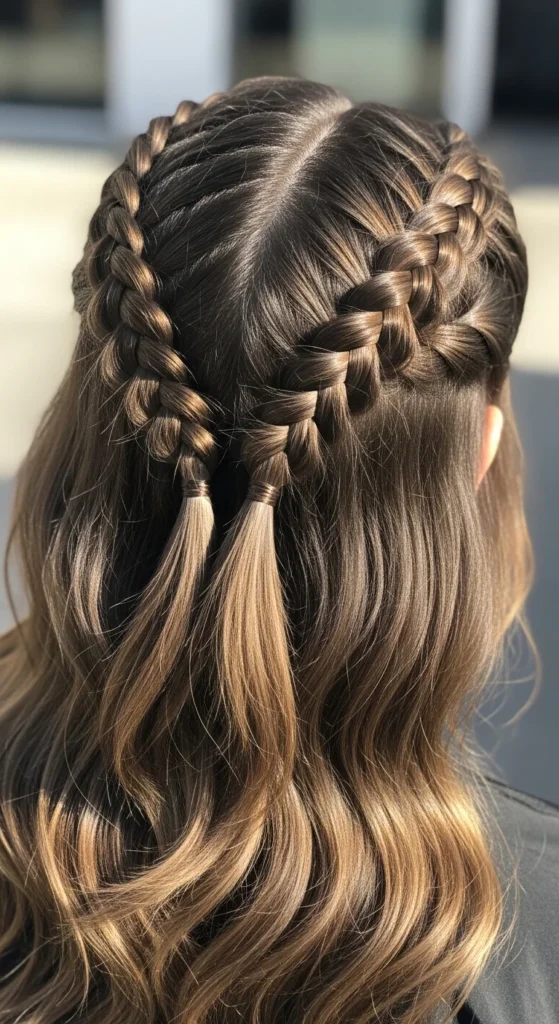
3. Half-Up Viking Braids with Ponytail
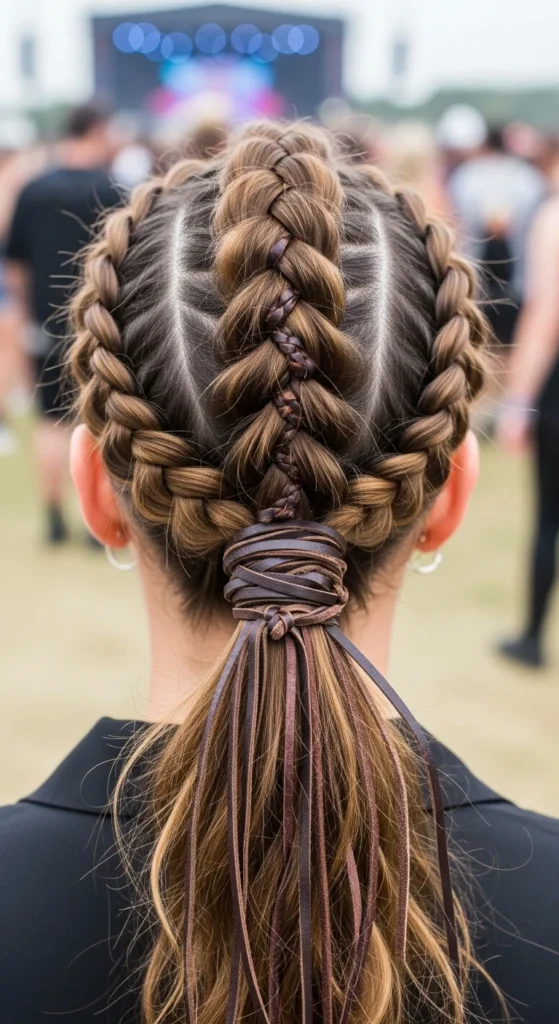
Create two side Dutch braids starting from the front hairline. Braid them backward while keeping the sections tight and neat. Join both braids at the crown and tie them into a high ponytail. Wrap a small strand of hair around the elastic to hide it.
Lightly curl the ponytail to add movement and texture. Apply wax along the braid edges to control flyaways. Add rings or thread around the base for extra detail. This style keeps hair off the neck and stays secure during long festival hours.
4. Viking Mohawk Braids
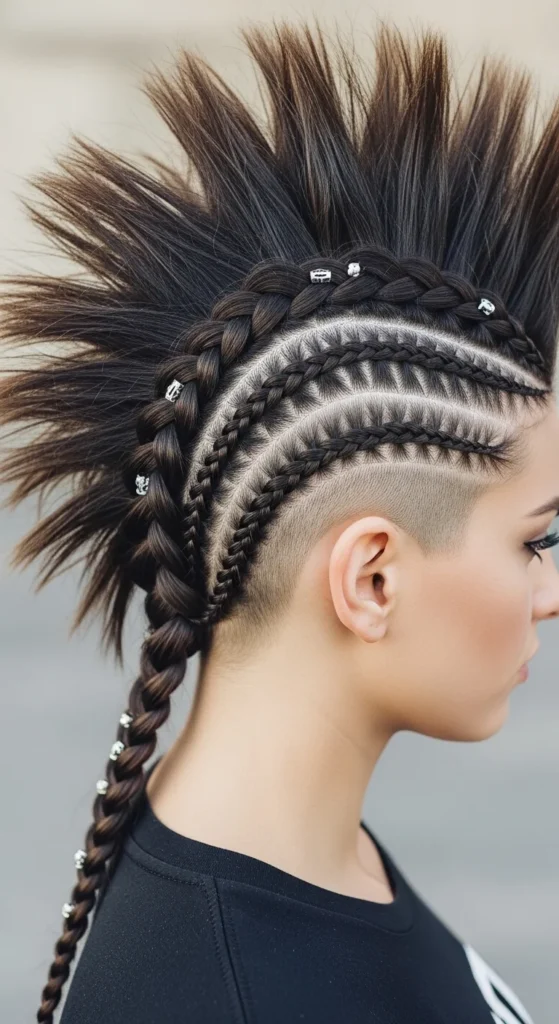
Section a strip of hair from the forehead to the back of the head. Clip the side hair flat and out of the way. Create a Dutch braid along this center strip, keeping it tight and raised. Once finished, gently pull the braid outward to add height and thickness.
Smooth the side hair with wax or gel for a clean contrast. Add beads along the braid for a bold finish. This style works especially well with undercuts or shaved sides and gives a strong warrior appearance for festivals.
5. Rope Braids for Quick Viking Look
Take small sections from both temples and split each into two strands. Twist the strands around each other tightly while moving backward. Secure both twisted sections together at the back of the head with a small elastic or pin.
Repeat a second set of rope twists slightly below the first for a layered effect. Leave the remaining hair wavy for texture and volume. Apply texture spray before twisting so the ropes hold firmly and last through the day.
6. Viking Bubble Ponytail
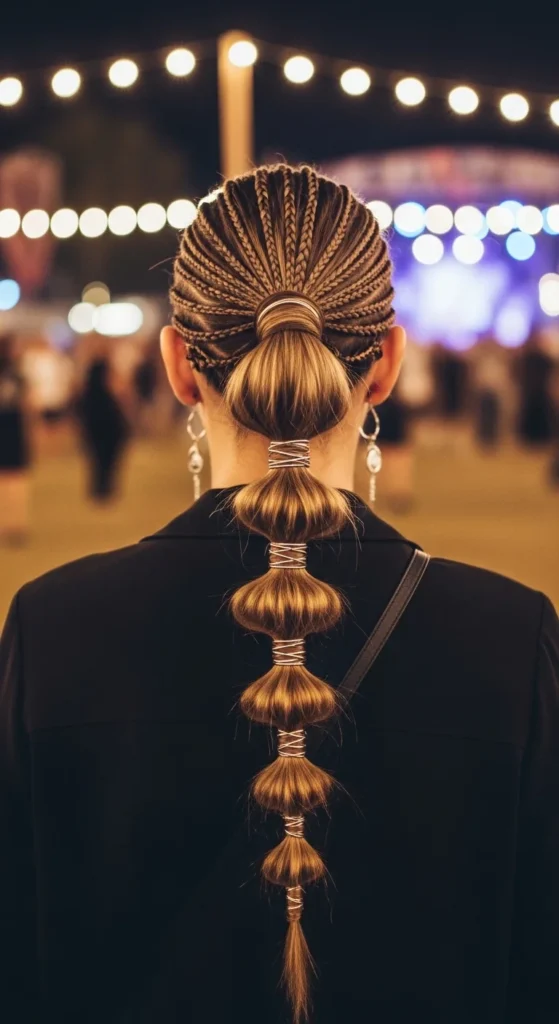
Start by creating two thin Dutch braids from the temples, moving backward. Keep them tight and close to the scalp so they stay neat for hours. Gather all your hair, including the braids, into a mid or high ponytail. Secure it firmly with a strong elastic that can handle movement and heat.
Add additional elastics every few inches down the ponytail. Gently tug each section to form round “bubbles.” Slide small rings or cords between sections for detail. This style looks dramatic, feels light on the scalp, and works beautifully with long hair or extensions.
7. Fishtail Viking Braid with Texture
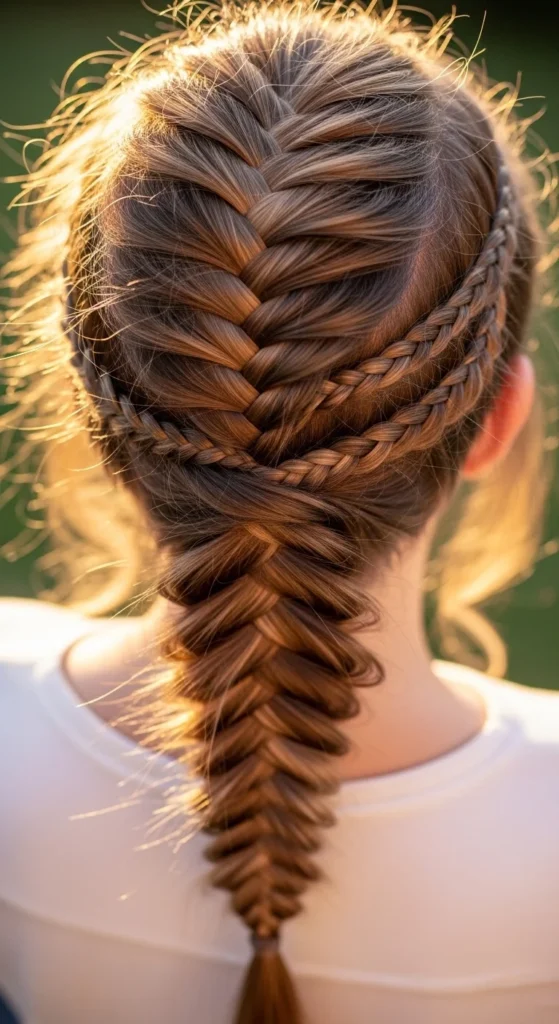
Create two small accent braids near the front hairline and secure them temporarily. Gather the rest of the hair at the back and split it into two large sections. Begin the fishtail braid by crossing small outer strands over to the opposite side, keeping the pattern tight and neat.
Once finished, gently pull the fishtail outward to make it wider and more textured. Release the accent braids and blend them into the main braid. Use mousse before starting for a better grip. This woven look appears complex but is friendly for beginners.
8. Viking Braids for Short Hair
Short hair can still carry a strong Viking vibe. Focus on creating multiple tight micro Dutch braids along one side of the head. Keep the braids small and close to the scalp so they stay firm throughout the day.
Leave the top section textured and slightly messy for contrast. Tuck and pin the braid ends underneath the hair. Apply wax to control flyaways and add definition. This look is simple, practical, and perfect for short festival styles.
9. Curly Hair Protective Viking Braids
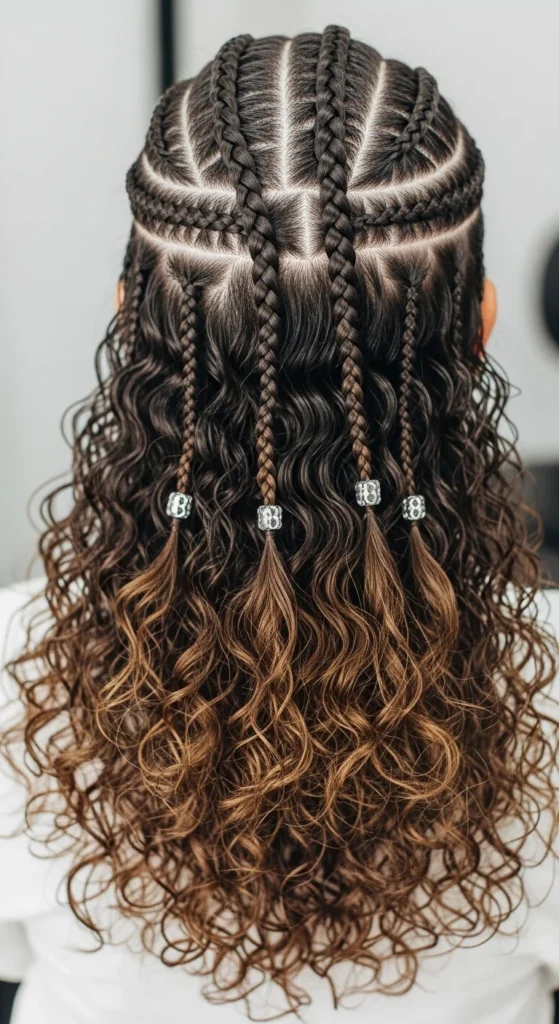
Curly hair holds braids extremely well, making it ideal for protective Viking styles. Braid both sides tightly using the Dutch or cornrow technique. Keep the braids close to the scalp so they stay secure and comfortable.
Leave the curls free and voluminous at the back. Add beads at the braid ends for a bold finish. Apply leave-in conditioner before braiding to keep curls soft and defined. This style protects the hair while creating a powerful festival look.
10. Two-Toned Viking Temple Braids
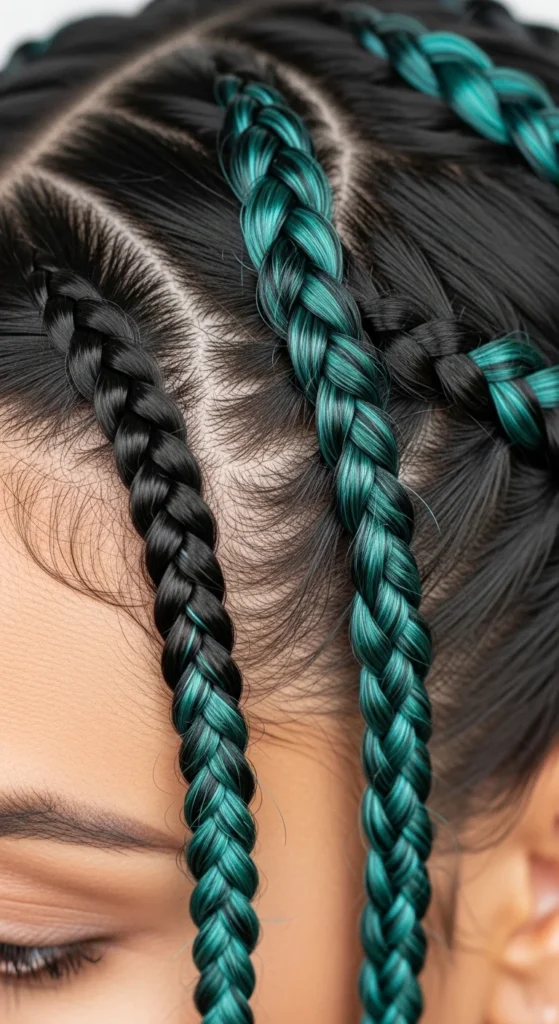
Add colored extensions to two small temple sections near the face. Teal, burgundy, or blue strands work well for festival settings. Braid these sections tightly so the color stays visible and defined from the front.
Let the rest of the hair remain natural and textured. This adds a bold color effect without dyeing your hair. Secure the braid ends with small, clear elastics and use hairspray for hold. It is a quick way to add personality to a simple Viking style.
11. Viking Half-Bun with Braids
Start by creating two Dutch braids from the front hairline on each side. Braid them backward while keeping the sections tight and even. Bring both braids to the crown and tie them together into a small ponytail. Twist this ponytail into a half-bun and pin it securely.
Wrap a thin leather cord or thread around the bun for a rugged finish. Leave the remaining hair loose with soft waves for contrast. This style keeps hair away from the face and feels light on the scalp. It works well for long festival hours and looks strong from every angle.
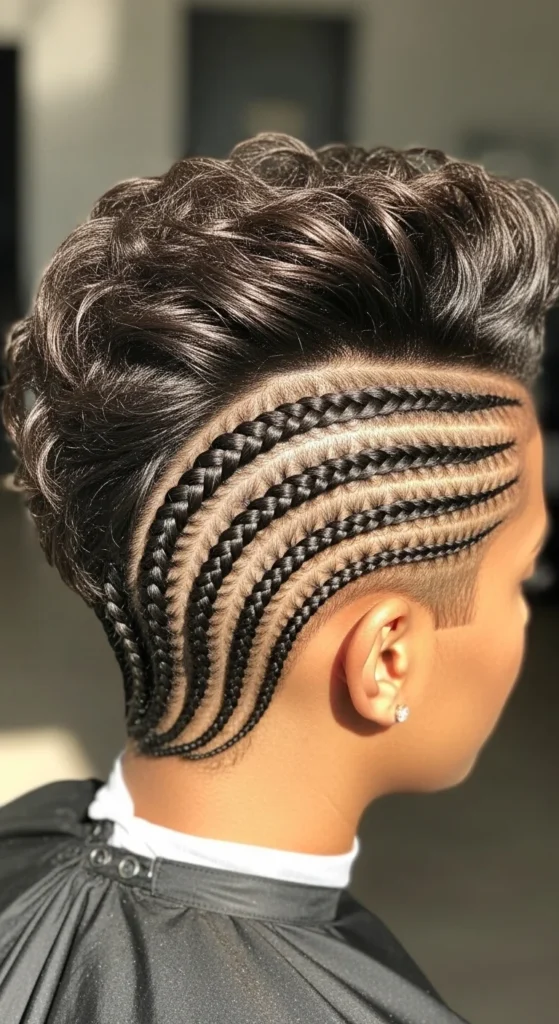
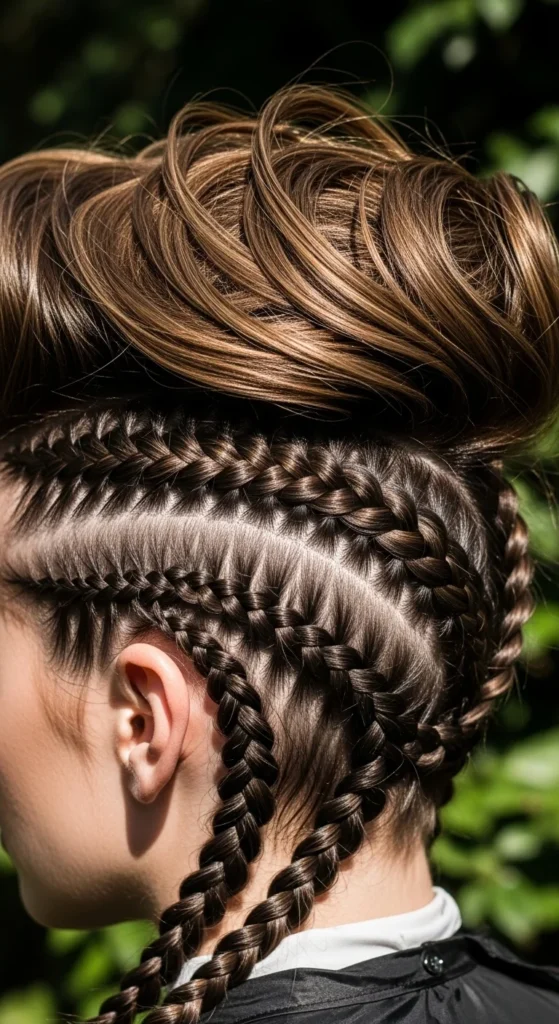
12. Undercut Viking Braid Top

If you have shaved sides or an undercut, focus attention on the top section. Take a central strip of hair from the forehead to the back. Create a tight Dutch braid along this strip, keeping the braid raised and bold.
Gently pull the braid wider after finishing to add thickness. Slide small rings into the braid loops for detail. Smooth the shaved sides with wax for a clean contrast. This style looks bold, sharp, and perfect for outdoor festival settings.
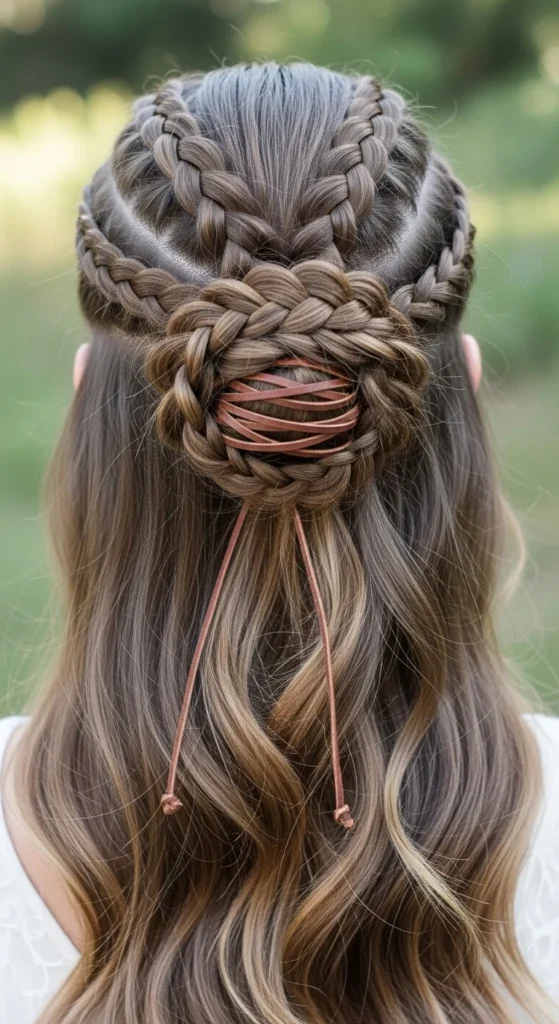
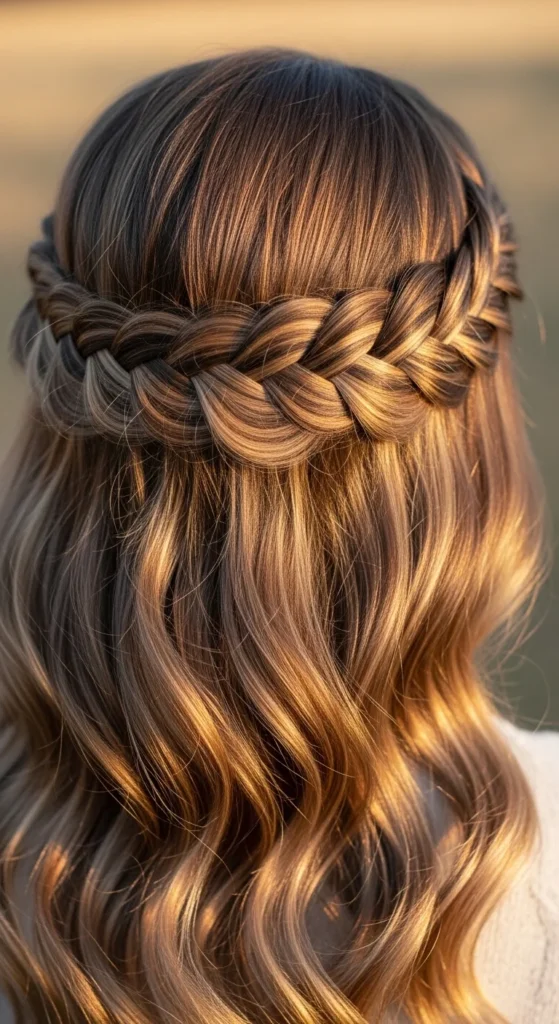
13. Viking Crown with Loose Waves
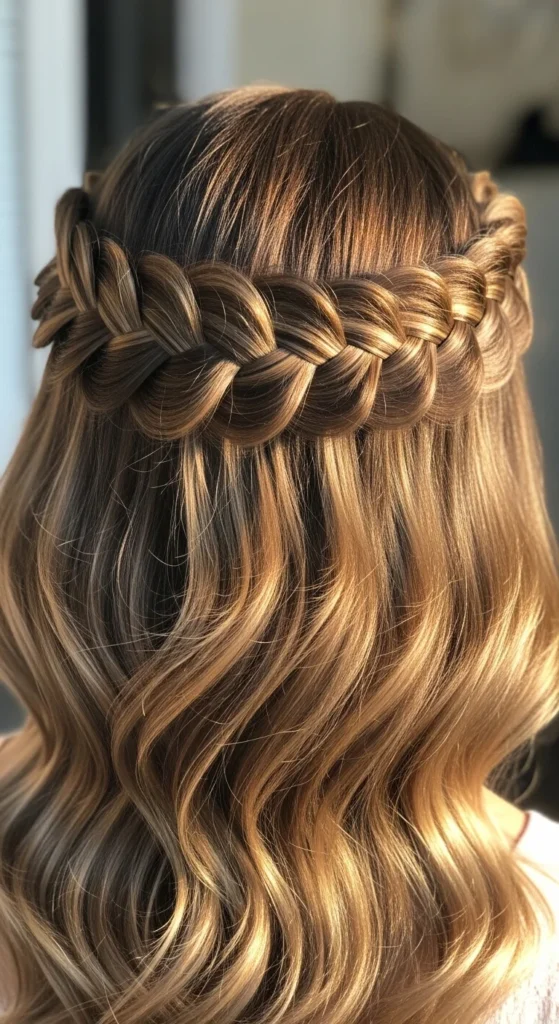
Create a deep side part and begin a Dutch braid near one temple. Braid across the front of the head like a headband, moving toward the opposite side. Keep the braid close to the scalp and secure it behind the ear with pins.
Leave the rest of the hair in loose waves for a soft finish. Gently widen the braid for volume. This style mixes warrior detail with relaxed texture and stays comfortable through heat and movement during festivals.
14. Multicultural Viking Cornrow Blend
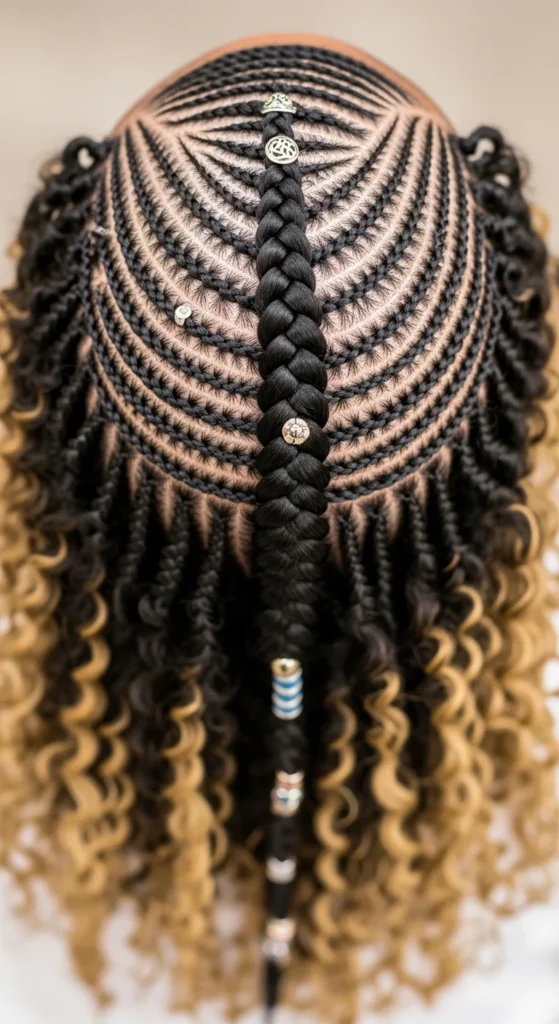
Create several neat cornrows along the scalp, starting from the front and moving backward. Keep the rows even and tight so they stay in place for many hours. Gather the ends of the cornrows into one large braid at the back.
Add beads along the braid for a bold finish. Leave the remaining hair textured and natural. This style lasts all day with minimal touch-ups and combines strong scalp detail with dramatic length for a true festival-ready Viking look.
15. Statement Viking Low Pony
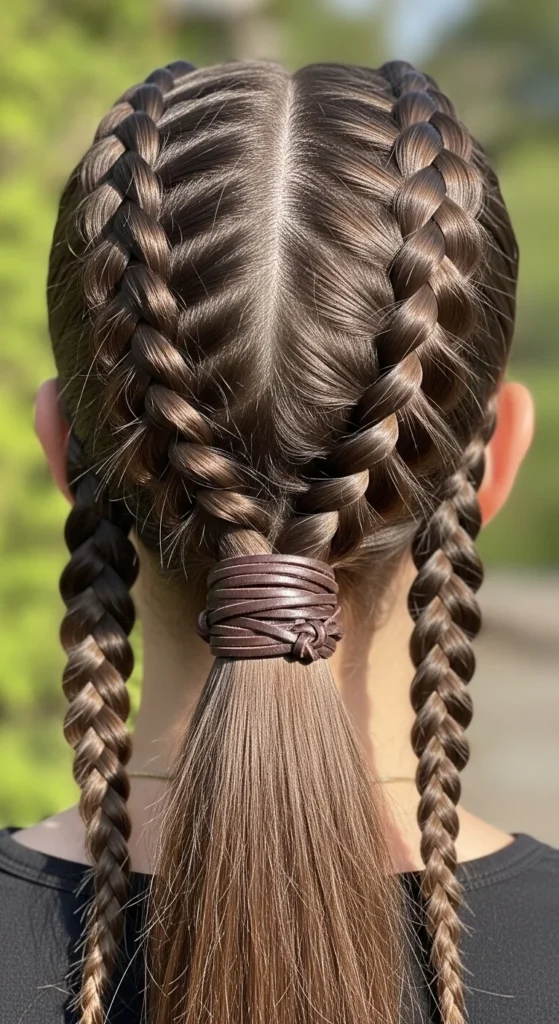
Create two French braids starting from the front hairline and guide them toward the back of the head. Keep the braids tight so they stay neat during long hours outdoors. Gather all the hair into a low ponytail at the nape of the neck and secure it with a strong elastic.
Wrap a small section of hair or leather cord around the base to hide the elastic. Lightly curl the ponytail for movement and texture. This style feels secure, looks bold from every angle, and stays comfortable even in heat and wind.
16. Viking Braids with Hair Jewelry
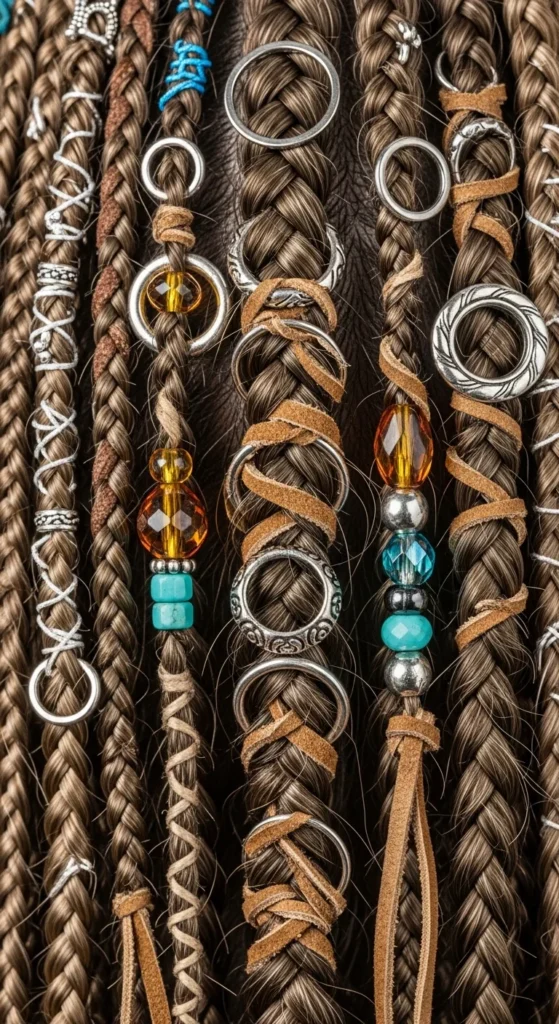
Choose any simple braid pattern you like, such as Dutch or fishtail. Once finished, slide small rings, beads, or thin cords into random braid loops. Spread them out so the detail looks balanced and not crowded.
Use pliers to gently close rings if needed. This turns an ordinary braid into a strong Viking festival look within minutes. It works on all hair lengths and adds personality without extra styling effort.
17. Layered Hair Viking Weave
Layered cuts create a natural texture that looks great in woven braids. Take advantage of the uneven lengths by creating loose Dutch braids that show off the layers instead of hiding them. Keep the braids slightly messy for a rugged effect.
Pull the braid loops wider to highlight the layers. Apply texture spray before starting so the shorter strands stay in place. This style looks complex but takes very little time to create.
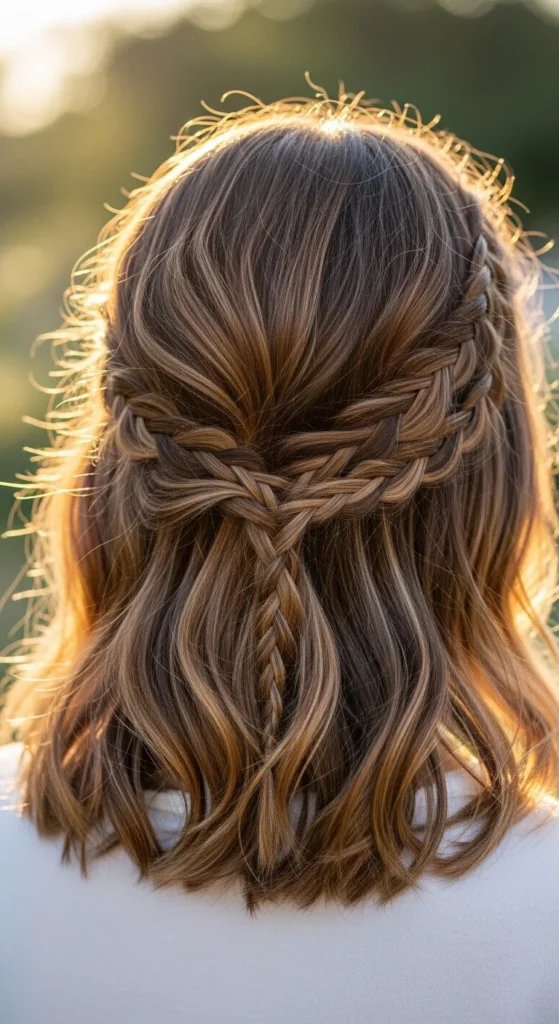
18. Viking Waterfall Braid Look
Start a waterfall braid from one side of the head and guide it across to the other side. Drop strands as you go to create the cascading effect. Keep the braid close to the scalp for a firm hold.
Curl or wave the remaining hair underneath. This adds softness while keeping the warrior-inspired braid detail on top. Use hairspray lightly to keep everything in place without stiffness.
19. Extensions for Very Long Viking Braids
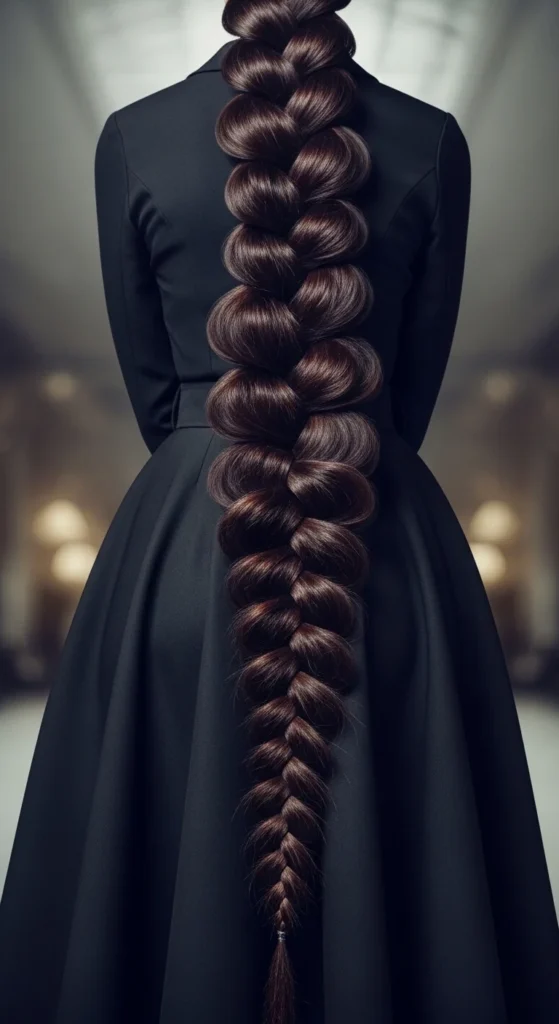
Clip-in extensions add instant length and thickness to any Viking braid. Attach them securely before starting your braid so they blend naturally with your hair. Comb through to remove any visible separation.
Create a large Dutch or fishtail braid using all the hair together. Pull the braid wider for a bold, dramatic look. This is perfect for festivals where long, eye-catching styles stand out in photos.
20. Quick 10-Minute Easy Viking Braids
Take two small sections from each side of the head and create simple three-strand braids. Pull them backward and pin them together at the back of the head. Keep the braids tight so they last longer.
Apply texture spray before braiding and a light mist of hairspray after. Add a couple of rings if you want extra detail. This style takes less than ten minutes and still looks festival ready.
21. Viking Braid-Survival Style for Outdoor Festivals

Start with two tight Dutch braids along the sides of your head. Keep the sections clean and small so they grip better. Join them into a secure mid ponytail at the back. Use a thick elastic that won’t loosen after hours of movement. Tight braiding at the scalp helps reduce frizz and slipping.
Apply mousse before braiding for structure. Finish with strong-hold hairspray focused on the roots, not the ends. If your hair is fine, lightly tease the ponytail for fullness. This style is built for wind, heat, and long festival days. It looks bold but stays practical from morning until night.
22. Modern Viking Warrior Half-Shaved Illusion
You don’t need a real undercut to get that sharp warrior effect. Create three to four tight cornrow-style braids on one side of your head. Keep them straight and close together to form a shaved illusion. Leave the rest of your hair loose and textured for contrast.
Add a few metal rings to the braids for extra detail. Use wax along the braided side to keep it sleek and controlled. This look feels bold, modern, and festival ready without making permanent changes. It works on medium to long hair and photographs beautifully from every angle.
Conclusion
Viking festival hairstyles are bold, practical, and surprisingly doable at home. From tight shield-maiden braids to modern warrior illusions, each style can be customized for your hair length and texture. Practice once before your event, gather a few simple tools, and add small accessories for personality.
Pick your favorite look, braid it with confidence, and let your festival style make a powerful statement.

Leave a Reply