
Finding the perfect hairstyle as a mother of the bride can feel overwhelming. You want something elegant, durable, and flattering. Low buns have become a go-to choice—they sit at the nape, elongate the neck, and balance formal gowns beautifully. With subtle twists, braids, or accessories, these styles can suit all hair types, ages, and wedding vibes.
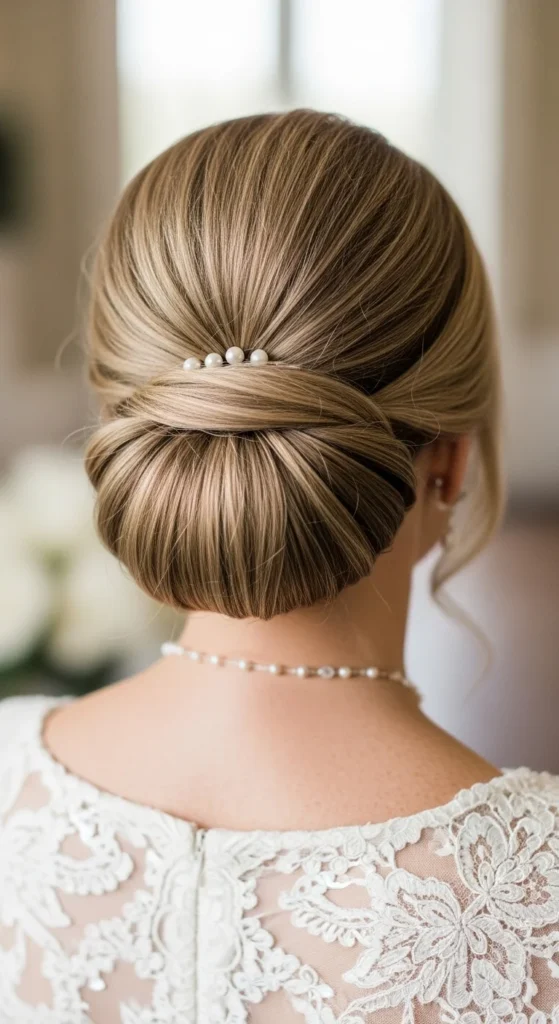
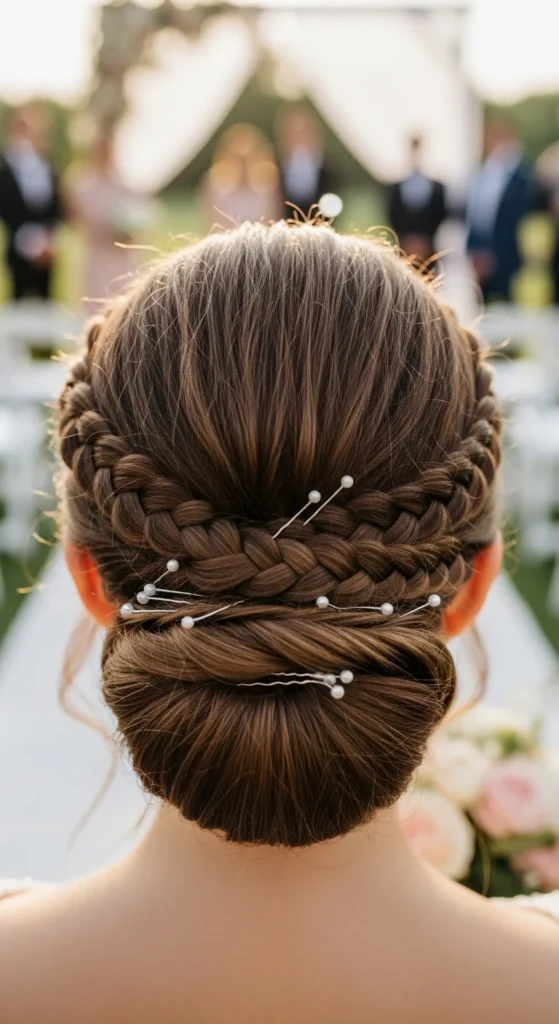
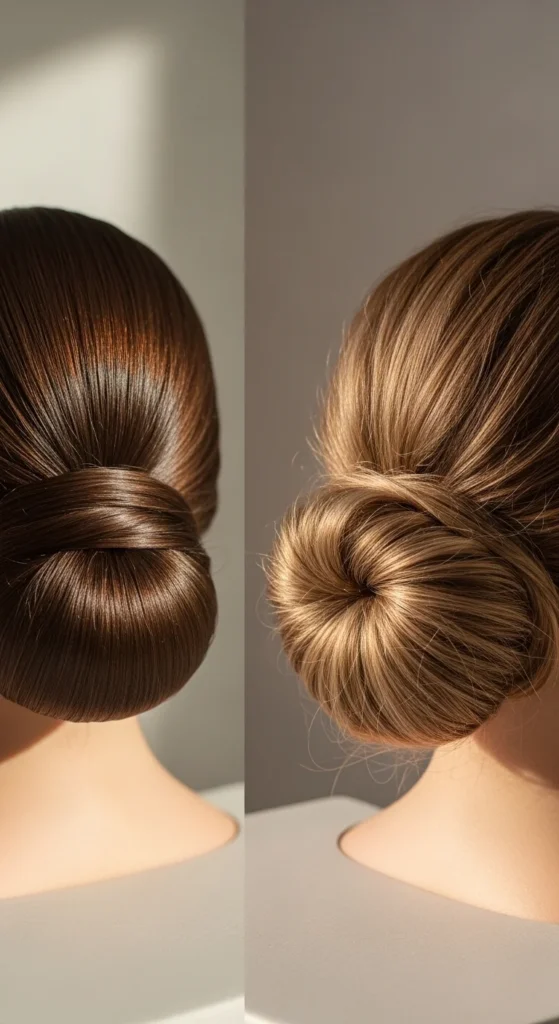
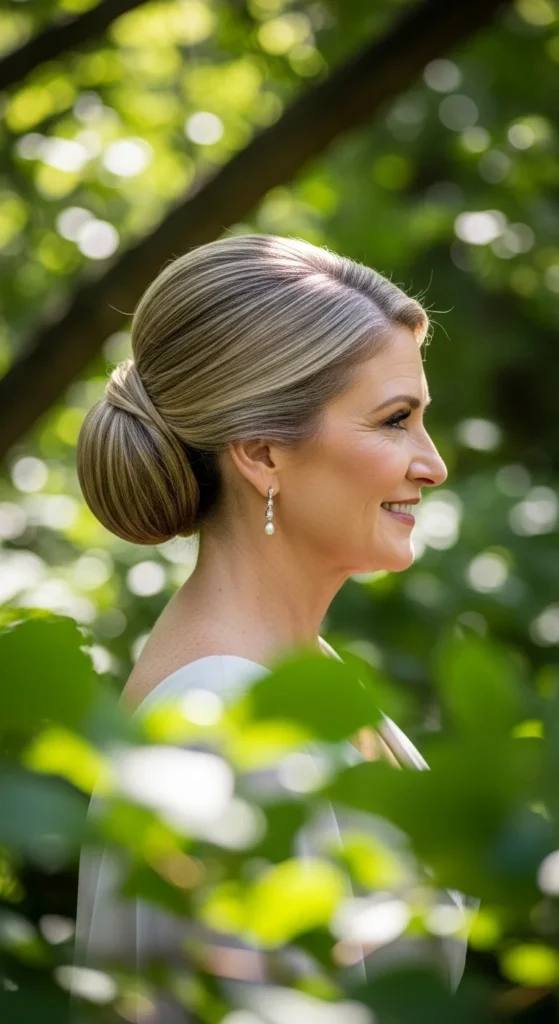
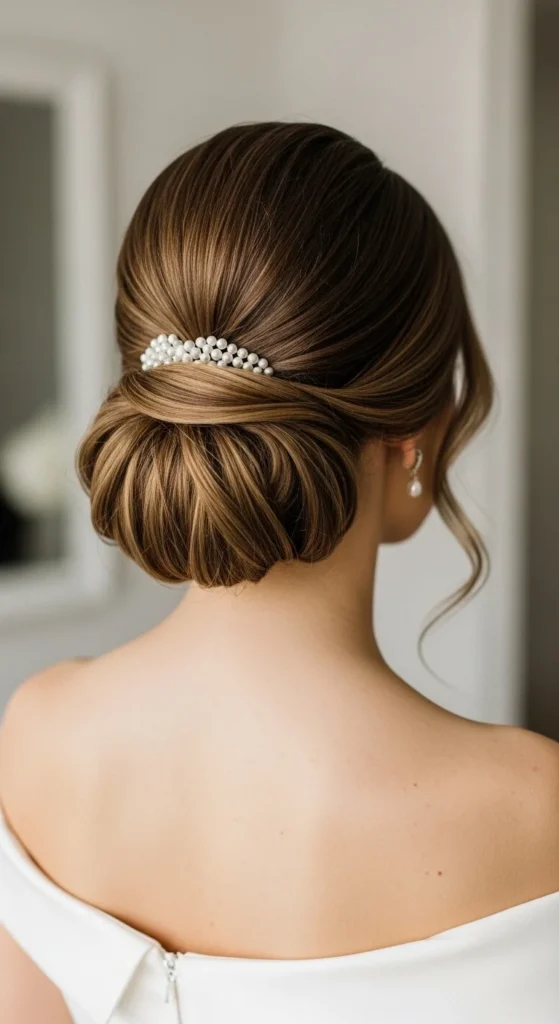
1. Nape-Perfect Twisted Low Bun
This classic nape bun is perfect for mothers of the bride who want a timeless look. Start by brushing your hair smooth and parting it slightly to the side or in the middle. Take small sections, twist them gently, and pin them at the nape. Teasing the crown lightly can add subtle lift, even for fine hair, giving the illusion of fullness. A touch of hairspray ensures it stays neat throughout the day.
For a polished finish, consider adding a small pearl pin or a delicate floral clip. This technique works on all hair types and can be achieved at home with minimal tools. DIY tip: a bun sock or hair donut can help create a perfectly rounded shape in seconds. The nape-focused placement elongates the neck and complements formal dresses beautifully.
2. Textured Twists for Soft Volume
Textured low buns are ideal for adding romantic dimension without looking bulky. Begin by curling hair loosely or enhancing natural waves, then divide hair into sections and twist each individually before pinning them into a bun. This creates layers and depth, giving the style a soft, elegant look. Light teasing at the crown can enhance volume further and make the bun appear more substantial.
To finish, leave a few tendrils around the face to soften features. Pairing the bun with a floral comb or small hair accessory can elevate the style without extra effort. DIY tip: Use texturizing spray to help twists grip better, ensuring the style holds for hours. This approach works beautifully for medium-thick hair and adds a natural, effortless elegance to your overall look.
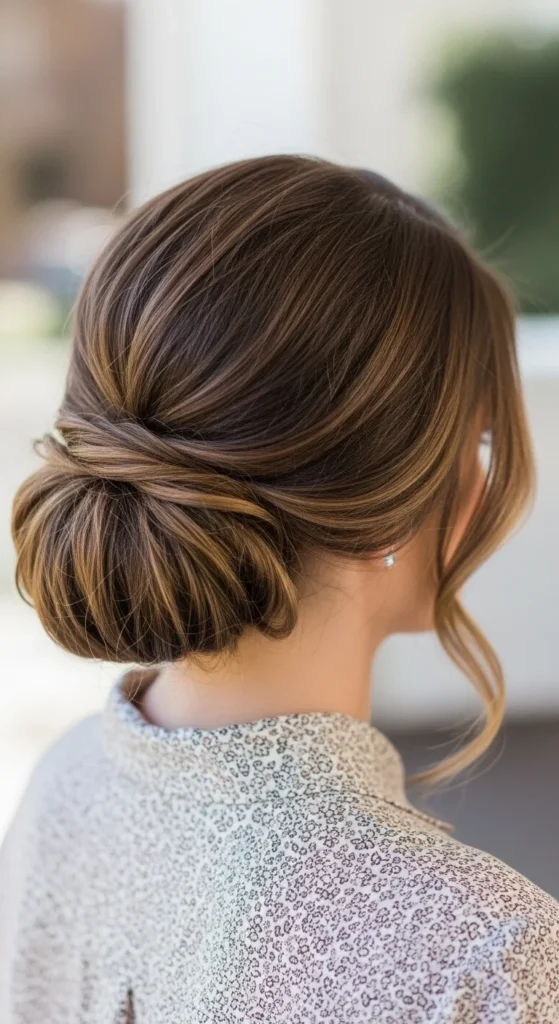
3. Sleek & Simple: 5-Minute MOB Bun
Busy moms will love the sleek low bun for its simplicity and polish. Start by brushing hair completely smooth, then tie it into a low ponytail at the nape. Twist the ponytail around its base to form a bun and secure with bobby pins. Finish with a light mist of hairspray for shine and hold. This style works especially well for straight or fine hair that might otherwise look limp.
For an elegant touch, add a single pearl pin or a minimalist comb. DIY tip: a small elastic and a few pins are all you need to achieve a professional look at home. This low-maintenance bun is perfect for weddings with tight schedules, giving a clean, sophisticated finish in under five minutes without compromising style.
4. Braided Bun Hybrid
Braided hybrid buns combine structure, security, and style in one elegant package. Start by braiding a small section of hair along the crown or side of the head. Gather the remaining hair at the nape, twist it into a low bun, and pin the braid on top or wrap it around it. This creates texture, interest, and extra hold, which is ideal for outdoor or windy weddings.
DIY tip: Even a single crown braid works beautifully if you don’t want a full braid. Finish with light hairspray to keep everything in place and consider adding a pearl pin for a subtle sparkle. The combination of braid and bun keeps hair secure during dancing or photos while giving a romantic, polished look suitable for all formal occasions.
5. Framing Tricks for Every Face Shape
Face-framing tendrils soften features and add a youthful touch to a classic low bun. After forming your bun at the nape, pull out a few small sections around the face and curl them lightly. These tendrils can be subtle waves or curls, depending on your hair type and preference, helping to balance round, oval, or mature faces.
DIY tip: You can use a small curling iron or rollers to shape these strands. Keeping the curls loose ensures the style feels natural and romantic rather than stiff. Adding a small pearl pin or delicate floral clip near the bun can complement the framing tendrils, making the hairstyle look elegant and thoughtfully finished without overcomplicating the process.
6. Bun Jewelry Essentials
Adding accessories is one of the easiest ways to transform a simple low bun into an elegant statement. Pearls, jeweled pins, and small floral clips instantly give your hairstyle a polished finish. Place them strategically around the bun to accentuate twists or curls, ensuring they’re secure enough to last all day. Even a few well-placed pieces can make the look feel luxurious without being overwhelming.
DIY tip: You don’t need expensive pieces—affordable pearl pins or small faux flowers from craft stores can look high-end when positioned carefully. Combine different sizes for depth or stick to a single accent for subtle elegance. This approach works for weddings, receptions, or any formal occasion, giving your bun an instant wow factor without adding extra styling time.
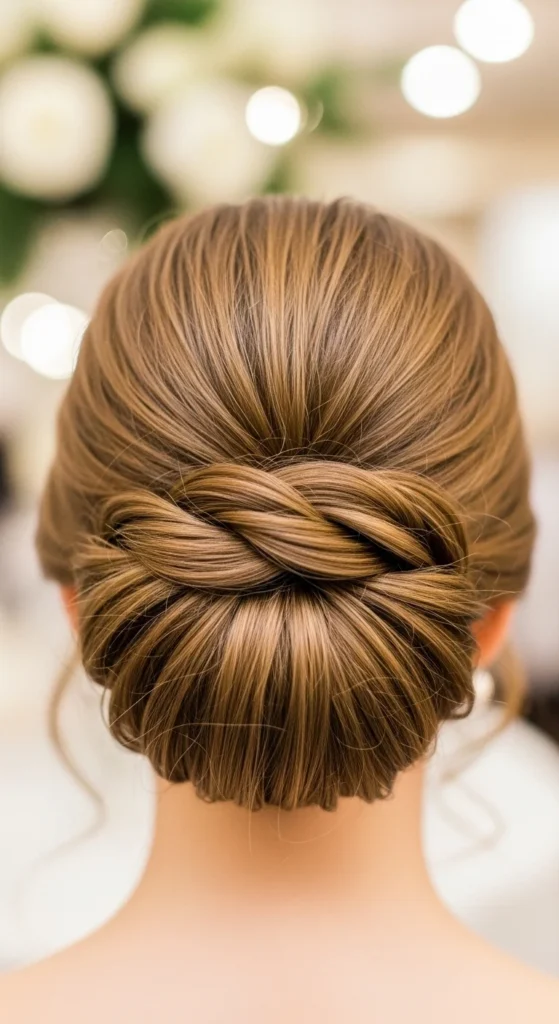
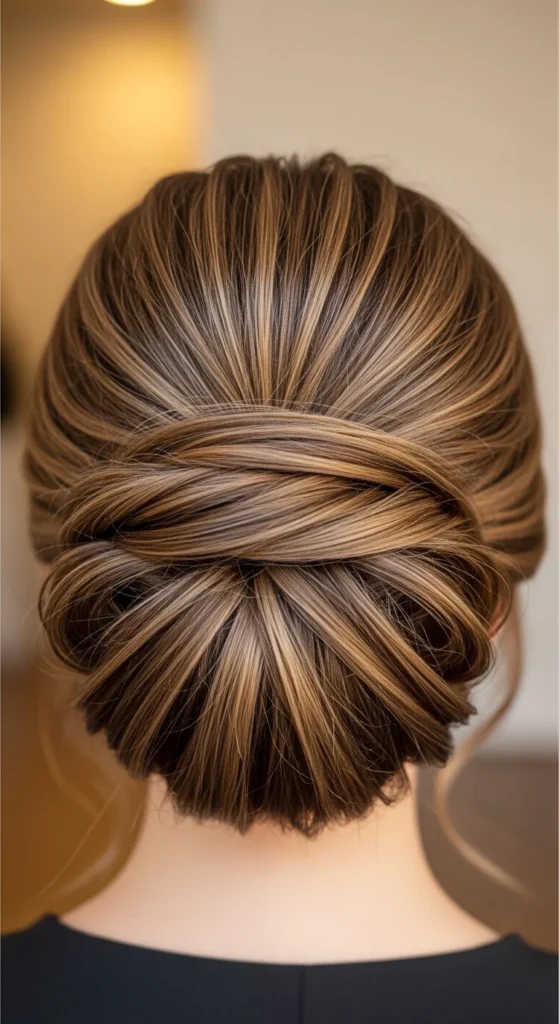
7. Twist Variations for Dimensional Layers
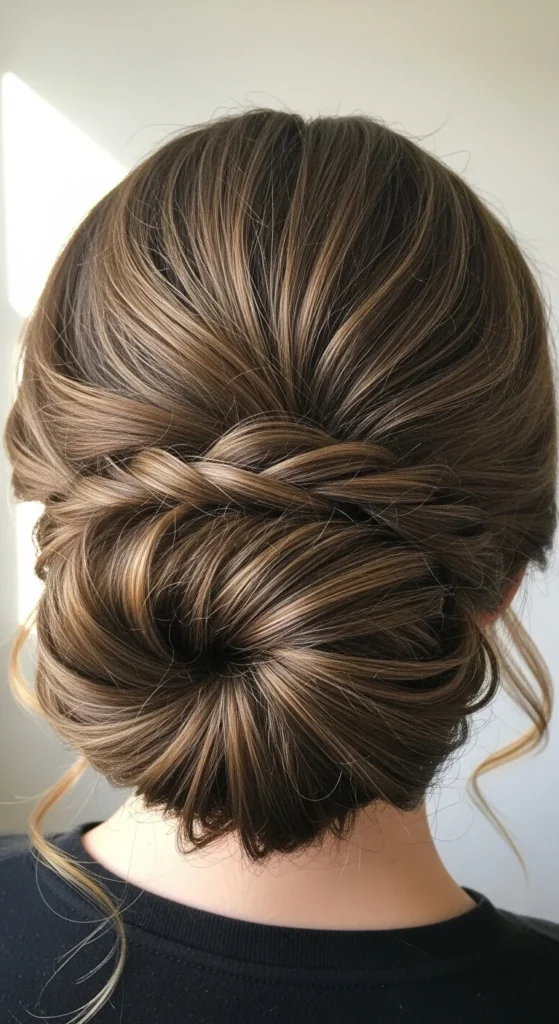
Twist variations are perfect for adding texture and volume to medium-thick hair. Divide the hair into sections, twist each piece gently, and pin them together at the nape. Layering twists builds dimension naturally, so the bun appears fuller and more intricate without bulk. This method also helps hair hold better throughout a long day.
DIY tip: Lightly mist each section with texturizing spray before twisting—it improves grip and prevents slipping. Once pinned, gently tug small sections to soften the shape and create movement. You can even add a small pearl or floral pin within a twist for extra charm. This technique keeps the hairstyle elegant yet approachable for at-home styling.
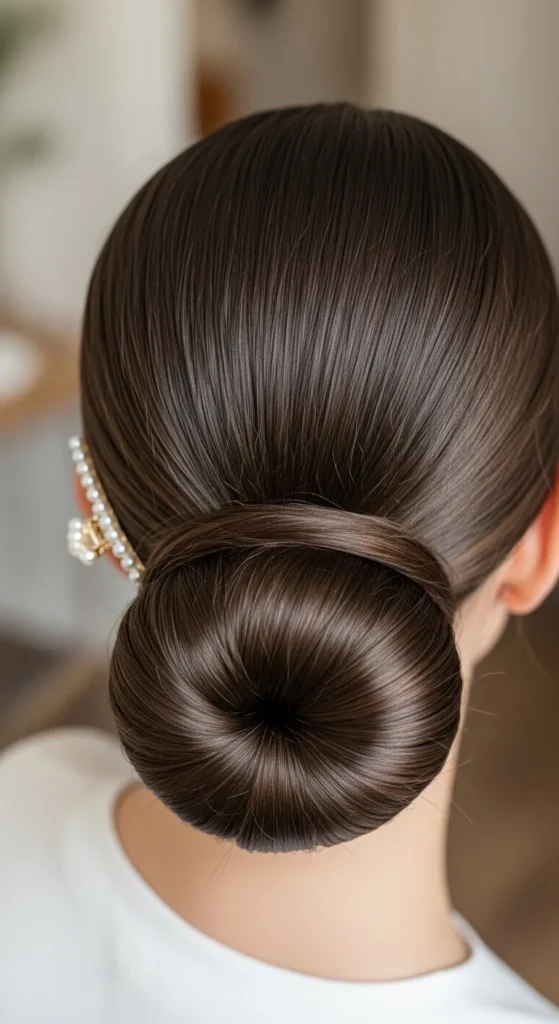
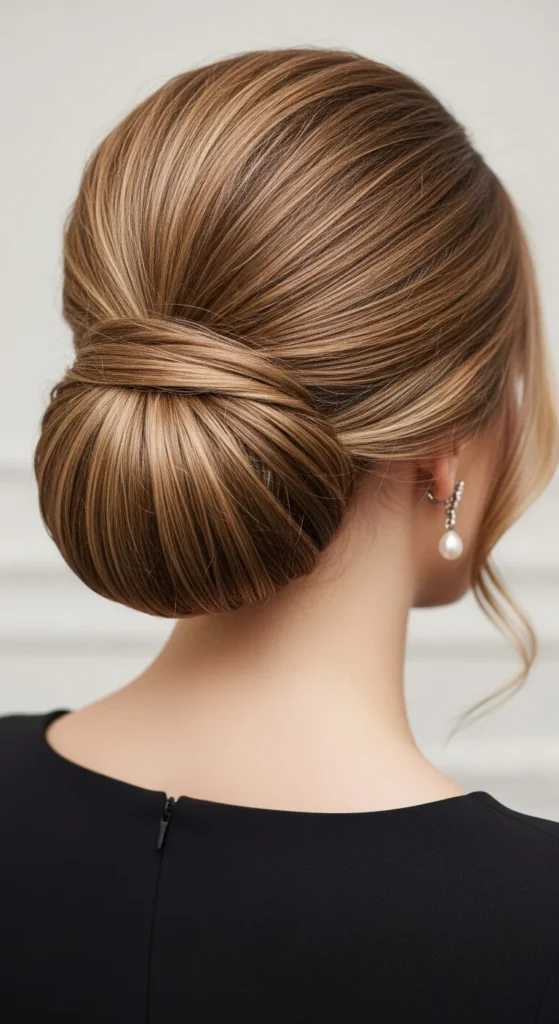
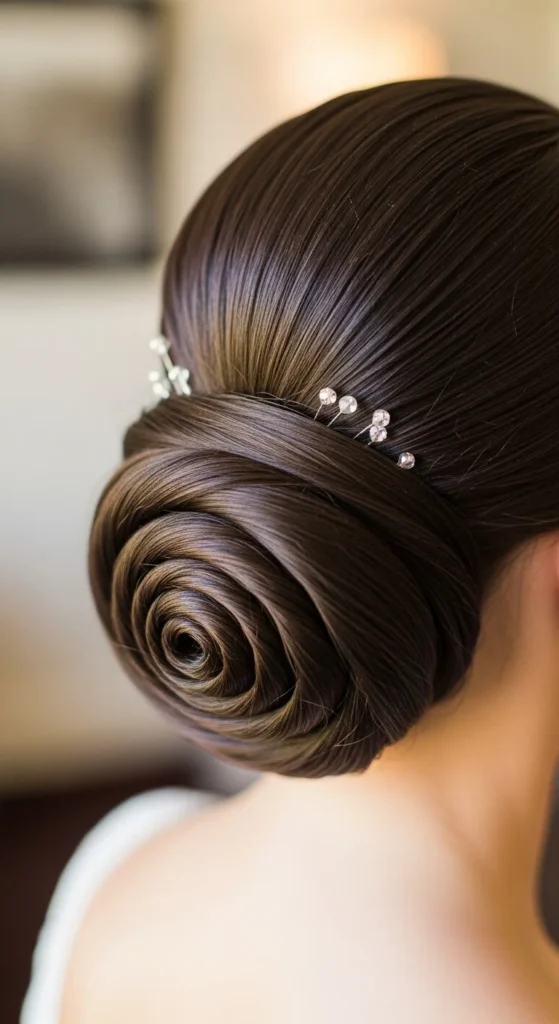
8. Chic Chignons: Timeless vs Modern
Chignons are classic low buns that never go out of style. A traditional chignon is sleek, neat, and smooth—perfect for formal settings. A modern chignon introduces texture, soft tendrils, and loose twists, creating a relaxed yet polished look. Both versions sit at the nape, elongating the neck and complementing any gown.
DIY tip: A hair donut or sock can make forming a uniform chignon quick and easy. Secure twists with bobby pins and add a single pearl or floral accessory for elegance. Choose a classic or modern variation depending on your dress style and comfort level. This technique is perfect for mothers wanting sophistication without fuss.
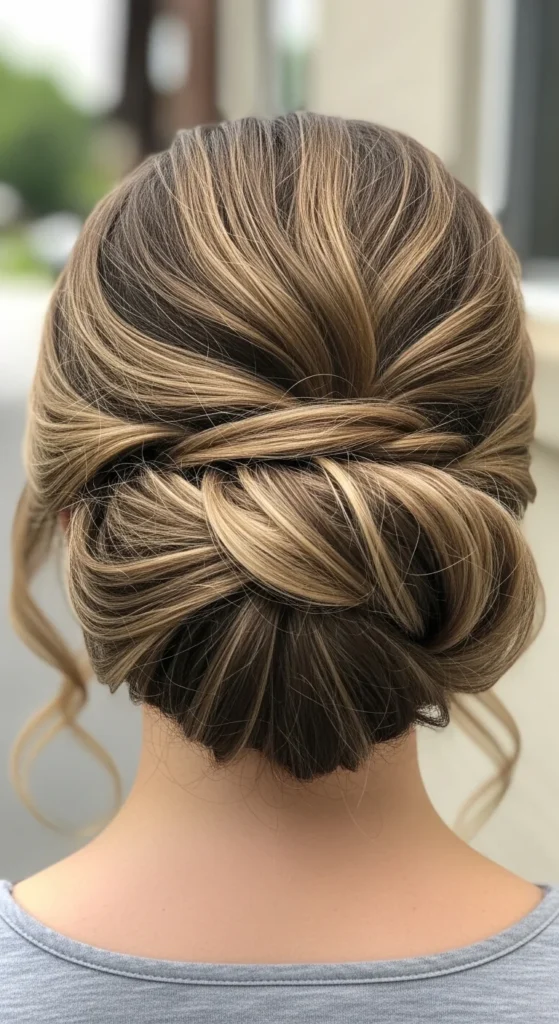
9. Hybrid Half-Up Low Bun

The hybrid half-up low bun balances structure and natural flow. Pull the top half of your hair into a small bun at the nape while leaving the bottom half loose. This keeps hair secure for dancing or photos but maintains softness and movement. It’s especially good for active receptions where you want comfort without sacrificing elegance.
DIY tip: Section the top half carefully, twist or braid for extra texture, and pin securely. Curl the loose strands underneath to complement the bun and create a cohesive look. Small pearl or floral pins can tie the style together. This versatile option works for straight, wavy, or curly hair.
10. Volume Boosters for Flat Roots
Fine or flat hair can make low buns appear limp, but volume boosters solve this problem. Lightly tease the crown before forming your bun, and add a volumizing spray or dry shampoo for lift. This creates a subtle puff at the top, making the hairstyle appear fuller and more dynamic.
DIY tip: Tease in small sections and gently smooth the surface to maintain a polished look. You can even place a small pearl pin at the base to highlight the volume. This simple technique ensures that your low bun looks stylish and substantial all day, even with fine or thinning hair.
11. Color-Pop Curly Buns
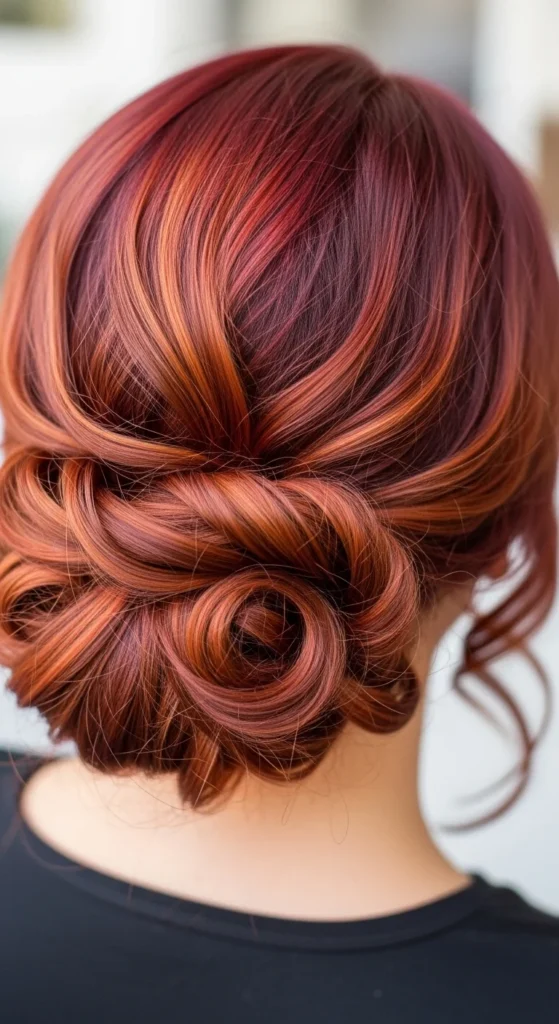
Curly low buns are a great way to showcase natural highlights or color dimension. Pull curls into a low bun at the nape, leaving a few tendrils loose around the face. This adds softness while emphasizing your hair’s natural texture and movement. It’s perfect for medium-thick or curly hair types and creates a romantic, playful effect.
DIY tip: Refresh curls before styling using a curling wand or rollers to enhance volume. Secure the bun with bobby pins and finish with light hairspray. You can also tuck a small floral or pearl accessory into the bun to complement your dress. This style is perfect for bridesmaid or mother-of-the-bride looks that require elegance with a touch of personality.
12. Face-Flattering Asymmetry
Side-swept low buns create asymmetry that flatters round or oval faces. Position the bun slightly to one side and pull a few loose strands around the face. This draws attention to facial features while maintaining elegance. It’s a subtle twist on the classic low bun that adds personality and dimension.
DIY tip: Twist sections from the front into the bun for added texture. Lightly curl loose strands to frame the face delicately. For a polished look, add a small pearl pin or comb opposite the bun’s side, balancing the asymmetry. This technique works for straight, wavy, or curly hair and gives a sophisticated, tailored finish.
13. Weatherproof Bun Hacks
Humidity can quickly ruin a carefully styled bun. Weatherproof bun hacks include using strong hairspray and anti-frizz serum before and after styling. Secure all sections with pins and lightly mist the bun to lock it in place. These tips help maintain a polished look for outdoor weddings or long photo sessions.
DIY tip: Smooth flyaways with a small comb or your fingers and apply a bit of lightweight serum for shine. If it’s windy, consider adding extra pins at the base of the bun. These small adjustments ensure your low bun stays elegant and intact throughout the day, even in challenging weather.
14. Extension-Ready Low Buns
Short or thin hair can benefit from extensions to create fuller low buns. Clip-in extensions can be styled into the bun for extra volume and length. This is perfect for achieving a dramatic, polished look without heavy products or complicated techniques. Extensions also help maintain the bun’s shape for longer periods.
DIY tip: Attach small sections at a time, then blend with your natural hair before twisting into a bun. Secure with pins and finish with hairspray. Optional: add pearl or floral pins for elegance. This method is ideal for mothers seeking a fuller, more luxurious bun while keeping styling relatively simple.
15. Effortless Messy Buns
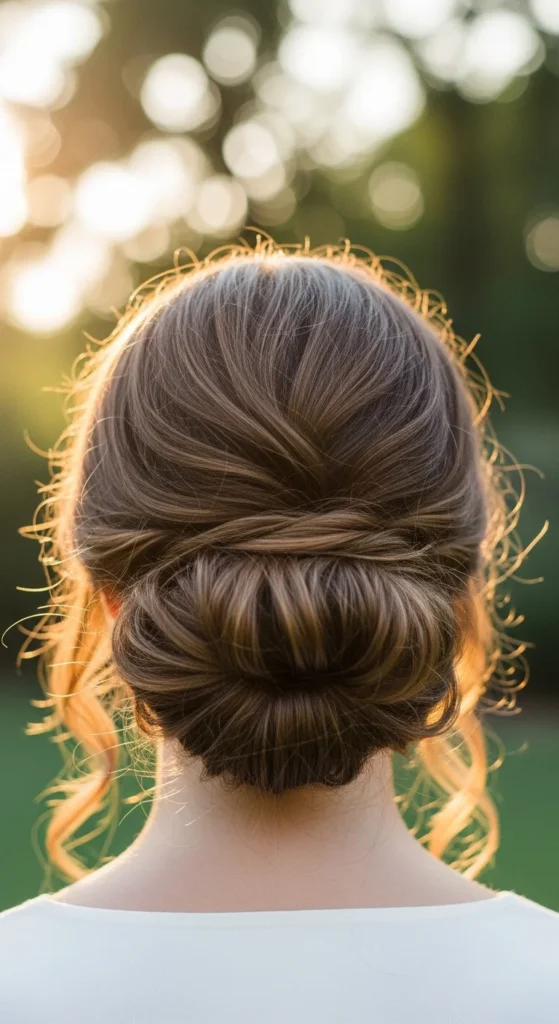
Messy low buns are perfect for casual or boho weddings. Start by loosely twisting or braiding sections and pinning them at the nape. Allow some strands to fall freely for a soft, effortless appearance. This style looks relaxed but still polished and works for wavy or curly hair.
DIY tip: Curl hair lightly before pinning to enhance texture. Use minimal hairspray to maintain flexibility while preventing frizz. For a romantic touch, tuck in a small flower or pearl pin. This bun is ideal for mothers who want elegance without looking overly structured.
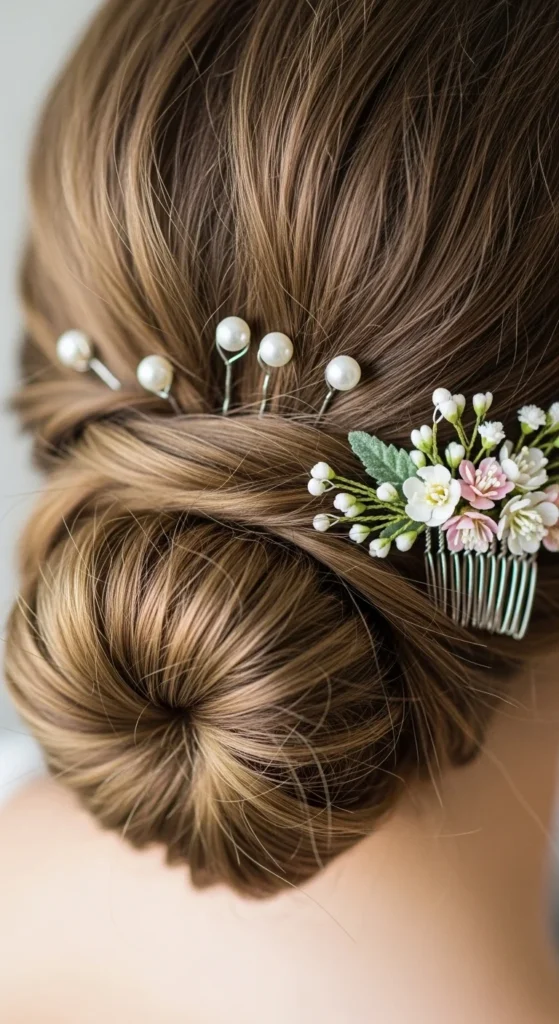
16. Pearl-Pin Low Bun Gallery
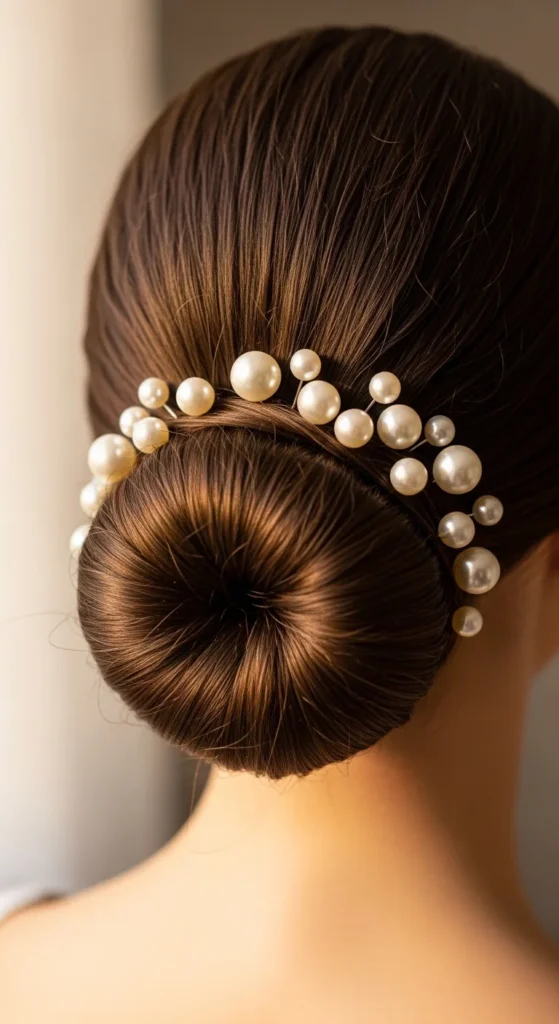
Pearl pins are a simple yet elegant way to upgrade any low bun. Add them strategically around the twists or curls to create sparkle and dimension. This technique works on sleek, textured, or messy buns, instantly giving the hairstyle a more sophisticated look. Pearls also pair beautifully with pastel or neutral gowns for a timeless finish.
DIY tip: You don’t need expensive pins—affordable craft or bridal sets work perfectly. Mix sizes for a layered effect, or place a single line of pearls along one side for subtle elegance. This styling trick keeps your bun polished and eye-catching without overcomplicating the process.
17. Dress-Matching Bun Ideas
Your hairstyle should complement your dress, and low buns pair beautifully with off-shoulder gowns. This placement highlights your neckline and shoulders, balancing elegance with simplicity. Soft tendrils around the face enhance the effect, making the look feminine and polished.
DIY tip: Match small accessories—like pearl pins, floral clips, or jeweled combs—to the color or style of your gown. This creates a cohesive, wedding-ready look without extra effort. Even a minimal accessory can tie the hairstyle to your outfit seamlessly, ensuring you feel confident and camera-ready all day.
18. Prep Day Checklist

Second-day hair often has better grip, making styling low buns easier and more secure. Wash or lightly refresh hair the night before, then section and style into your bun on the wedding day. Hair will hold pins better, and styling will require less product overall.
DIY tip: Lightly mist hair with water or texturizing spray before pinning to improve grip. Keep some sections loose to frame the face and finish with light hairspray. A few well-placed pins ensure the bun stays intact during dancing and photography. This prep ensures a durable, elegant hairstyle that lasts all day.
19. Silver Fox Bun Styles

Gray or silver hair shines in textured or braided low buns. Pull small braids or twists into the bun to add depth, especially for thinning areas. The contrast of braid and smooth sections adds elegance and dimension to your hairstyle.
DIY tip: Tease small sections gently to boost volume. Finish with pearl or floral pins for subtle sophistication. This style is ideal for mothers who want a chic, modern look while embracing their natural hair color. It keeps the bun polished, secure, and wedding-ready without overcomplicating the process.
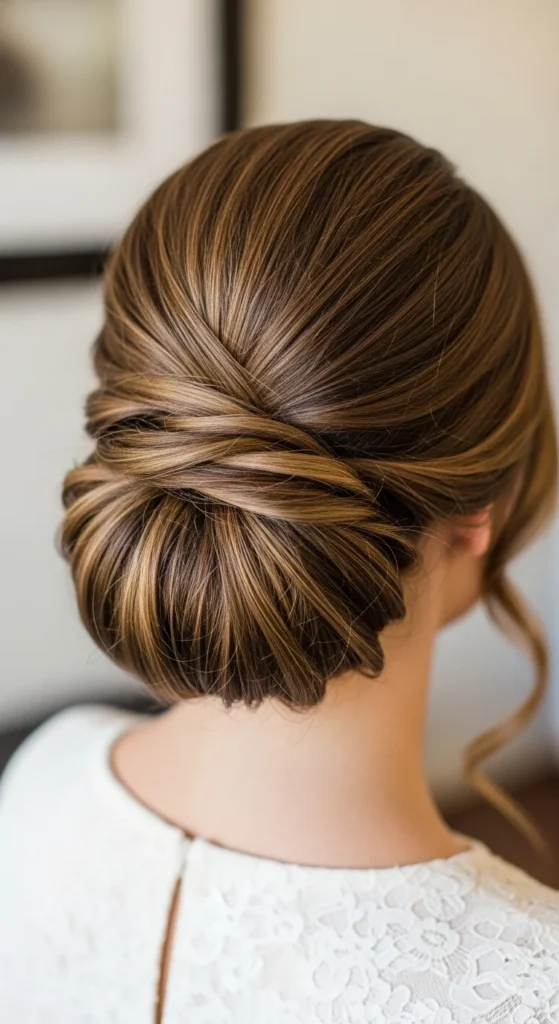
20. Twist vs Bun for Formal Events
A French twist offers a sleek, formal alternative to a low bun, giving height and structure. Low buns sit at the nape, creating elegance and elongating the neck. Both options work for formal events, but combining a twist into a low bun can provide the best of both worlds—polish, security, and dimension.
DIY tip: For hybrid styles, twist the hair gently before pinning into a low bun. Add subtle pearl pins or small floral accents to highlight texture. This method ensures your hairstyle looks refined and stays intact, even during long receptions or outdoor weddings.
21. Lavender Flower Twist
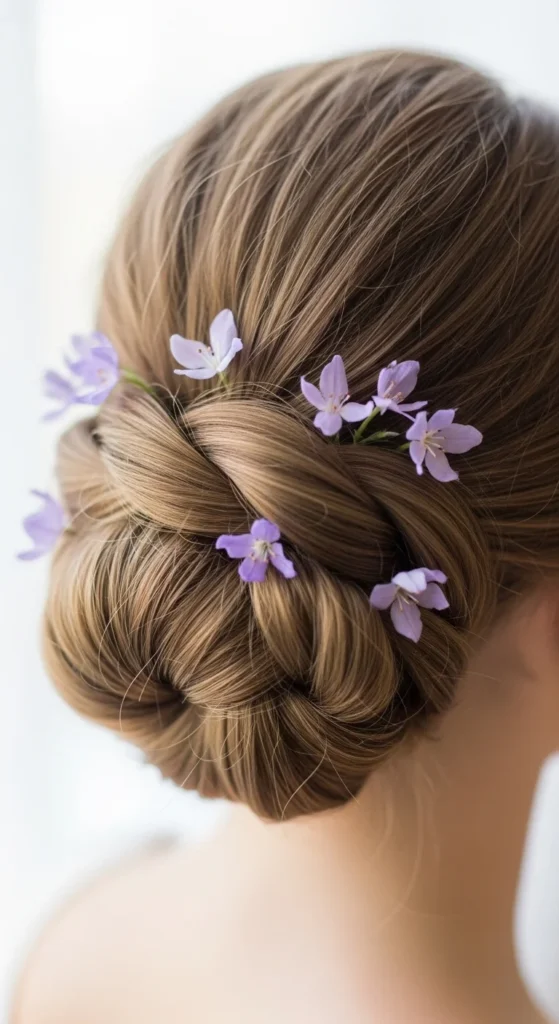
Adding lavender or pastel flowers into a low bun gives a subtle pop of color without overpowering your look. Twist small sections of hair into the bun, then tuck tiny blooms in between the twists for a romantic, ethereal effect. This works especially well for spring or garden weddings.
DIY tip: Faux flowers work just as well as fresh ones and last all day. Secure them with small pins or clips hidden inside the bun. This simple addition instantly elevates the hairstyle, giving it a soft, whimsical charm while keeping the overall look elegant and polished.
22. Asian-Inspired Sleek Middle-Part Bun
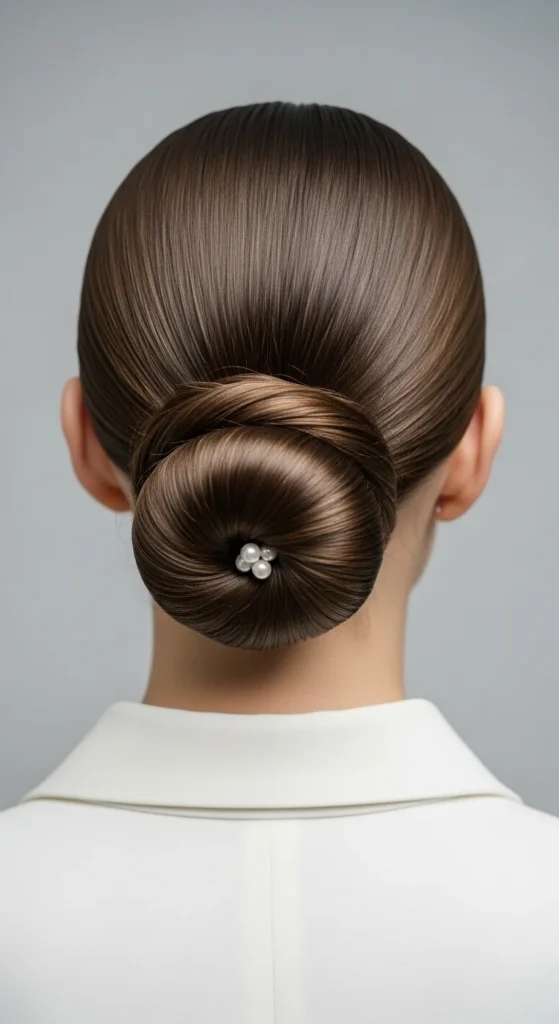
A middle-part sleek low bun is elegant, modern, and perfect for formal occasions. Part the hair straight down the middle, smooth it with a fine comb, then wrap it into a low bun at the nape. This minimalist approach highlights facial features and works beautifully with pearl or floral pins.
DIY tip: Apply a lightweight anti-frizz serum for shine and smoothness. The simplicity of this style allows accessories to stand out, creating a refined, sophisticated finish. Ideal for mothers who want a polished, low-maintenance hairstyle that exudes confidence and elegance.
Conclusion
Low buns are the ultimate elegant, versatile hairstyle for mothers of the bride. From sleek and polished to soft and textured, these 22 ideas offer options for all hair types, face shapes, and wedding styles. Try a DIY approach, add delicate accessories, or mix twists and braids to make the look your own.
Ready to create your perfect wedding hairstyle? Grab your pins, pick your favorite low bun style, and start styling today for a chic, polished finish that lasts all day.

Leave a Reply