
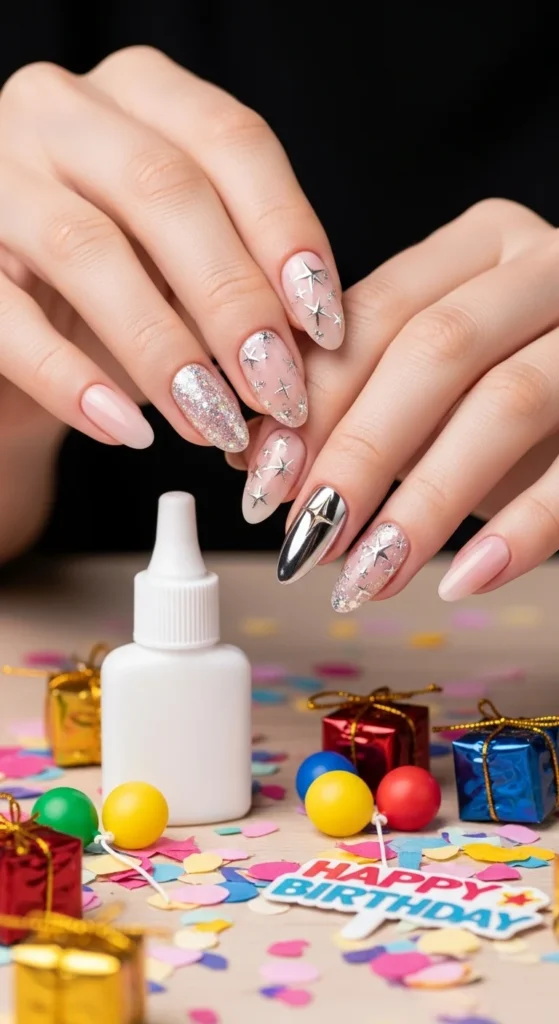
Birthdays feel like the perfect moment to try something playful on your nails. Many people search for birthday nail ideas that feel festive but still easy to recreate at home. Confetti dots, glitter French tips, chrome shine, and soft pastel designs appear again and again across popular party manicures.
The good news is that you do not need expensive tools to try most of these styles. Simple items like dotting tools, nail stickers, and glitter polish can create a fun party mani without spending much money.
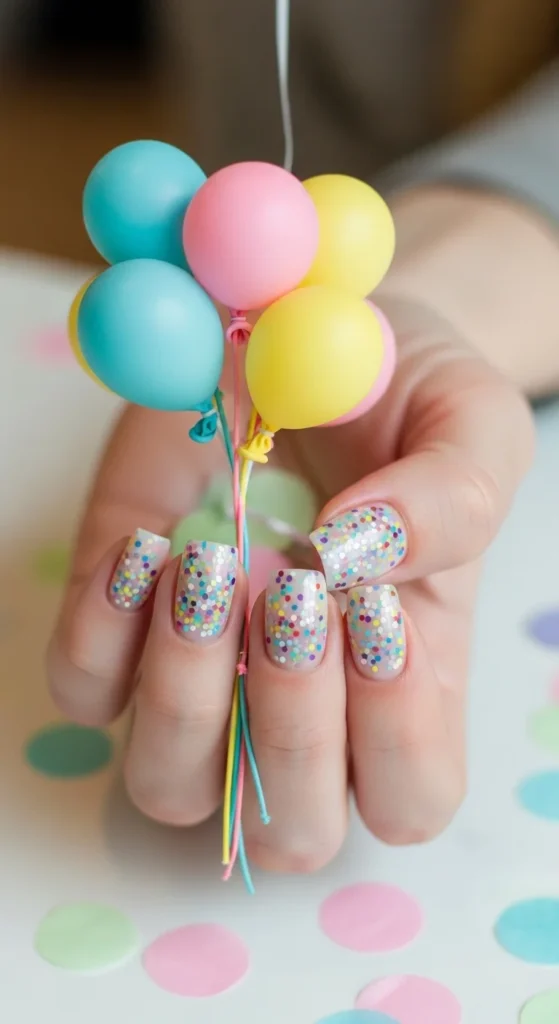
1. Confetti Dot Birthday Nails
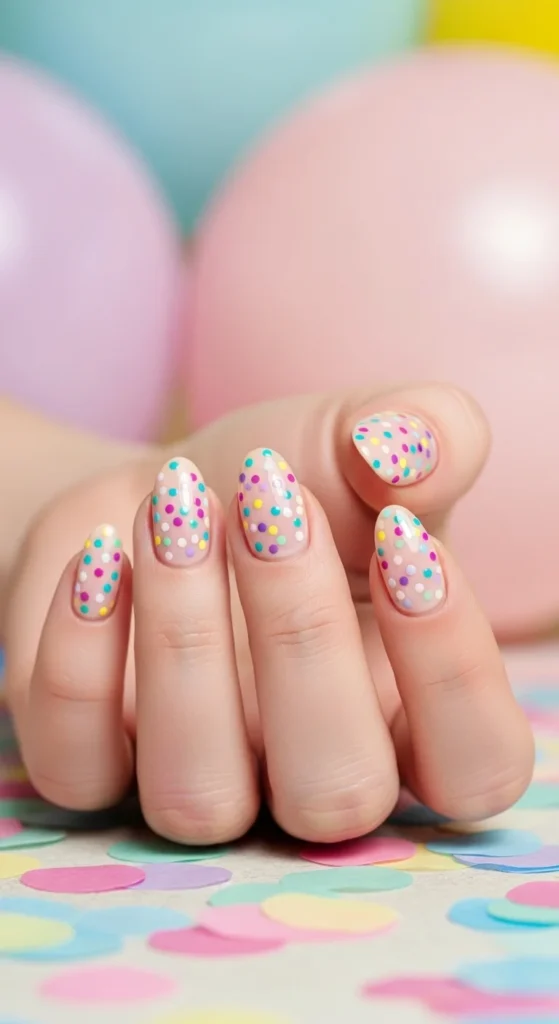
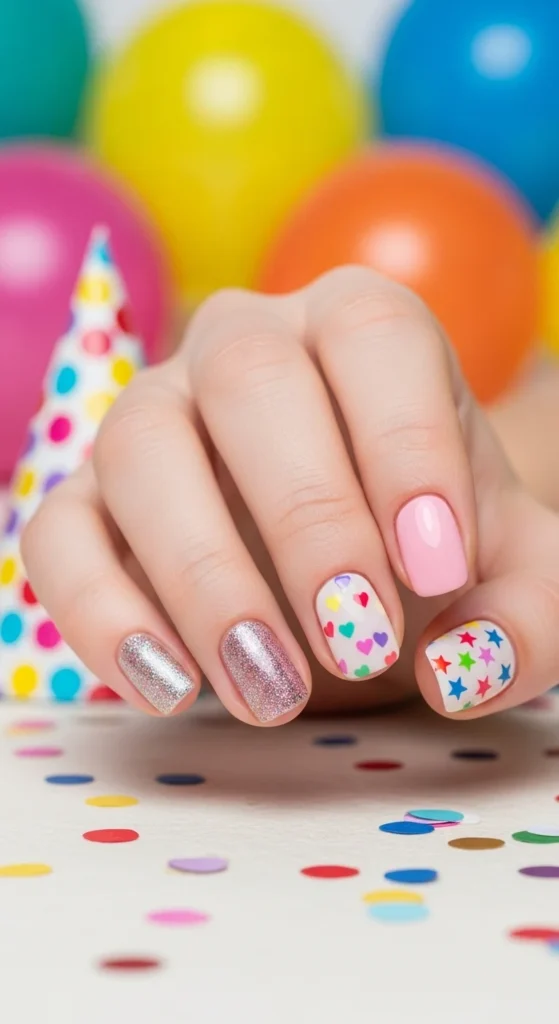
Confetti nails instantly create a birthday party mood. The tiny dots scattered across the nail look like colorful confetti falling during a celebration. Start with a soft pastel base such as light pink, lavender, or baby blue. After the base dries, use a dotting tool, toothpick, or even the tip of a hairpin to add small dots in different colors. Red, yellow, teal, and white work well together. Scatter the dots randomly across the nail so the pattern looks playful rather than perfectly arranged.
This design is beginner friendly and works on both short and long nails. If you want a softer look, keep most of the dots near the nail tip and leave the base visible. Finish the manicure with a glossy top coat to smooth the surface and make the colors pop. A budget friendly trick is using leftover polish shades from older bottles. Confetti nails actually look better when several random colors are mixed together.
2. Glitter French Birthday Tips
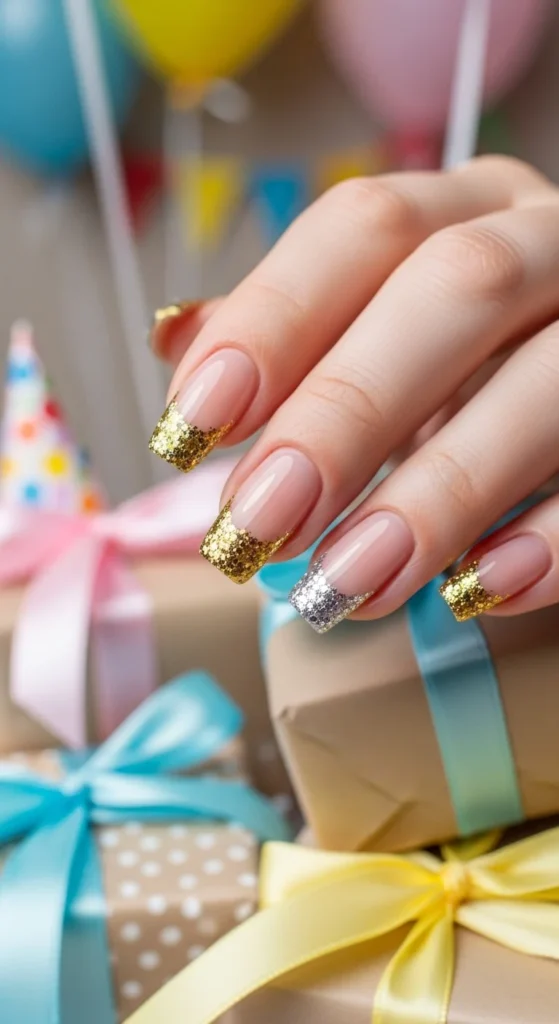
French manicures always look polished, but adding glitter makes them perfect for birthday celebrations. Begin with a sheer nude or pale pink base so the nails look clean and natural. Instead of painting a traditional white tip, apply glitter polish along the tip line. Gold glitter creates a warm party feel while silver glitter gives a sleek and shiny finish. The sparkle catches light beautifully in photos.
If creating the curved tip feels tricky, try using nail guide stickers or small pieces of tape to shape the line. Another simple trick is dabbing glitter polish with a sponge to create a soft fade along the tips. This style works well for dinner parties or family celebrations because it feels festive without looking overly busy. Glitter French tips also pair nicely with simple rings and bracelets for a balanced birthday look.
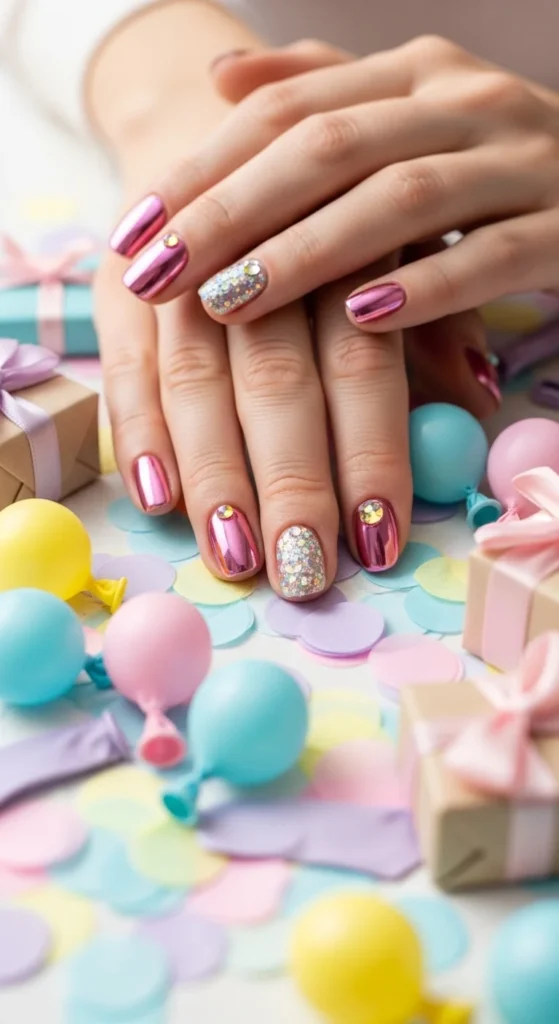
3. Chrome Disco Birthday Nails
Chrome nails create a bold birthday manicure that reflects light like a tiny mirror. Silver chrome is especially popular because it looks similar to a disco ball under bright lighting. The metallic shine makes the nails stand out in photos and videos during birthday celebrations. This design usually starts with a dark gel base coat, often black, which helps the chrome pigment appear brighter and more reflective.
Chrome powder is gently rubbed onto the nail surface using a sponge applicator until the metallic effect appears smooth and shiny. A glossy top coat seals the look and protects the finish. If silver feels too bold, rose chrome or soft champagne shades offer a more subtle shine. For a budget option, many press-on nail sets already include chrome designs, giving the same party effect without salon costs.
4. Pink Birthday Party Nails

Pink nails are one of the most loved styles for birthdays because they look cheerful and playful. Bubblegum pink shades feel youthful, while soft blush tones create a gentle and elegant manicure. A glossy pink base already feels festive, but small details can make it look even more special. Tiny star stickers, heart shapes, or glitter flakes add a fun party vibe.
One simple idea is turning one nail into an accent design. A mini cake drawing, sprinkle dots, or glitter polish on a single nail keeps the manicure balanced while still playful. Pink birthday nails also match well with pastel outfits and soft makeup looks. If buying nail art tools feels expensive, sticker sheets offer an easy shortcut that instantly turns plain pink polish into a celebration manicure.
5. Purple Party Mani
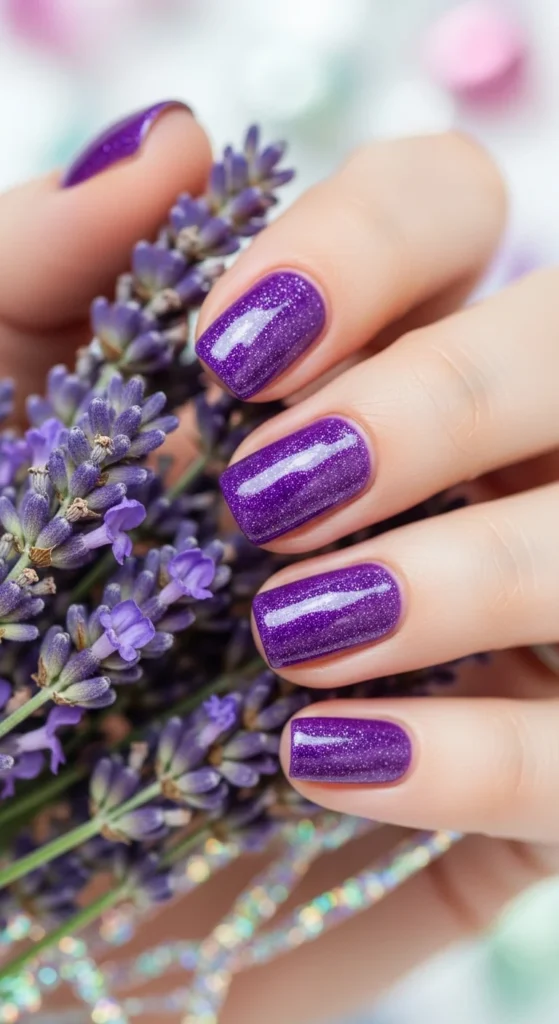
Purple nails create a dreamy birthday manicure that feels both playful and stylish. Light lavender shades give a soft and romantic look, while deeper violet tones add drama and shine. Start with a glossy purple base and let the color fully dry. Adding a glitter accent nail is an easy way to introduce sparkle without covering every nail with decoration.
Another creative option is blending two purple tones together to create a soft aura effect. Darker purple around the edges and lighter color in the center gives the nails depth and glow. Small silver star stickers also pair beautifully with purple shades for a celestial theme. A budget friendly trick is mixing a drop of white polish into purple to create a lighter lavender shade instead of buying a new bottle.
6. Butterfly Transformation Birthday Nails
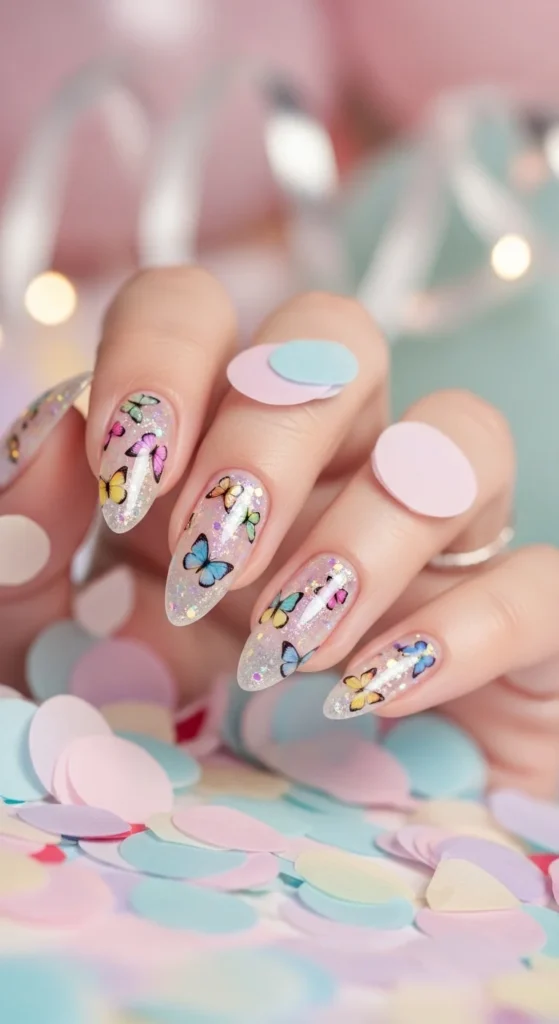
Butterfly nails feel perfect for birthdays because they symbolize change and growth. A new birthday often feels like the start of another chapter, and butterfly designs capture that mood beautifully. Begin with a soft base color like pale pink, peach, or sheer lavender. These shades keep the nails light and allow the butterfly details to stand out. Butterfly stickers or decals make the design quick and beginner friendly.
Place one butterfly on two accent nails and leave the others simple with glossy polish. Adding a little shimmer polish or chrome dust to the wings creates a magical shine under party lights. This design pairs nicely with pastel outfits or soft makeup looks. A budget friendly trick is buying butterfly sticker sheets online since they usually include dozens of tiny designs that can be used for many manicures.
7. Aura Glow Birthday Nails
Aura nails create a glowing color halo in the center of the nail, giving the manicure a dreamy and playful appearance. This style has become very popular because it looks artistic without requiring complicated tools. Start with a neutral base such as soft pink or milky white. Once it dries, lightly dab a brighter color into the center of the nail using a makeup sponge.
Popular aura combinations include pink and orange, purple and blue, or coral and yellow. The soft blend creates a glowing effect that looks unique on every nail. A glossy top coat smooths the design and adds shine. Aura nails work beautifully with jelly polish because the translucent finish gives extra depth. Using a small makeup sponge instead of professional tools keeps this manicure easy and affordable.
8. Jelly Glitter Birthday Nails
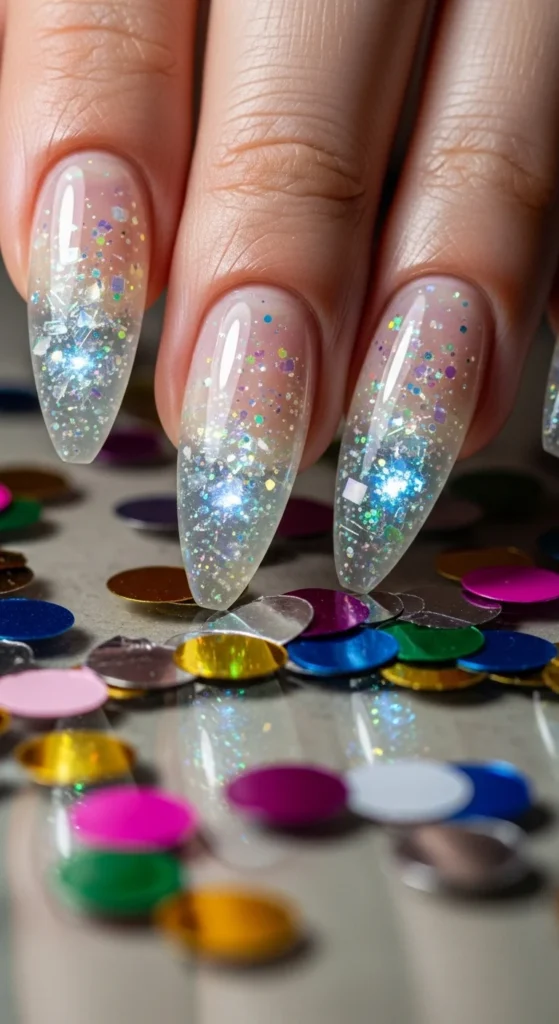
Jelly nails have a glossy, slightly transparent look that feels playful and youthful. When glitter is added inside the polish, the manicure starts to resemble sparkling candy or colorful glass. Choose a bright jelly shade like coral, raspberry pink, or orange. Apply two thin coats so the nail still looks slightly see-through.
Before the polish dries completely, sprinkle or place chunky glitter pieces across the surface. The glitter appears suspended inside the translucent polish and catches light beautifully. This design works especially well on short nails because the clear color keeps the look light and fun. If you do not have jelly polish, mix a drop of colored polish with clear top coat to create your own jelly shade at home.
9. Balloon Chrome Accent Nails
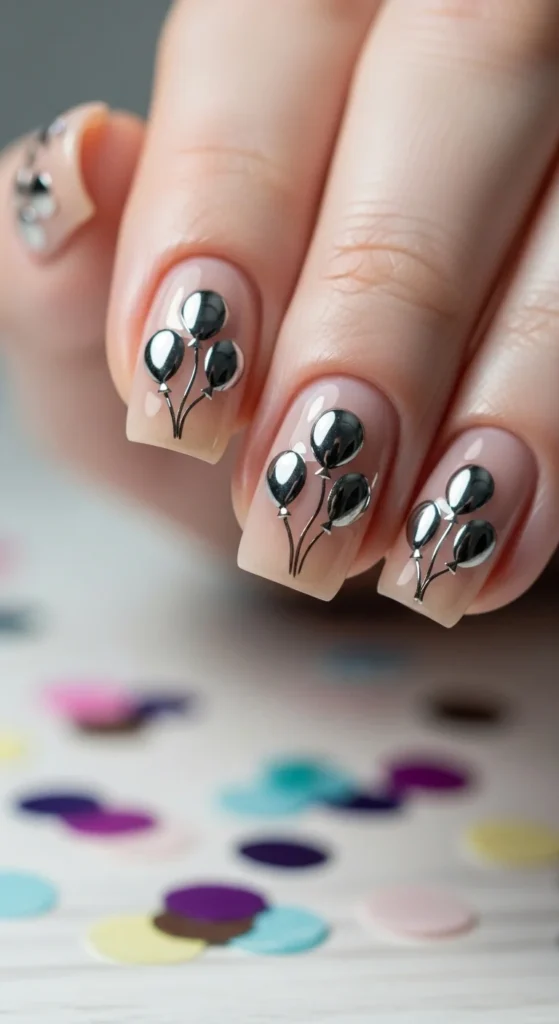
Balloon nail art instantly gives a manicure a birthday theme. The design looks festive without covering every nail with complex artwork. Begin with a simple base color such as nude, pale pink, or soft lavender. Keeping the base minimal allows the balloon design to stand out clearly.
Choose one or two accent nails to paint small balloon shapes using metallic polish or chrome pigment. Add thin lines beneath the balloons to represent the strings. Metallic silver, rose gold, or gold shades reflect light and create a party-ready manicure. If drawing balloons feels difficult, nail stickers work just as well. Small metallic foil pieces can also replace chrome polish and still create a shiny balloon effect.
10. Cupcake Accent Birthday Nails
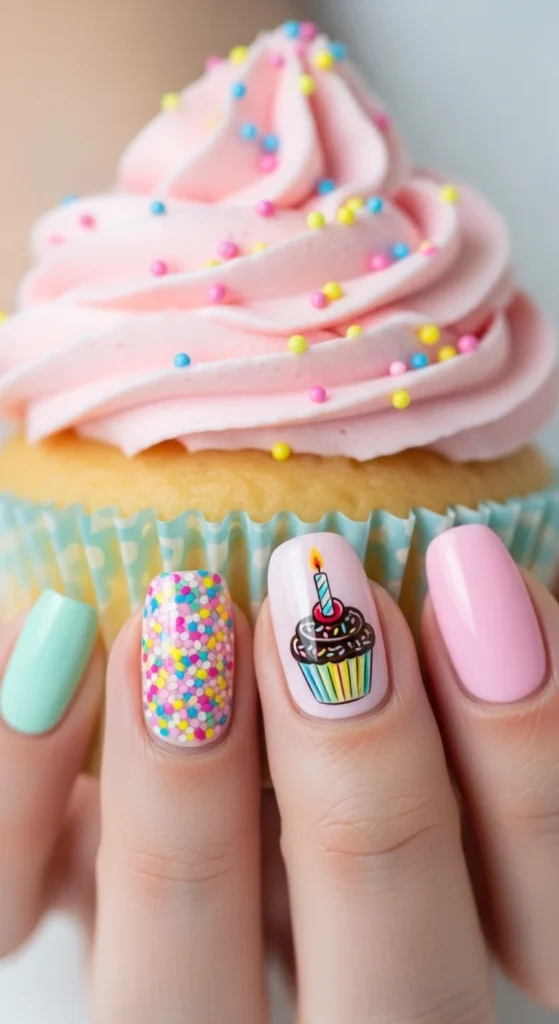
Cupcake nail art brings a playful dessert theme to birthday nails. The design works best when used as a small accent rather than covering every nail. Start with a pastel base color such as baby pink, mint green, or lavender. These shades resemble classic bakery colors and keep the manicure cheerful.
On one nail, paint a tiny cupcake shape using brown polish for the base and white polish for the frosting swirl. Add small colorful dots on top to represent sprinkles. Even beginners can create this look using a thin brush or toothpick. If painting feels tricky, cupcake nail stickers provide an easy shortcut. Keeping the rest of the nails simple helps the cupcake design stand out and keeps the manicure balanced.
11. Mismatched Birthday Skittle Nails
Mismatched nails, often called Skittle nails, are perfect for birthdays because they allow every nail to look different. Instead of repeating the same design, each finger can feature a unique pattern. One nail might have glitter, another could show pastel polish, and another may include stars or small hearts. This playful mix gives the manicure a creative and carefree vibe.
To keep the look cohesive, choose a small color palette before starting. For example, pink, lavender, white, and gold work beautifully together. Use simple patterns like dots, stripes, or tiny sparkles so the nails feel fun without becoming messy. The mismatched style is also budget friendly because you can use leftover polish shades from older sets instead of buying new bottles.
12. 3D Bow Birthday Nails
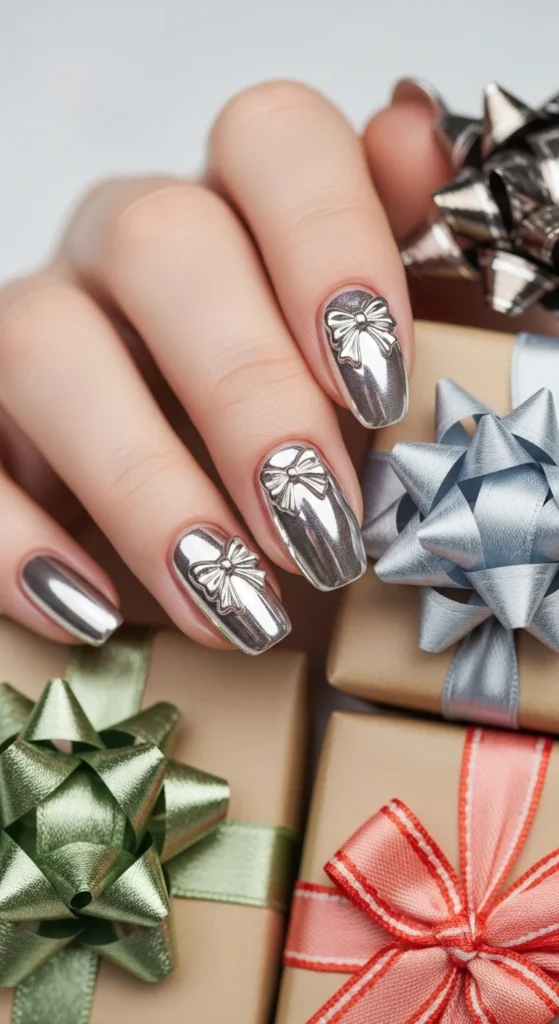
3D bow nails create a cute and decorative birthday manicure. Small bow charms instantly add texture and make the nails feel extra special for a celebration. Begin with a simple base color such as soft pink, nude, or milky white. Keeping the base minimal allows the bow decoration to stand out clearly.
Attach small bow charms on one or two accent nails using nail glue. Placing them near the center or cuticle area usually looks the most balanced. This design pairs beautifully with glossy polish or subtle glitter accents. Nail charm sets are inexpensive and often include multiple shapes, making them a fun option for several future manicures.
13. Gold Glitter Ombre Birthday Nails
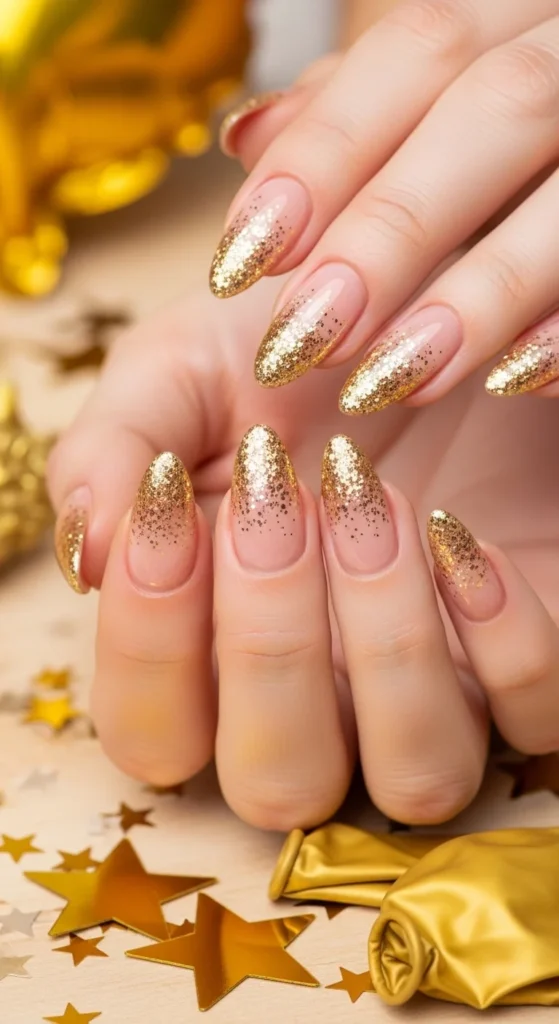
Gold glitter ombre nails create a glamorous birthday manicure without complicated artwork. The design fades from a soft nude base into sparkling gold glitter at the tips. Start by painting the nails with a neutral base color such as nude or pale beige. Allow the base to dry fully before adding the glitter layer.
Use a small sponge to dab gold glitter polish near the tips and gently blend downward. This creates a smooth gradient effect that looks soft and elegant. The sparkle catches light beautifully during birthday photos. Loose glitter powder can also be used for the same look if glitter polish is unavailable, making this manicure affordable and easy to recreate.
14. Minimal Nude Birthday Nails
Not everyone wants bold glitter or colorful patterns for their birthday manicure. Minimal nude nails offer a soft and classy alternative while still feeling festive. Start with a glossy nude or blush polish that matches your skin tone. This creates a clean base that looks elegant with any outfit.
Add tiny gold dots near the cuticle on one or two nails using a dotting tool. The small metallic detail brings subtle sparkle without making the manicure busy. Minimal birthday nails work beautifully for dinner celebrations or formal events. Gold nail studs or metallic polish can create the same effect, keeping the design simple and budget friendly.
15. Zodiac Birthday Nails
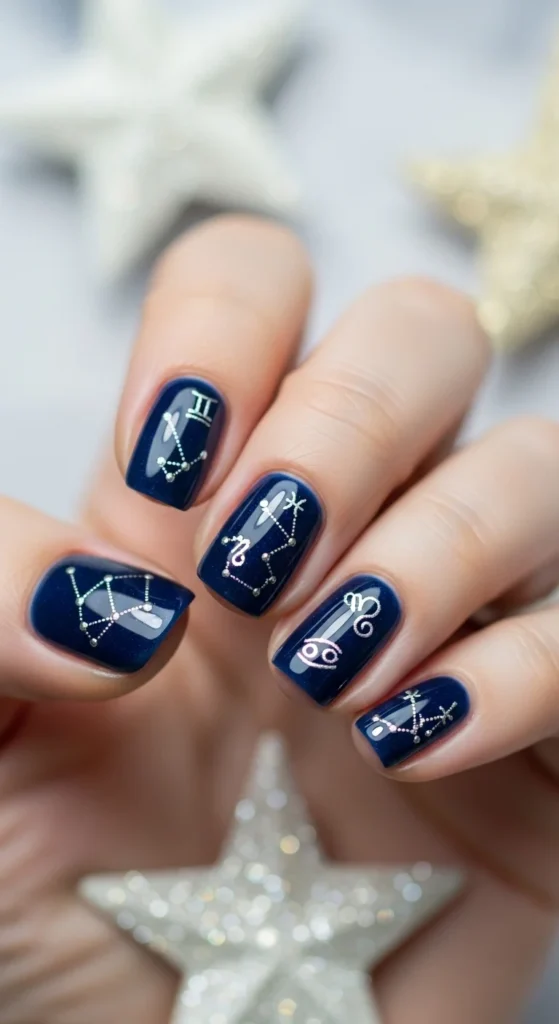
Zodiac nails create a birthday manicure that feels personal and meaningful. Each design reflects the star sign connected to the birth date. Begin with a deep blue or black polish to resemble the night sky. This dark base helps silver or white details stand out clearly.
Use a thin brush or dotting tool to place small silver dots across the nail. Connect the dots with fine lines to form constellation patterns. Each nail can represent a different part of the star pattern or symbol connected to the zodiac sign. Constellation nail stickers are also widely available and make this design easier for beginners to recreate at home.
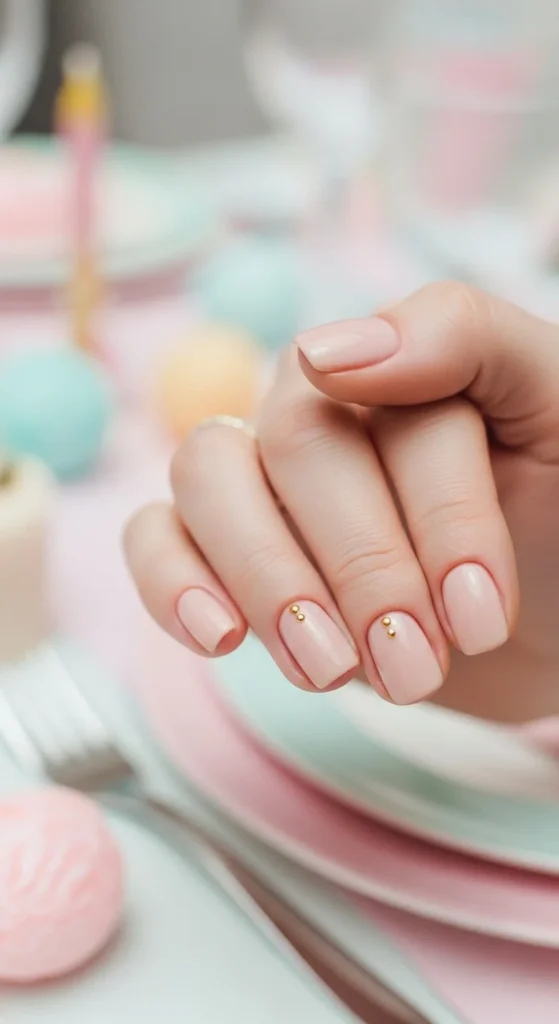
16. Birthstone Gem Birthday Nails
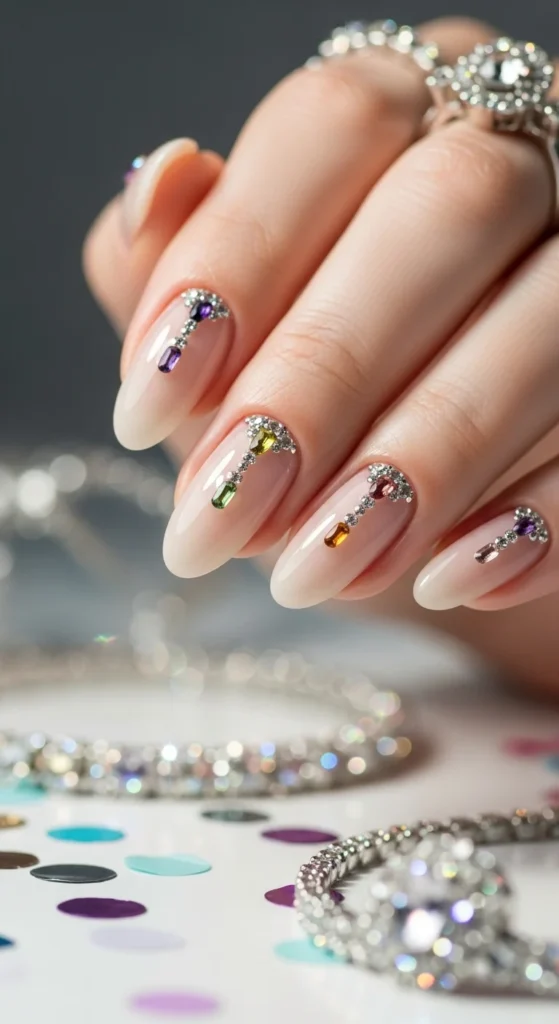
Birthstone nails create a birthday manicure that feels personal and meaningful. Each month is linked with a gemstone color, making it easy to design nails around that shade. January can feature deep red crystals, April might highlight clear gems, and September often pairs beautifully with sapphire blue tones. Start with a neutral or soft pastel base so the gemstone details stand out clearly.
Place small rhinestones near the cuticle or along the nail tip for a delicate sparkle. Limiting gems to one or two accent nails keeps the manicure balanced and comfortable to wear. Rhinestone kits are affordable and include many colors, so you can reuse them for other nail designs later. This idea works well for both short and long nails and pairs beautifully with rings and bracelets during birthday celebrations.
17. Short Confetti Birthday Nails
Short nails can still look festive and playful for birthdays. Confetti glitter works especially well on shorter nail shapes because it adds color without making the design feel crowded. Begin with a pastel polish such as mint green, baby pink, or soft yellow. These light shades help the confetti glitter stand out clearly.
Apply a confetti glitter top coat over the polish or place individual glitter pieces with a dotting tool. The scattered pieces create the same cheerful look as party decorations. Short nails are practical for busy celebrations and daily tasks while still feeling stylish. A glossy top coat seals the glitter and keeps the manicure smooth and shiny for the entire birthday weekend.
18. Birthday Candle Nail Art

Birthday candle nails celebrate the classic moment of blowing out candles on a cake. The design feels playful and instantly connects with the birthday theme. Start with a simple base color such as pale pink, nude, or light lavender. A soft base allows the candle artwork to stand out without overwhelming the manicure.
Use a thin nail brush or striping brush to paint tiny vertical candle shapes in bright colors like blue, yellow, or red. Add a small yellow dot at the top of each candle to represent the flame. Limiting the candle art to one or two nails keeps the design balanced. Nail art pens or striping brushes make drawing thin candle shapes easier for beginners who want to try the design at home.
19. Press-On Birthday Nail Set
Press-on nails are perfect for last-minute birthday plans when there is no time for a salon visit. Many press-on sets already include fun details such as glitter tips, star patterns, chrome shine, or tiny gems. The application process takes only a few minutes and instantly gives the appearance of a detailed manicure.
Choose the correct size for each nail and apply them using nail glue or adhesive tabs. Press-ons are also convenient because they can be removed easily after the celebration. Many people keep a few stylish sets at home for special occasions. This option is affordable compared with professional nail services and still delivers a polished party-ready look.
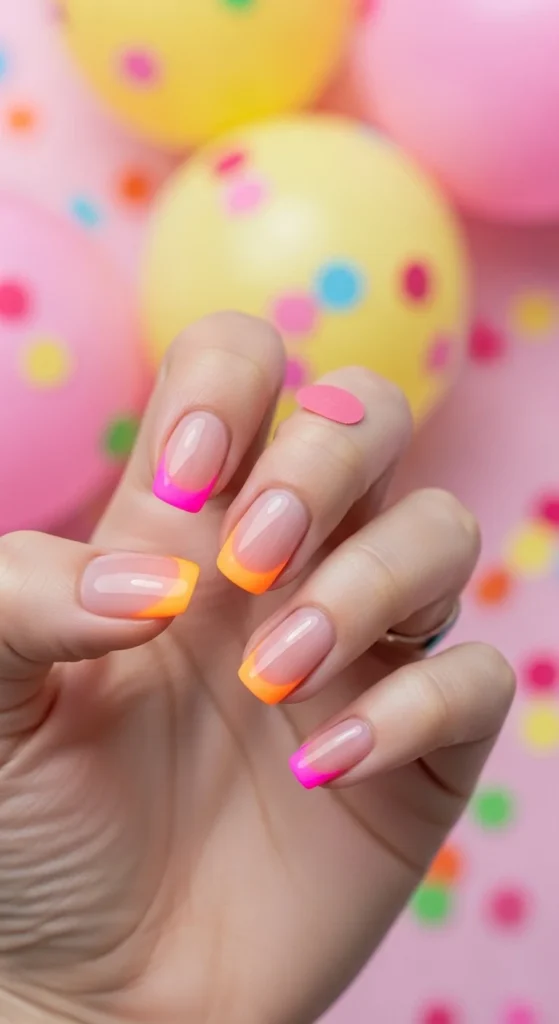
20. Neon Summer Birthday Nails
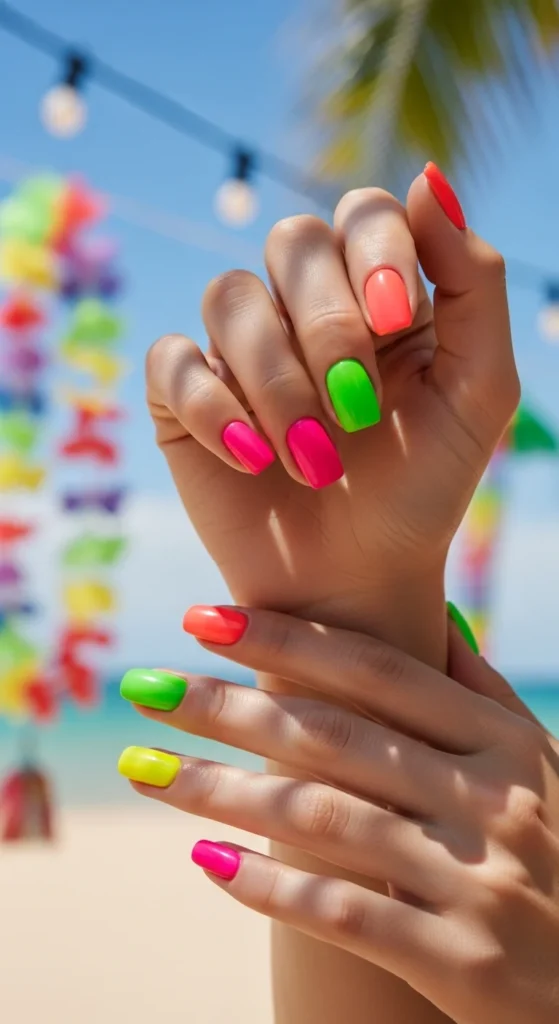
Neon nails create a cheerful manicure that feels perfect for summer birthdays. Bright shades like electric pink, coral, lime green, and neon orange instantly stand out. One fun approach is painting each nail a different neon color for a playful party look. The vibrant shades pair beautifully with outdoor celebrations and sunny weather.
To add more personality, place tiny white stars or dots on two nails for subtle decoration. Neon polish also looks beautiful with a glossy top coat that enhances the brightness. If neon shades feel too intense, mixing a small amount of white polish into the color can soften the tone while still keeping the manicure bright and festive.
21. Black and Gold Party Nails
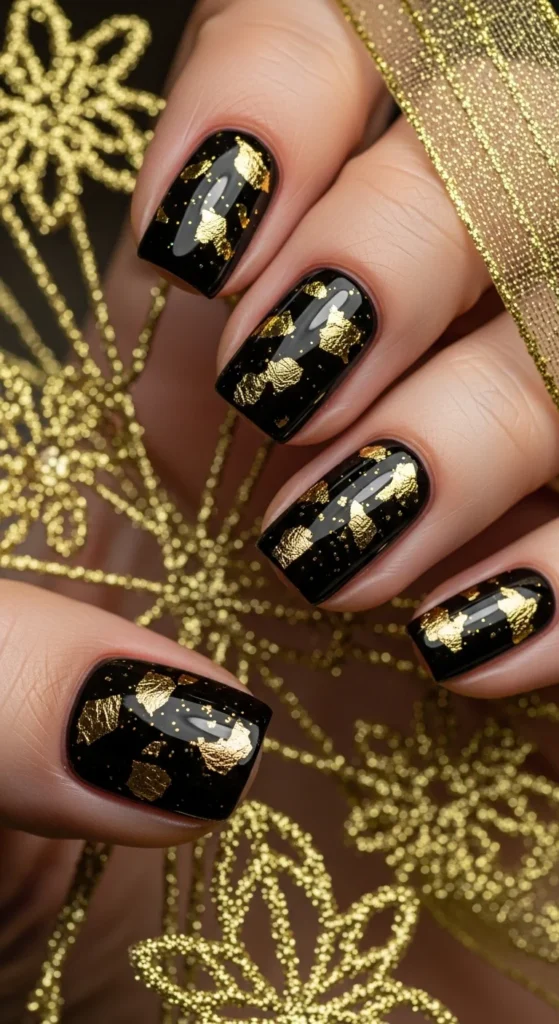
Black and gold nails create a bold and glamorous birthday manicure. The deep black base provides a dramatic background for shiny gold foil or glitter accents. Begin with a glossy black polish and allow it to dry fully before adding decorative elements. The contrast between dark polish and gold sparkle creates a striking party look.
Gold foil flakes can be gently pressed onto the nail surface in random patterns. This creates a luxurious texture that reflects light beautifully. Limiting the foil to a few nails keeps the manicure balanced and wearable. Gold foil sheets are inexpensive and last through many manicures, making them a budget friendly way to create a dramatic birthday nail design.
Conclusion
Birthday nails are a small detail that can make the whole celebration feel more special. From confetti dots and glitter French tips to chrome shine, neon colors, and minimal nude styles, there are endless ways to design a manicure that matches your mood and party plans. Many of these looks can be created with simple tools, affordable nail stickers, or even press-on sets.
Choose a design that fits your personality, outfit, or party theme. You can keep things subtle with soft colors or go bold with glitter and chrome shine.

Leave a Reply