
Coffin nails, also called ballerina nails, are trending because they combine bold structure with everyday practicality. Search interest keeps rising for ombré fades, French tips, short lengths, and simple DIY styles that look polished without salon costs. This numbered list highlights stylish options you can recreate at home using affordable tools and easy techniques, so your manicure looks neat, trendy, and photo-ready.
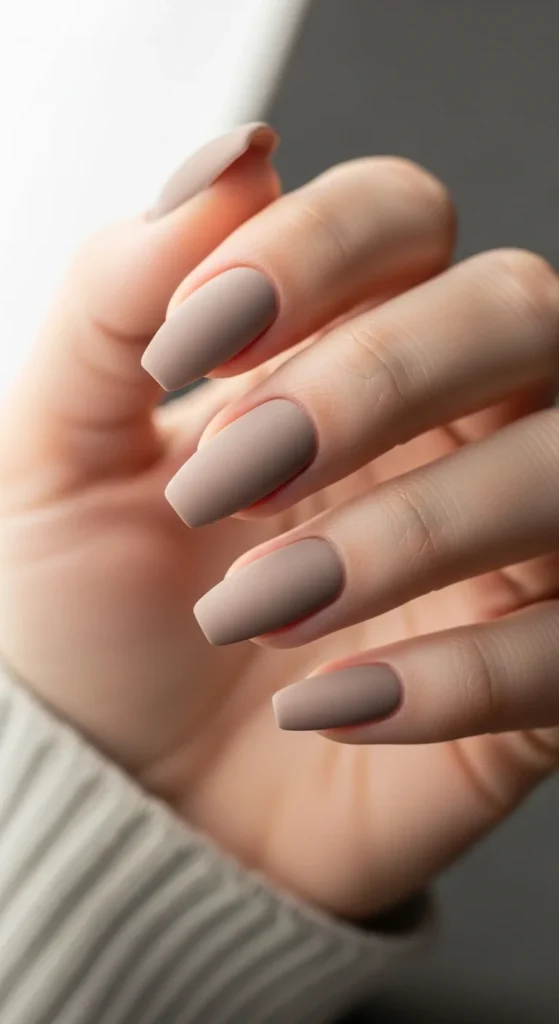
1. Milky Nude Ombre Coffin Nails
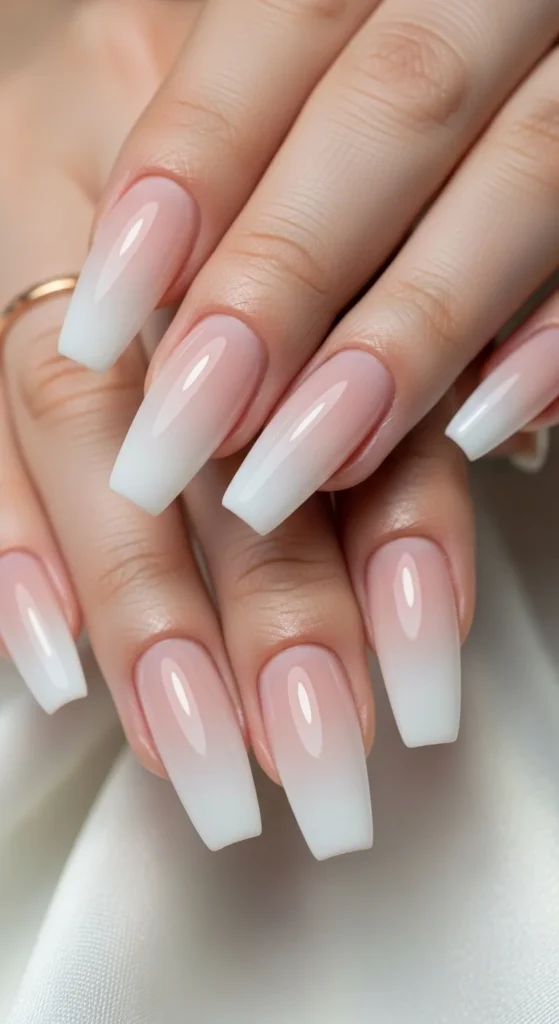
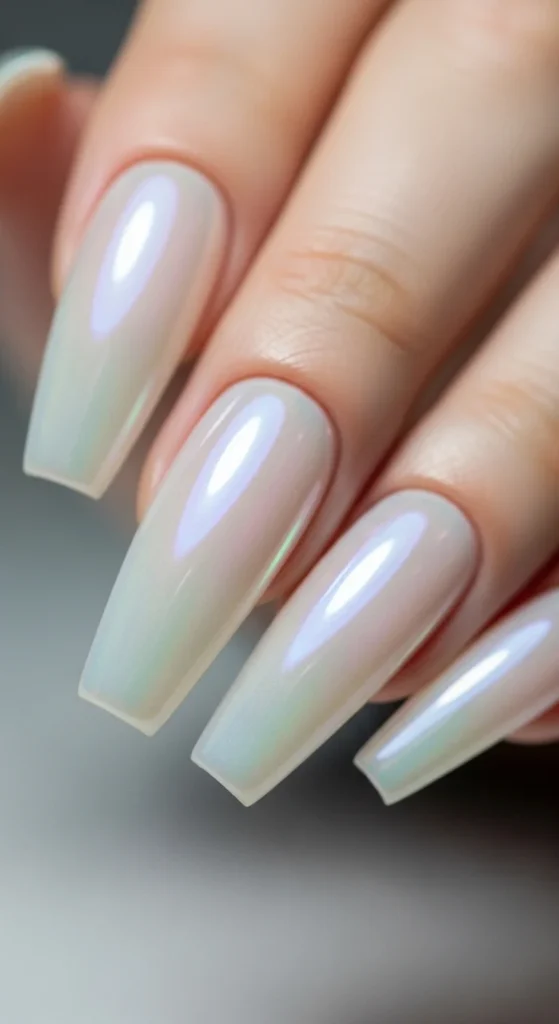
Milky nude ombré nails give a soft gradient that looks clean and elegant. The fade from nude to white creates a smooth effect that suits daily wear and events. This design works on both short and long coffin shapes. Short lengths feel practical for typing and chores. Longer shapes look dramatic in photos and highlight the fade more clearly.
You can recreate this style using two polishes and a sponge. Paint a nude base, dab white on the tips, then tap lightly to blur. Seal with a glossy top coat. If blending feels tricky, choose press-ons with a gradient design. They cost less than salon visits and can be reused, making them a budget-friendly choice.
2. Rainbow Gradient Coffin Nails
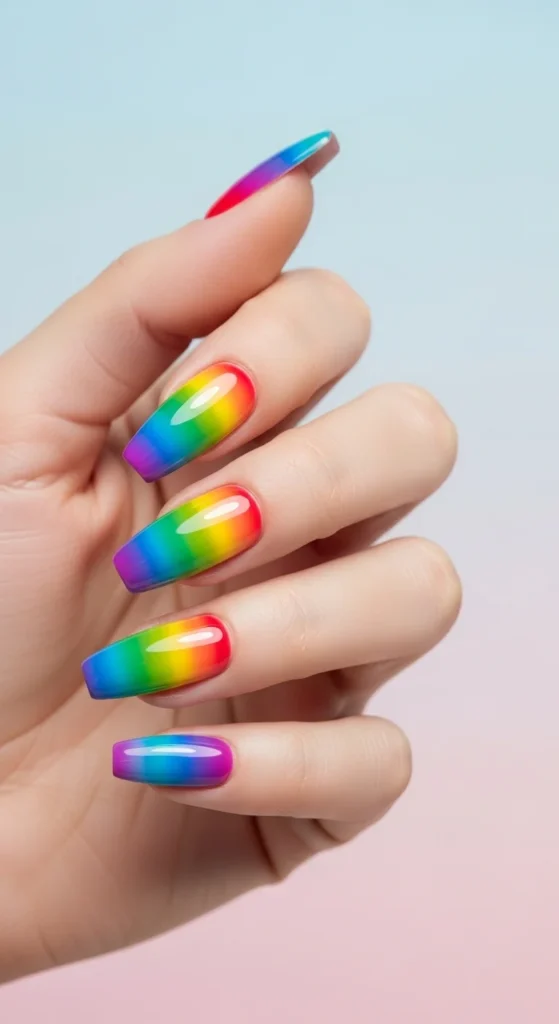
Rainbow gradients add color without looking messy because each nail blends two shades. Together, they create a soft spectrum effect that stands out while still looking neat. This design catches light beautifully and looks striking in photos, making it popular for social posts and events where you want something playful.
Start with a light base and blend colors using a sponge or applicator. Thin layers help transitions look smooth. Old eyeshadow applicators work well as blending tools and save money. Short coffin shapes keep the look practical, while longer shapes give more space for color blending and detail.
3. Classic White French Coffin Nails
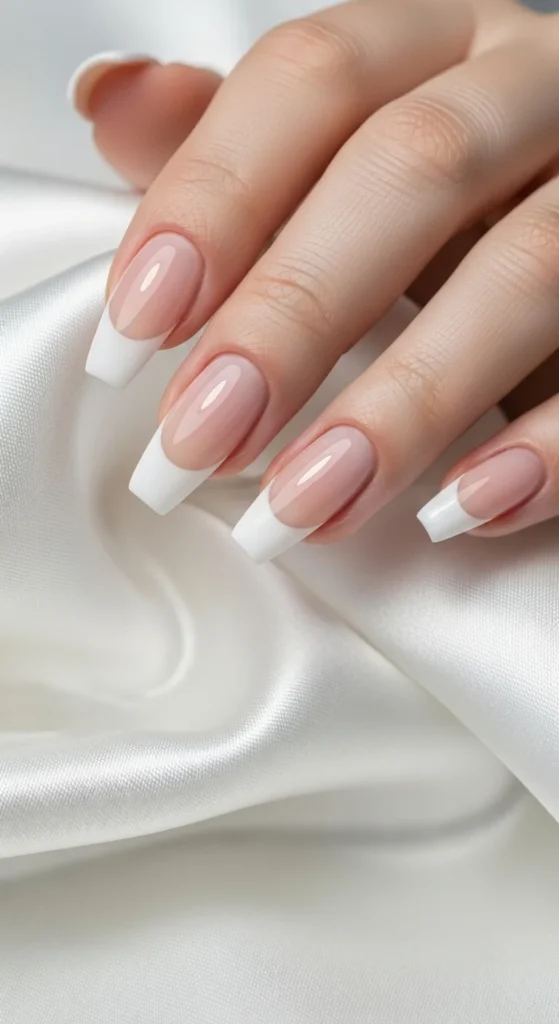
Classic white French tips remain timeless, and the coffin shape gives them a modern feel. Straight edges make the white tip appear crisp and balanced. This manicure fits workdays, events, or casual outings. It looks polished without bright colors, which makes it a favorite for people who like clean styles.
Use nail tape to guide the tip line, paint white polish, then remove the tape slowly. Add a clear top coat for shine. If straight lines feel difficult, try white press-on tips and file the sides into a coffin shape. This shortcut saves time and keeps the result neat.
4. Short Pink Coffin Nails with Hearts
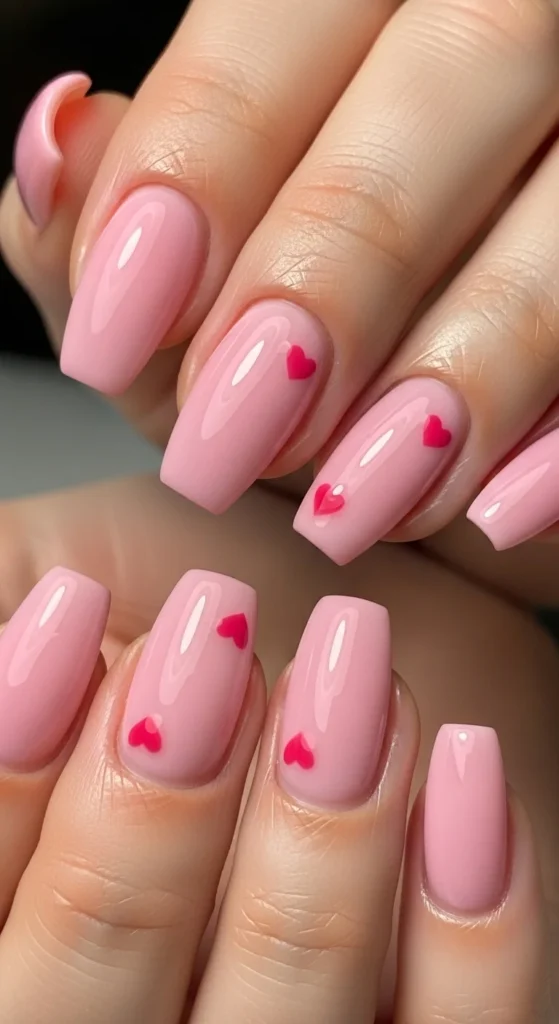
Short coffin nails prove you do not need long nails for style. A soft pink base with tiny hearts looks cute yet wearable. This design feels light and sweet while still looking tidy. The shorter shape makes daily tasks easier, which is why many people prefer it.
Paint nails pale pink, then create hearts using two dots pulled together. Seal with clear polish for shine. Stickers can replace painting if you want a faster method. Try different heart colors to change the mood. Red looks bold, white looks soft, and glitter adds sparkle.
5. Matte Black and Gold Marble Nails
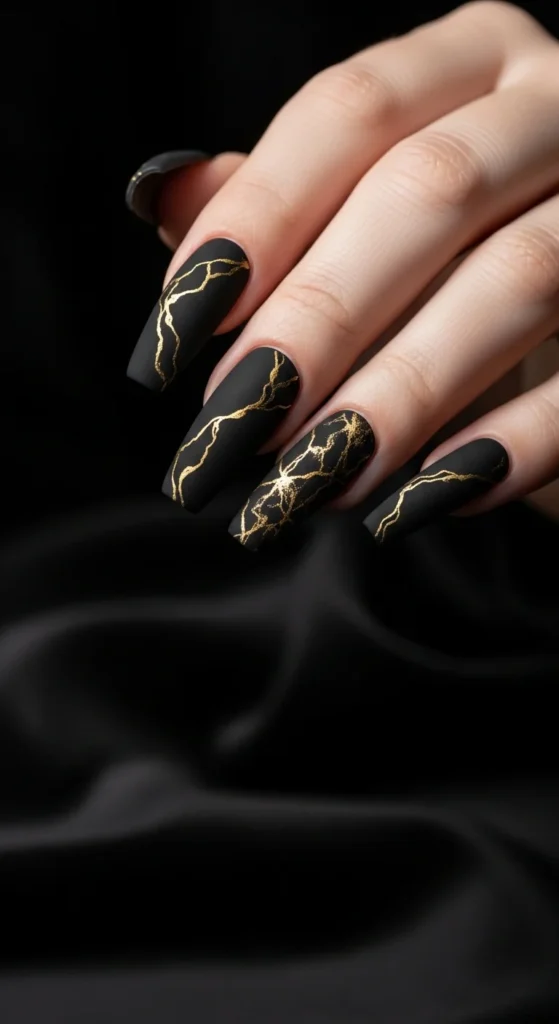
Matte black with gold marble lines creates a bold contrast that looks stylish and dramatic. The dark base highlights the coffin shape, while gold veins add shine and detail. This design suits evening events or bold outfits and stands out in photos because of the strong color contrast.
Paint nails black, then draw thin gold lines in random patterns. Keep lines uneven so they resemble natural stone. Finish with matte top coat. If freehand art feels hard, press small gold foil pieces onto tacky polish instead. Accent one nail if you want a simpler version that still looks striking.
6. White Marble Coffin Nails
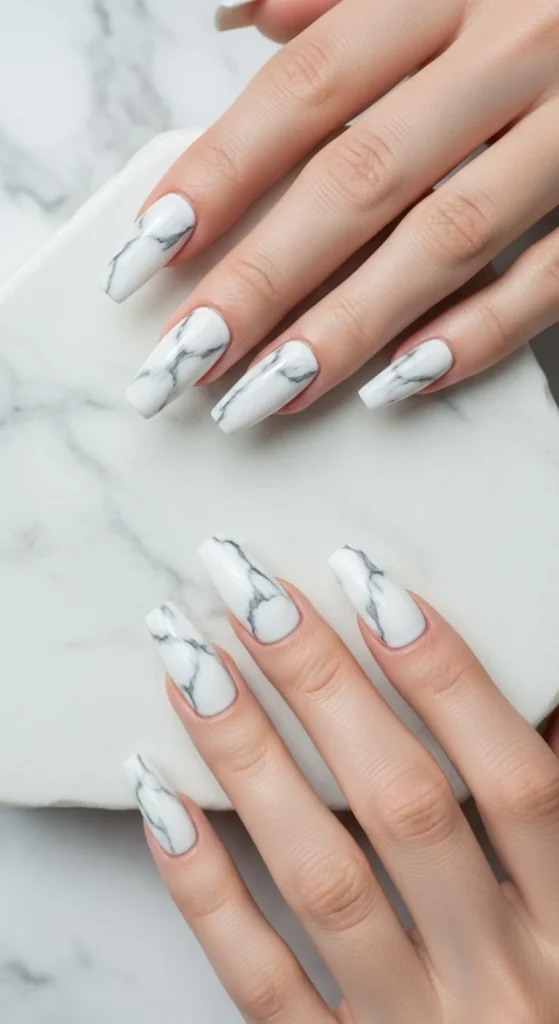
White marble coffin nails give a clean and polished look that suits both casual and formal settings. The soft gray veining against a white base creates a stone-like effect that looks stylish without bright color. This design pairs well with silver rings and neutral outfits, making it a popular pick for weddings, events, or daily wear.
Start with a white polish base, then draw thin gray lines using a detail brush. Lightly dab with a sponge to blur the lines for a natural stone effect. Seal with a glossy top coat. If you do not have a sponge, a crumpled plastic wrap piece works just as well and saves money on tools.
7. Moody Aura Gradient Nails
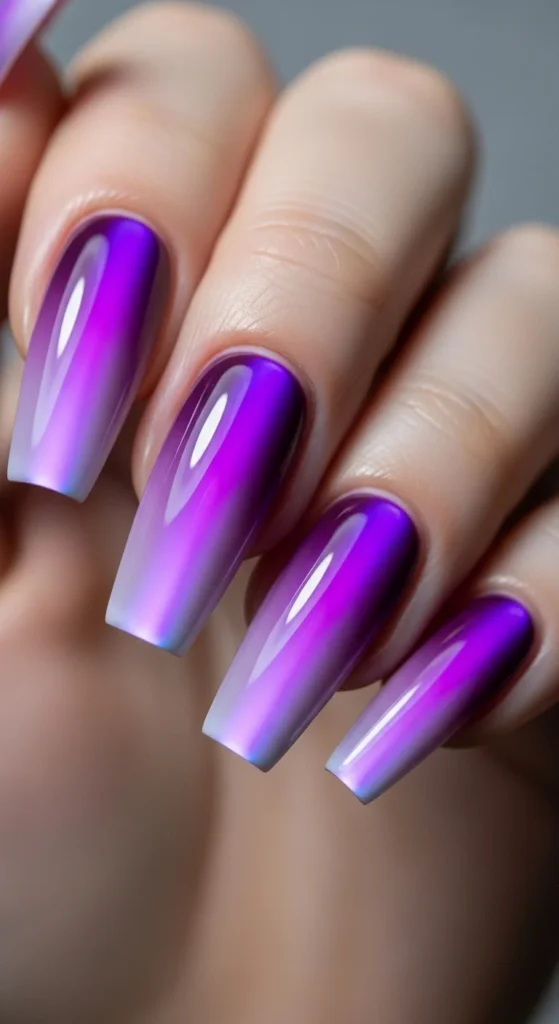
Aura nails feature a glowing center that fades into darker edges, creating a soft halo effect. This style stands out because the gradient draws attention to the middle of each nail. Dark shades with bright centers create contrast that looks bold yet smooth, making it a favorite for photos and evening looks.
Paint a dark base color first, then dab a lighter shade in the center using a small sponge. Blend outward gently until the glow looks soft. Makeup sponge pieces work perfectly and cost little. Try purple and black for drama or pink and nude for a softer look that still feels stylish.
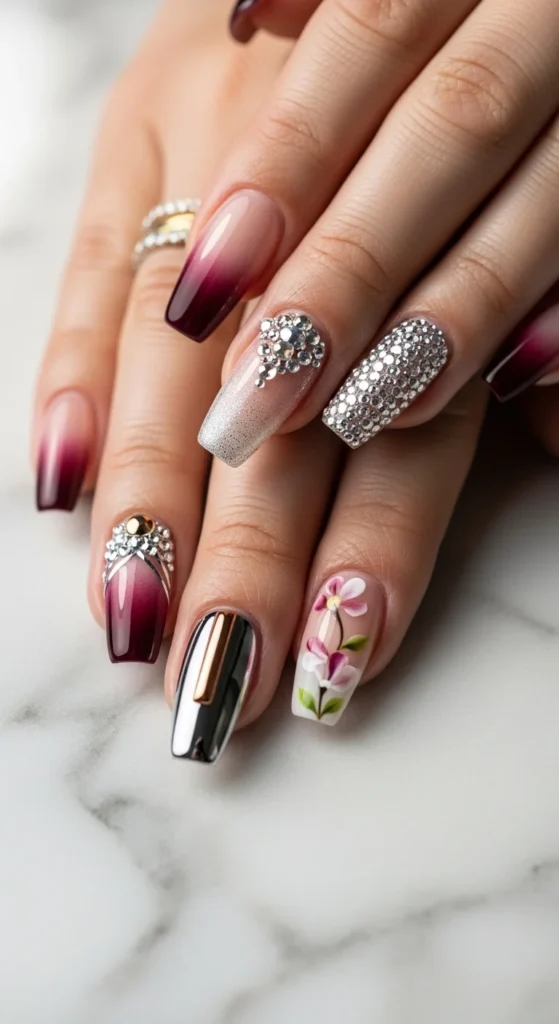
8. Rhinestone and Pearl Accent Nails
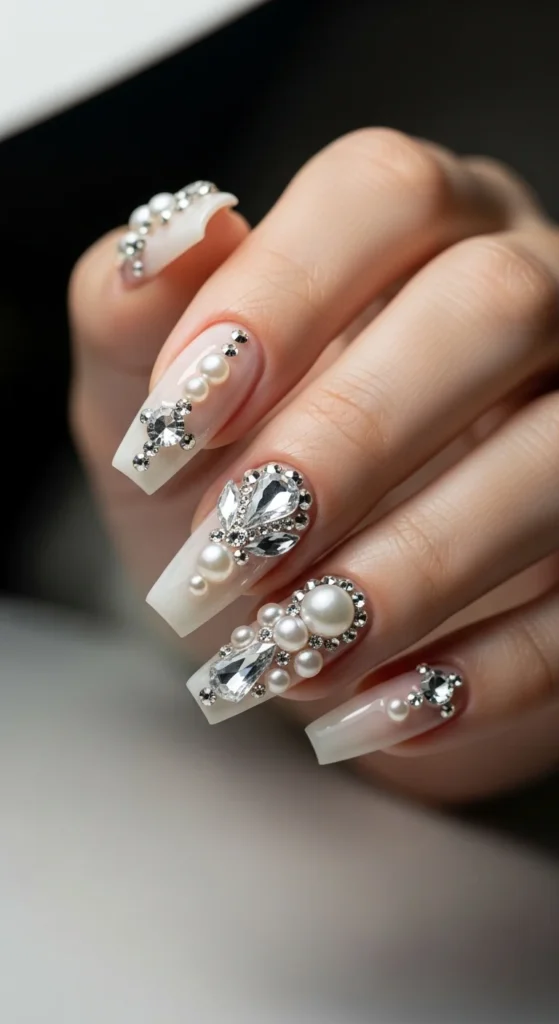
Rhinestones and pearls add texture and shine that catch light from every angle. These small accents turn a simple polish into a statement manicure. They are perfect for events, photos, or days when you want your nails to stand out without complex painting techniques.
Apply your base color, then place gems while the polish is slightly tacky. Press gently with tweezers and seal edges with clear top coat. Small gem wheels are inexpensive and last for many sets. Use accents on one or two nails if you prefer comfort and a lighter feel.
9. Leopard Print French Tips
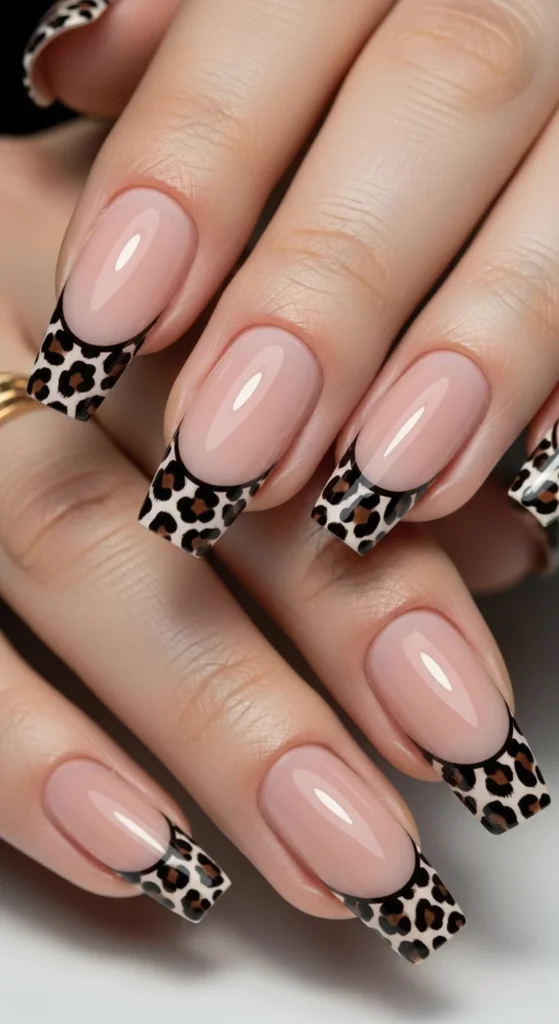
Leopard print French tips mix classic shape with playful pattern. Keeping the design only on the tips balances the look so it feels stylish instead of busy. This manicure works well with simple outfits because the print becomes the highlight detail.
Paint a nude base first. Add brown patches near the tips, then outline some with black polish. Gloss top coat smooths the finish. Nail stamps or stickers can replace hand painting if you want quicker results. Even short coffin nails look great with this pattern because the tips provide enough space for detail.
10. Holographic Chrome Coffin Nails
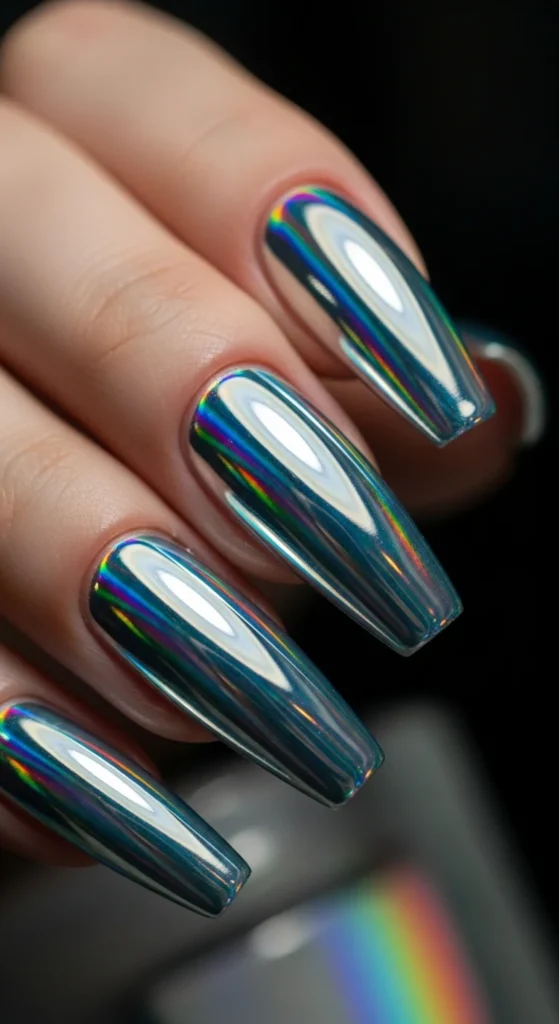
Holographic chrome nails reflect light like a mirror and shift colors as your hand moves. The shiny surface highlights the coffin shape and makes the nails look bold and eye-catching. This design is popular for photos because the reflective finish stands out instantly.
Apply black polish as a base, then rub chrome powder over it using a sponge applicator. Seal with top coat to lock in shine. Small chrome powder jars are affordable and last for many uses. Short coffin shapes look sleek, while long shapes make the reflective effect more dramatic.
11. Rose Garden Coffin Nails

Rose garden coffin nails feel soft and romantic while staying wearable for daily life. Small roses placed on a nude base keep the look balanced and neat. This style works well for spring outfits, casual days, and light events where you want detail without loud color. Short or medium lengths keep the design tidy and comfortable.
Create this look with a nude base and a dotting tool. Form tiny spirals for roses and add small green strokes for leaves. Nail decals are a faster option and cost very little. Use floral art on one or two nails only if you want a simpler finish that still looks styled.
12. Neon V-Tip Coffin Nails
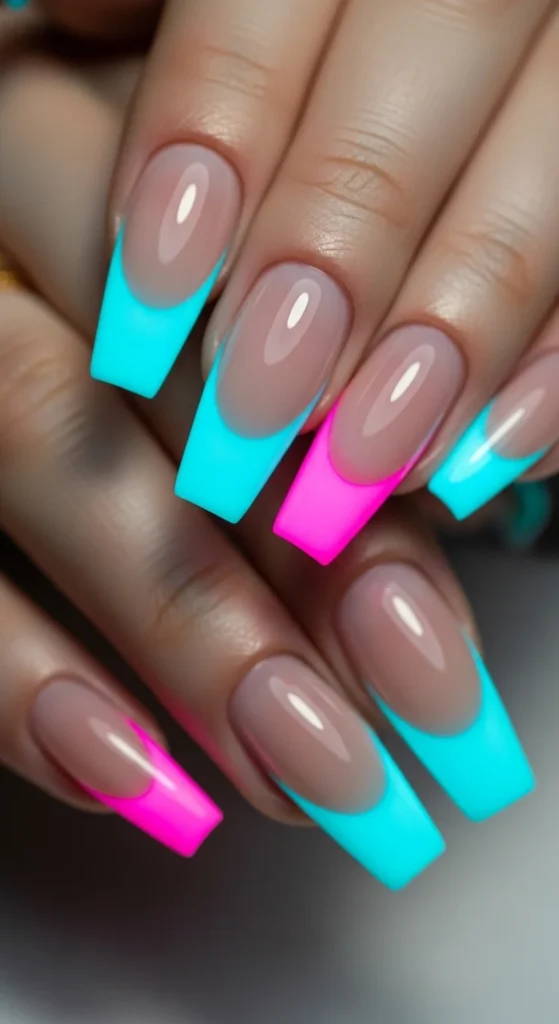
Neon V-tip coffin nails add a sharp edge to the classic French style. The angled tip draws attention to the nail shape and makes fingers look longer. Bright colors keep the design playful while the structure keeps it neat. This style works well for summer outfits and bold fashion choices.
Apply a nude or clear base, then use tape to guide a V shape at the tip. Fill with neon polish and remove tape carefully. A white base under neon helps the color show better. For a softer version, use pastel shades while keeping the same V shape.
13. Minimal Taupe Coffin Nails
Taupe coffin nails give a calm and polished appearance that fits everyday routines. The neutral shade works well with any outfit and does not draw too much attention. Matte finish adds a smooth texture that feels modern and clean. Short lengths make this style practical for work or study.
Apply two thin coats of taupe polish for even color. Finish with matte top coat for a soft look. You can mix a drop of brown into gray polish to create taupe at home. Add a tiny gem on one nail if you want a small detail.
14. Silver Glitter Tip Coffin Nails
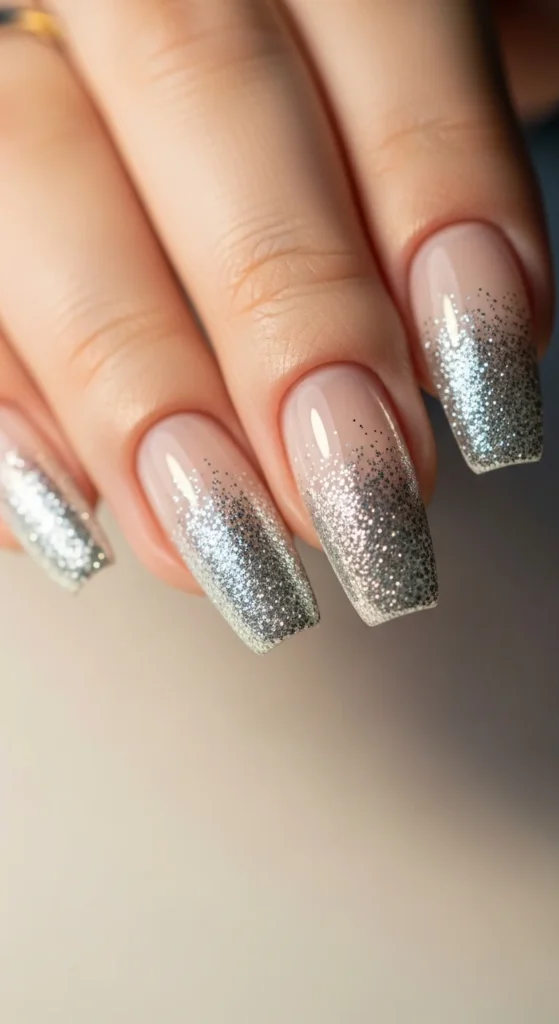
Silver glitter tips add shine without covering the entire nail. The sparkle highlights the coffin shape while keeping the base clean and simple. This design works for events and daily wear, depending on how light you apply the glitter. Short nails look neat, while longer nails feel dramatic.
Paint a nude or clear base, then dab glitter on the tips using a sponge. Blend slightly downward for a soft finish. Loose glitter mixed with clear polish costs less than specialty products. Seal well so the surface stays smooth and comfortable.
15. Deep Red Coffin Nails
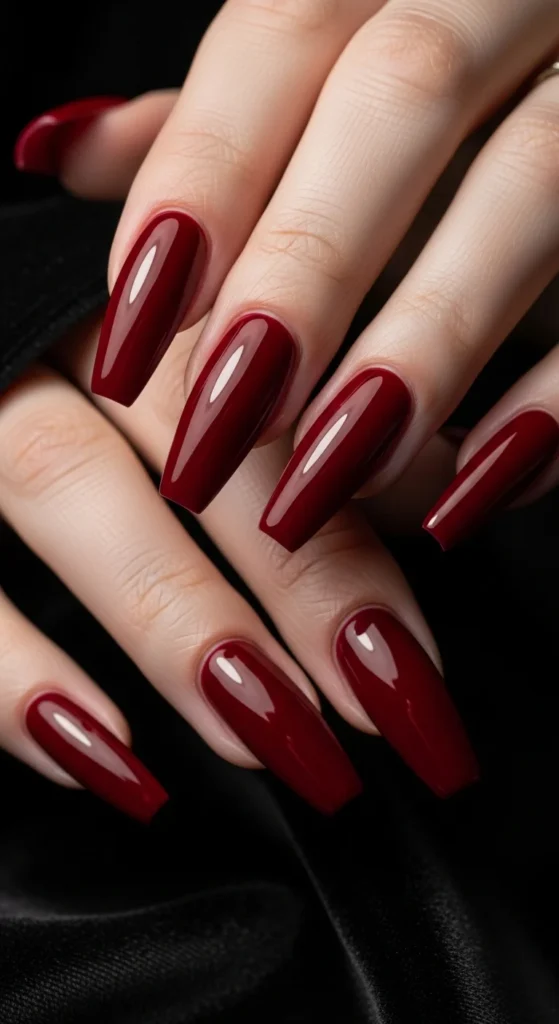
Deep red coffin nails look bold and classic at the same time. The rich color highlights the straight edges of the shape and gives a strong visual impact. This style suits evening outfits and cooler seasons. It also pairs nicely with simple jewelry and dark clothing.
Apply a base coat, then two thin layers of red polish for smooth coverage. Finish with a glossy top coat for shine. Add a single glitter accent nail if you want variation. Keeping the rest solid maintains a clean and stylish look.
16. Soft Cloud Coffin Nails
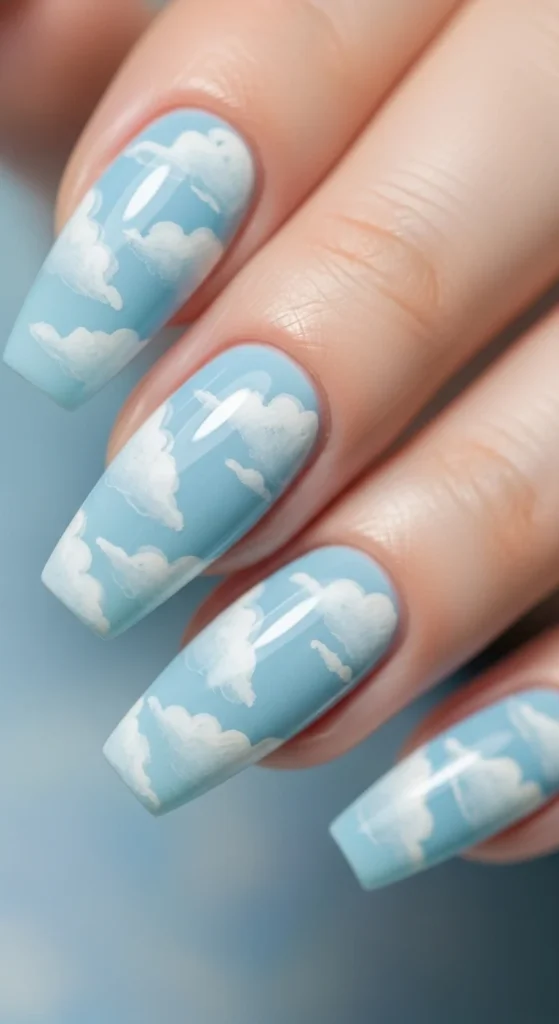
Soft cloud coffin nails bring a light and dreamy vibe that still feels wearable. The gentle white clouds on a pale base keep the design calm and neat. This look pairs well with casual outfits and light colors. Short or medium lengths make it easy to manage daily tasks while keeping the art visible.
Paint nails pastel blue, then use a sponge to dab white polish in soft shapes. Blend edges slightly so the clouds look fluffy. Cotton swabs can help soften lines if you do not have tools. Seal with glossy top coat. Add tiny stars on one nail if you want a little extra detail.
17. Croc Texture Coffin Nails
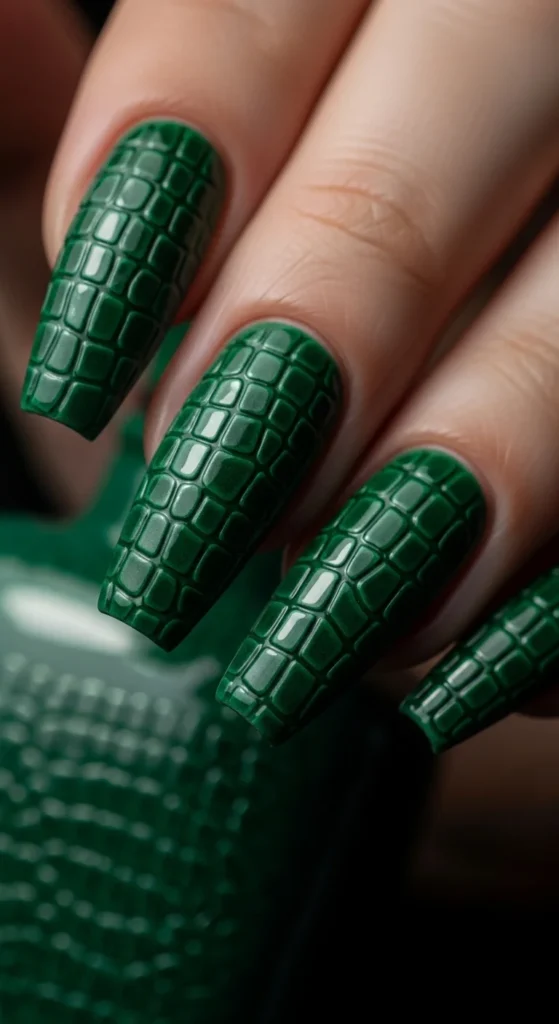
Croc texture nails create a bold pattern that looks stylish and structured. The raised pattern reflects light differently, making the surface stand out. Dark shades like green, brown, or black highlight the texture and keep the look balanced. This style works well for evenings or statement outfits.
Apply a dark base color first. Then dab clear builder gel in small uneven shapes and cure or let dry. Paint over it again to reveal the pattern. If you want a simpler version, use croc nail stickers. They are inexpensive and still give the textured effect without extra tools.
18. Evil Eye Coffin Nails
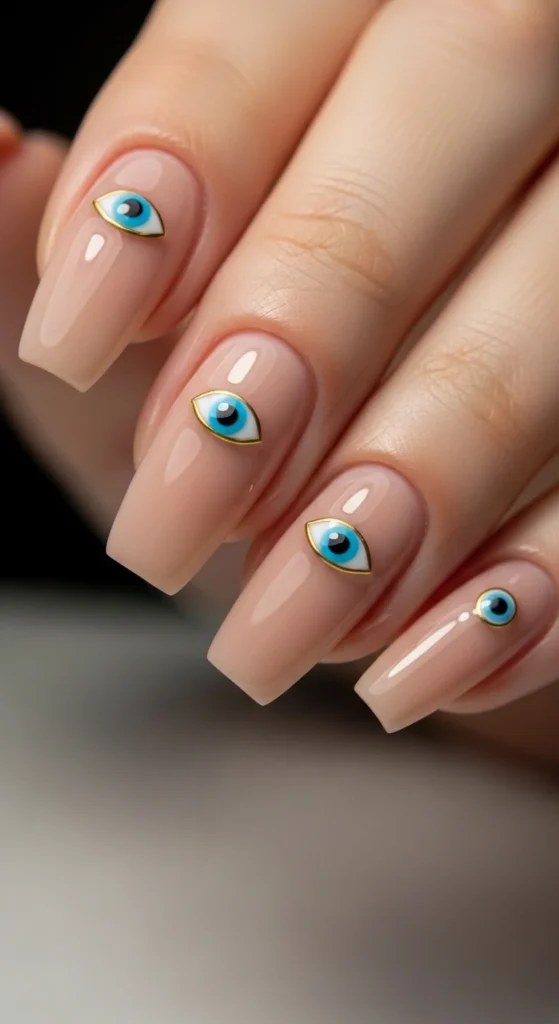
Evil eye coffin nails combine style with symbolic detail. The tiny eye motif stands out against a neutral base and gives a clean but eye-catching finish. Many people like this design because it feels meaningful while still looking neat. It works for everyday wear and special occasions.
Start with a nude base color. Use a dotting tool to layer blue, white, and black circles to form the eye. Stickers can replace painting if you want faster results. Keep the symbol on one or two nails so the design stays balanced and easy to wear.
19. Checkered Mix Coffin Nails
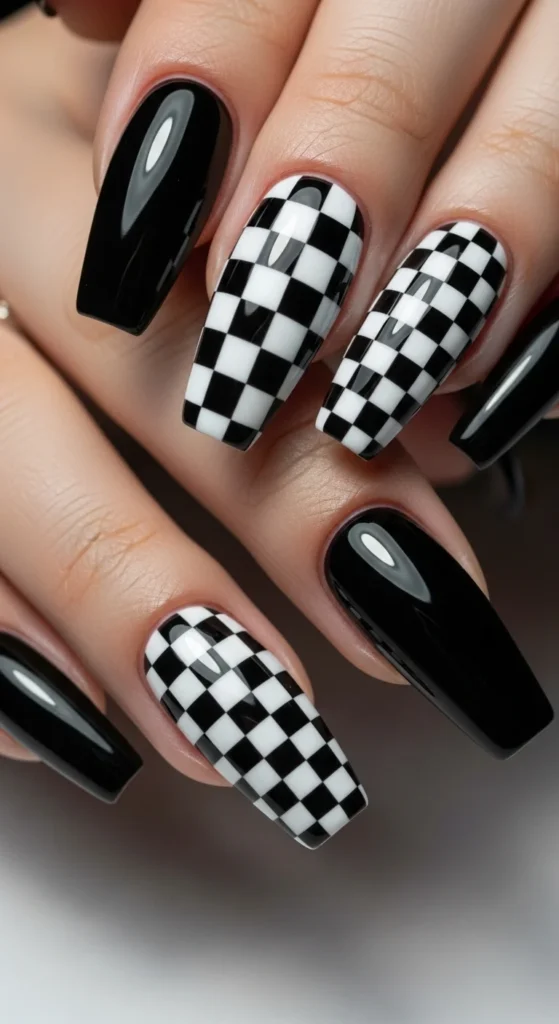
Checkered mix coffin nails create a playful contrast that draws attention without looking messy. Alternating patterned nails with solid ones keeps the manicure neat. The straight edges of the coffin shape make the pattern look sharp and clean. This style works well for casual outfits and street style looks.
Paint a white base first. Use a thin brush to draw a grid, then fill alternating squares with black polish. Nail tape can guide lines if you want extra precision. If hand painting feels tricky, use pre-printed nail wraps. They save time and still give a crisp pattern.
20. Pearl Glaze Coffin Nails
Pearl glaze coffin nails give a soft shine that shifts gently in the light. The finish looks smooth and polished without heavy decoration. This design suits workdays, events, and casual outings because it matches almost any outfit. Medium-length nails show the sheen clearly while staying comfortable.
Apply a pale base shade, then rub pearl powder over slightly tacky polish. Blend lightly until the surface looks smooth. Seal with top coat to lock in shine. Small powder jars last for many manicures, making them budget-friendly. Add a tiny gem on one nail if you want subtle detail.
21. Sunflower Accent Coffin Nails
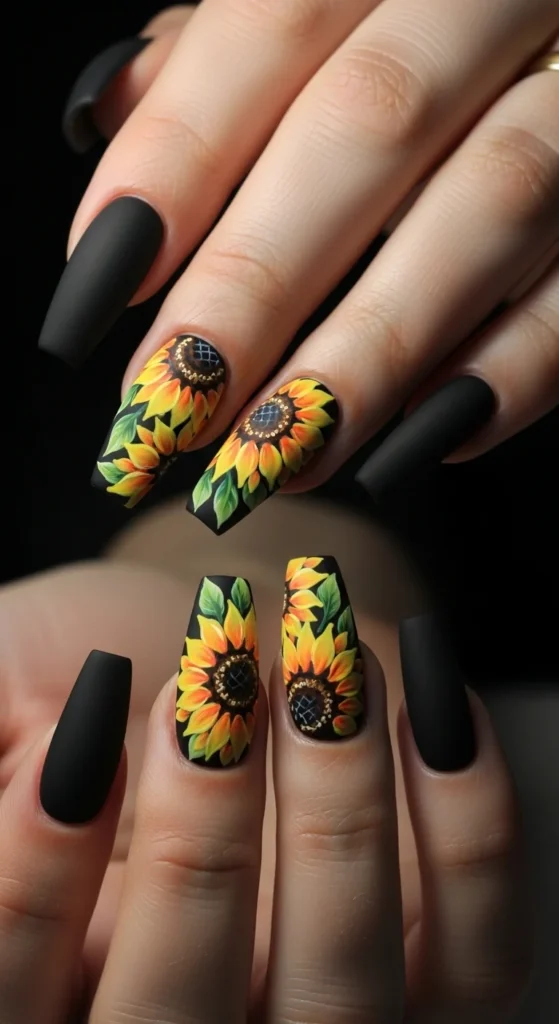
Sunflower accent coffin nails mix dark polish with bright floral detail. The contrast makes the flower design stand out while the rest of the nails stay simple. This look feels bold yet balanced, so it works for both casual days and styled outfits. Medium-length shapes show the artwork clearly without getting in the way.
Paint nails matte black first. Use yellow and brown polish with a dotting tool to form small sunflower shapes. Add green strokes for leaves. Floral nail stickers can replace painting if you want a quicker method. Keep flowers on one or two nails so the design stays neat and easy to manage.
22. Pastel Skittle Coffin Nails
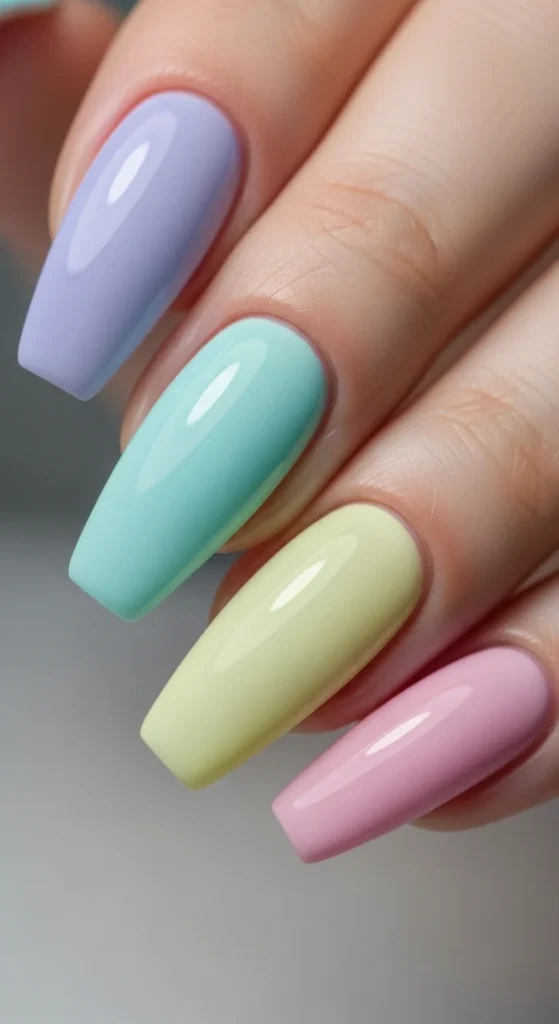
Pastel skittle nails use a different color on each nail for a playful effect. Soft tones keep the look calm instead of loud. This design is great when you want variety without patterns. It suits daily wear and looks especially nice in daylight photos. Short coffin shapes make it practical for typing and chores.
Choose five pastel shades and paint each nail a different color. Apply thin layers so the finish looks smooth. Budget tip: mix white polish into bold shades to create pastels instead of buying new bottles. A glossy top coat ties all colors together and adds shine.
23. Cat Eye French Coffin Nails
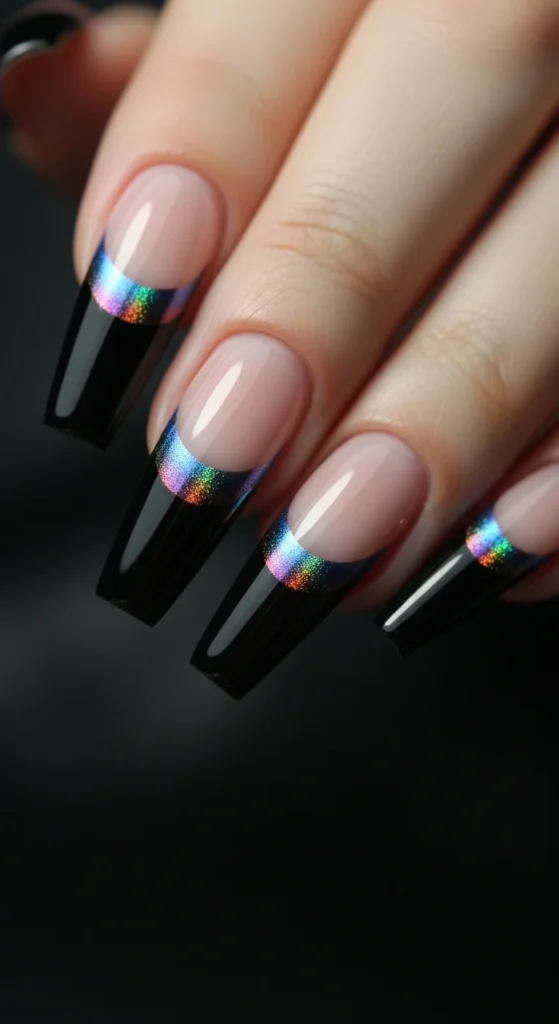
Cat eye French coffin nails combine shimmer with a classic tip design. Magnetic polish creates a glowing stripe that shifts when light hits it. Keeping the effect only on the tips balances the look so it feels stylish but not busy. This style looks striking in photos and under evening lighting.
Apply a neutral base, then paint magnetic polish on the tips. Hold a magnet near the polish to form the shimmer line. Seal with a top coat. Magnetic polishes may seem pricey, but one bottle lasts many manicures. If you want a simpler version, use shimmer polish instead.
24. Mismatched Art Coffin Nails
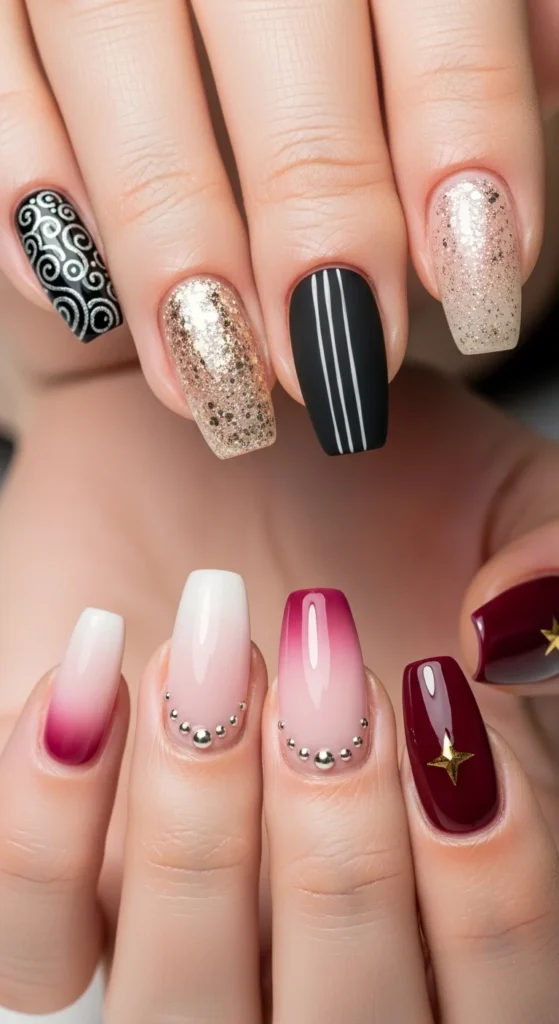
Mismatched art coffin nails let you show multiple styles in one manicure. Each nail can feature a different pattern or color while still looking coordinated. This design is great if you enjoy experimenting or cannot pick just one idea. The coffin shape provides enough space for detail without looking crowded.
Paint each nail a different design, such as swirls, dots, or glitter tips. Choose a color palette so the set still looks cohesive. Leftover Polish bottles work well for this idea, making it budget-friendly. Start simple with two designs, then add more patterns as your painting skills improve.
Final Thoughts
Coffin nails offer a stylish shape that works for bold art, soft gradients, and simple everyday looks. With affordable tools, press-ons, and easy painting tricks, you can recreate many of these designs at home. Try a few styles, mix techniques, and build your own signature manicure set that fits your routine and personal style.

Leave a Reply